Read this article to learn how to use My attendance correctly from each employee’s profile. The information from this article is fitted for any type of user in iFlow.
The My attendance panel was improved, in order to let employees check their attendance and work hours on their own profile.
Based on the settings from your company, employees can also edit their attendance from this panel.
Short presentation of the panel
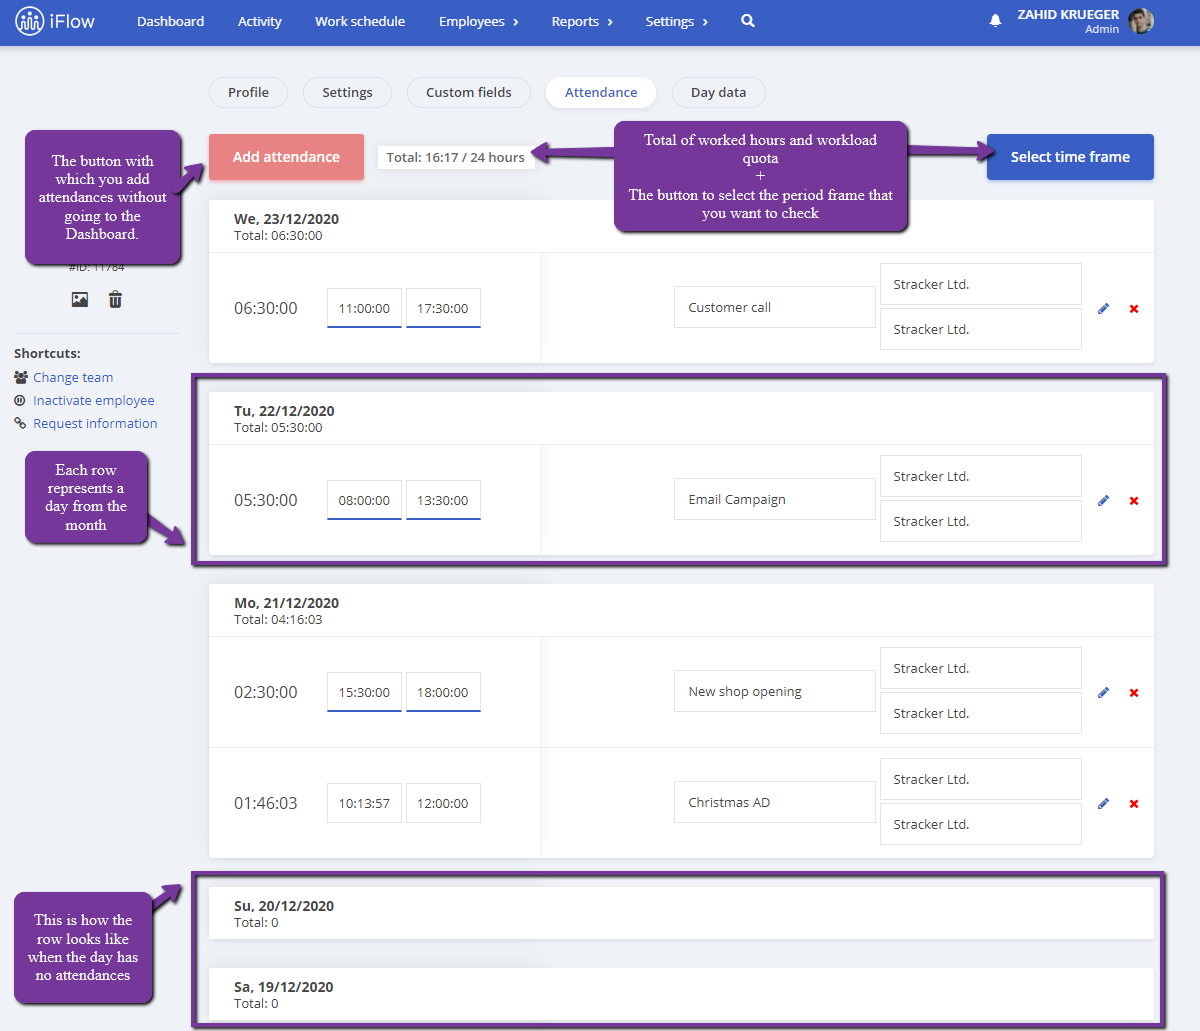
The My attendance panel has a few simple components:
- Add attendance button – add attendance directly from here
- Total – the area from which you can compare the worked hours and the number of hours that they should have worked based on the workload
- Select period – this button helps you filter the panel based on your preferred period of time. Based on this you can the total hours worked during that period and check all the attendances
- Each day of the month is represented by a different line. On each line you can see the check=in and check-out hours, on the left you will see the total hours for that interval. The space reserved for the project (if the module is activated), and the spaces reserved for the locations. There are also Edit and Delete buttons.
How to use the panel?
Log into your account, from the upper right corner select My attendance. This panel is used to see working hours, and if the permissions allow it to edit already added attendances.
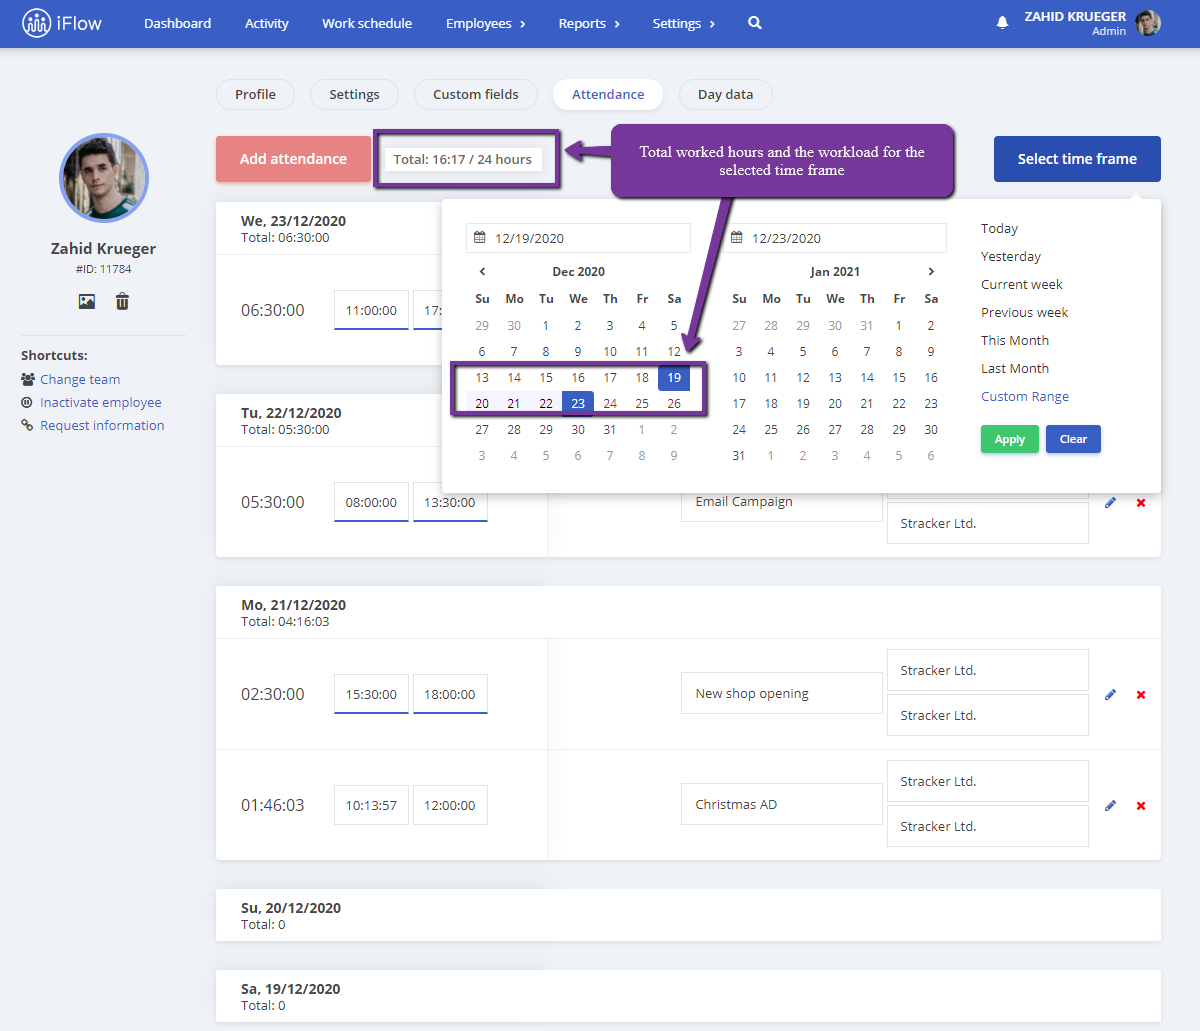
If you need to find out how much time you worked during a selected period of time, you will set the period from the calendar.
If in the selected period you have approved events (leaves, time off) the app will take them into consideration.
Advice: If the selected period includes the actual day, make sure that your attendance is closed before checking. Otherwise, the actual day will not be counted.
We recommend that you check a period of time that represents a month at maximum for a good overview.
If you want to check details regarding the attendance, click on Edit. You will be able to see details such as who added the attendance, from where, the device they used if it was edited.
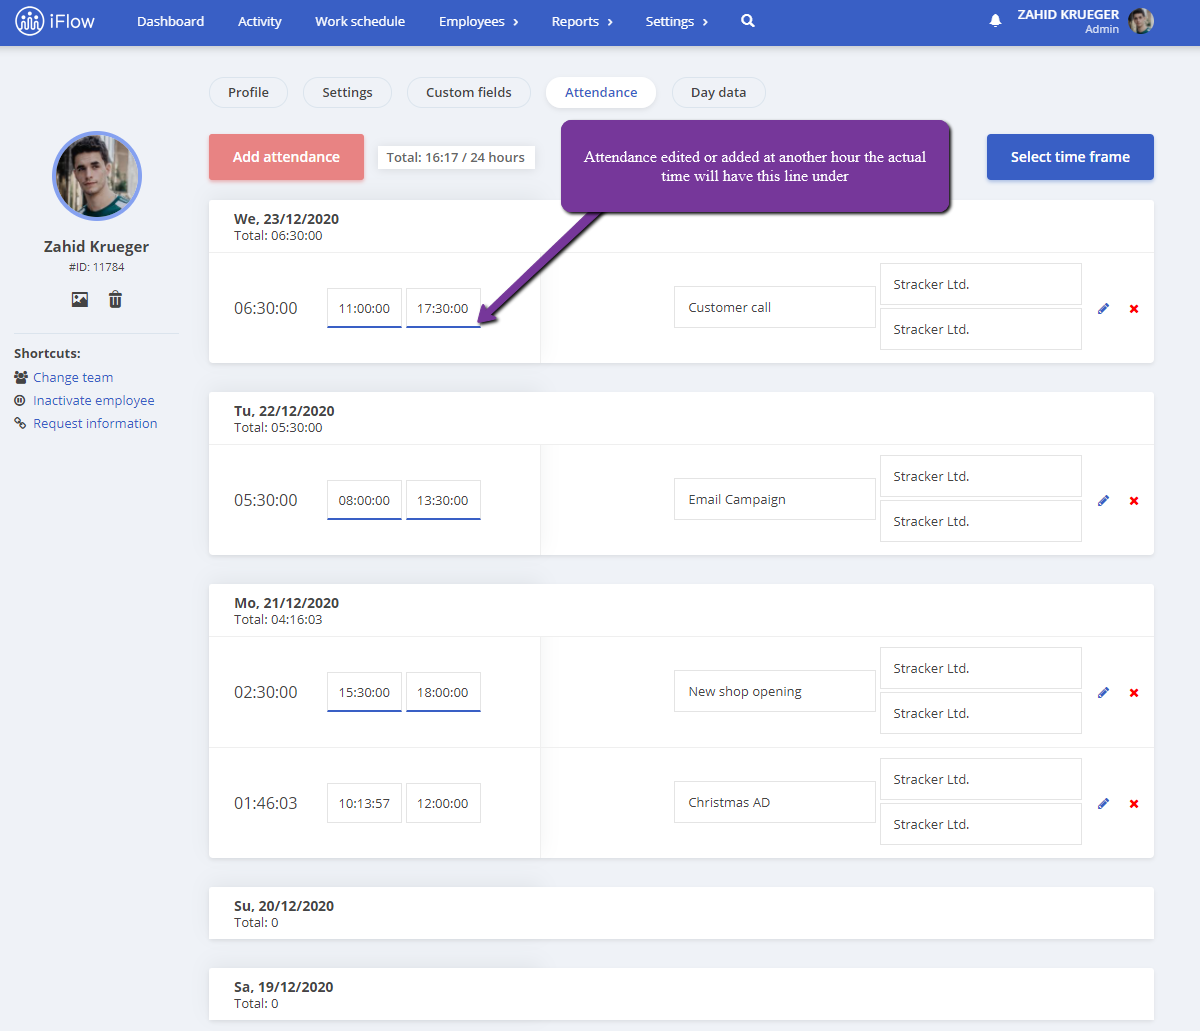
With one view you will be able to tell which attendances were edited. They will be underlined with a blue line, and by looking at the details you will be able to see what information was edited.
Conclusion
The iFlow app is continuously developing and it becomes easier to use for each type of user. Don’t hesitate to contact us in the chat or by email at [email protected].
