

You probably had at least once with the need to add unpaid leave to your employees. In iFlow you do this very easily, although unpaid leave is not one of the predefined events in the app.
Read this article and find out how you create the event and add it to your employees in a very short time, but with long-term effects.
How do I create an unpaid leave event?
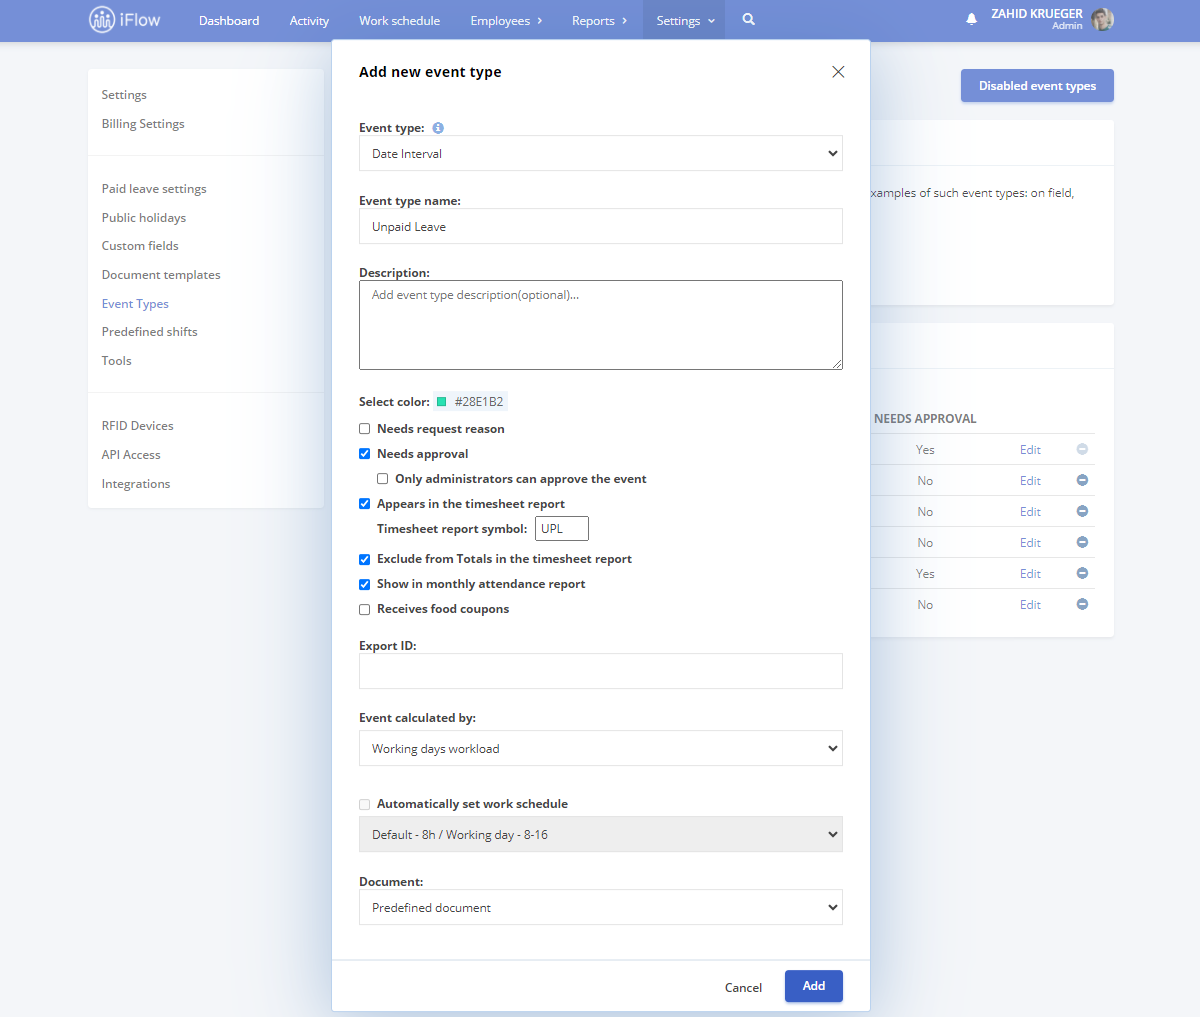
Follow the steps below and make sure your account settings are set as shown in the picture.
- From the “Settings” main Menu – “Event types”
- Click on the “Add new event type” button
- Select the “Date Interval” event type
- Fill in the name “unpaid leave”
- Selects a color
- Click on “Needs approval”
- Tick box “Appears in the timesheet report”
- Fill in the symbol (for example “UPL”)
- Tick “Exclude from totals in the timesheet report” box
- Tick the box “Show in monthly attendance report”
- Then click on “Add”
How do I add the Unpaid leave event to my employees?
Follow these steps:
- From Dashboard
- Click on “Add”
- Click on “Unpaid leave”
- Select the employee
- Select the time interval
- Click on “Add”
After you added the event, you will need to approve it in order for it to appear on your timesheet.
From the Activity menu, click on the request and press Approve.
You can follow these exact steps for other events like this. iFlow allows you to register any types of free days or leaves. You can configure your account easily. If you have any questions, you can find us on the chat or at [email protected].


