Custom fields are used in the application across multiple areas. Learn how each field can help you and how you can use them.
General information about custom fields
You have the option to add different types of custom fields, including:
- Label – serves strictly as a description
- Subtitle – functions solely as a subtitle
- Numeric – intended for entering numeric values
- Text – filled with small-sized text
- Long text area – can be filled with paragraphs or larger pieces of text
- Date – to be completed with calendar dates
- Select – can be filled with any kind of values (text or numeric) but allows the selection of only one item
- Multiple select – can be filled with any kind of values (text or numeric), allowing multiple items to be selected
- Rating – a value is selected between 1 and 10 (for example)
- Emoji select – an emoji can be selected by scale ore dropdown
Additional settings
- Multiple values – You can add and complete this field multiple times by checking this option
- Required – By checking this box, you will make this field mandatory
- Unique Value – By checking this box, you will require that the information entered in this field be unique (intended for a field used as a project code that must be unique)
Custom fields on Users
Custom fields on the employee profile are used to create a personalised report with these fields.
This allows you to create any field to store additional information in iFlow. However, note that iFlow does not keep a history of these fields. When you modify data in a custom field, the previous data is overwritten, and you cannot view the previous entries.
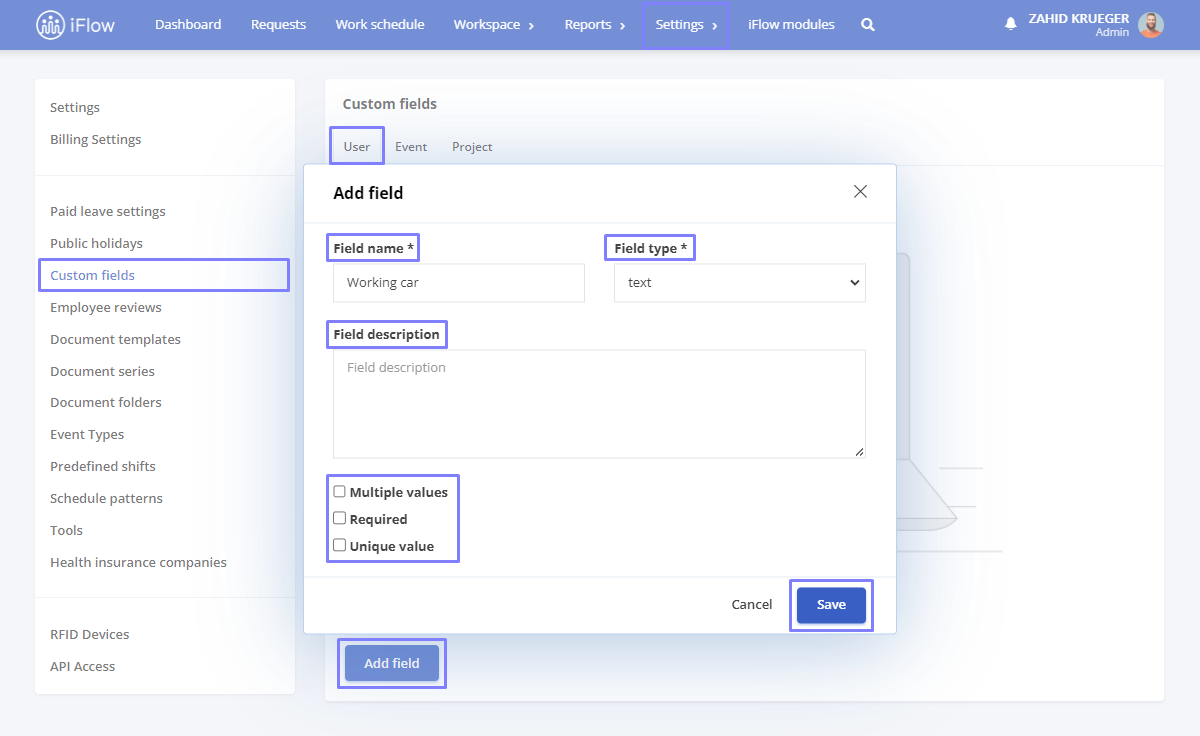
How to create custom fields on users
- Go to the Settings menu from the main menu
- Navigate to the Custom fields section
- Select the User submenu
- Click on the Add field button
- Enter the Field name
- Select the Field type
- Optionally, fill in the Field description
- Check the Multiple values box if you want to allow this field to be duplicated for the employee
- Check Required to make this field mandatory
- Check Unique value to require that the information entered in this field be unique
- To finish, click the Save button
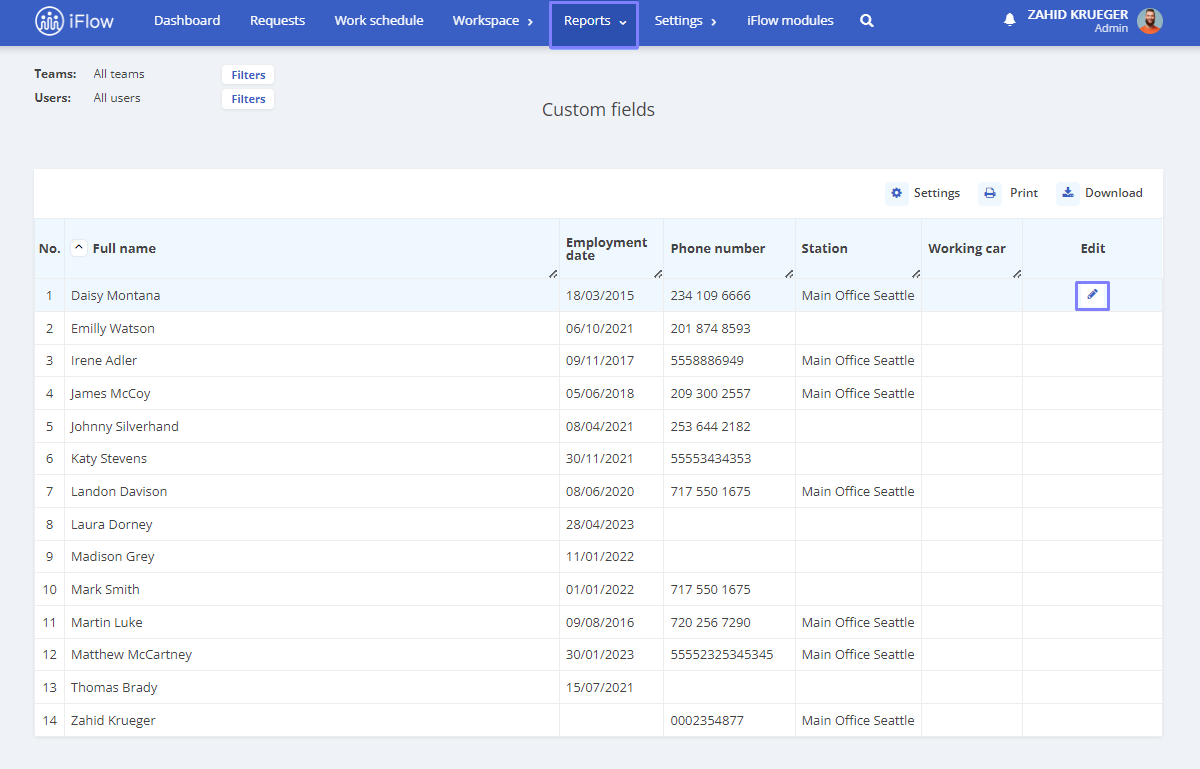
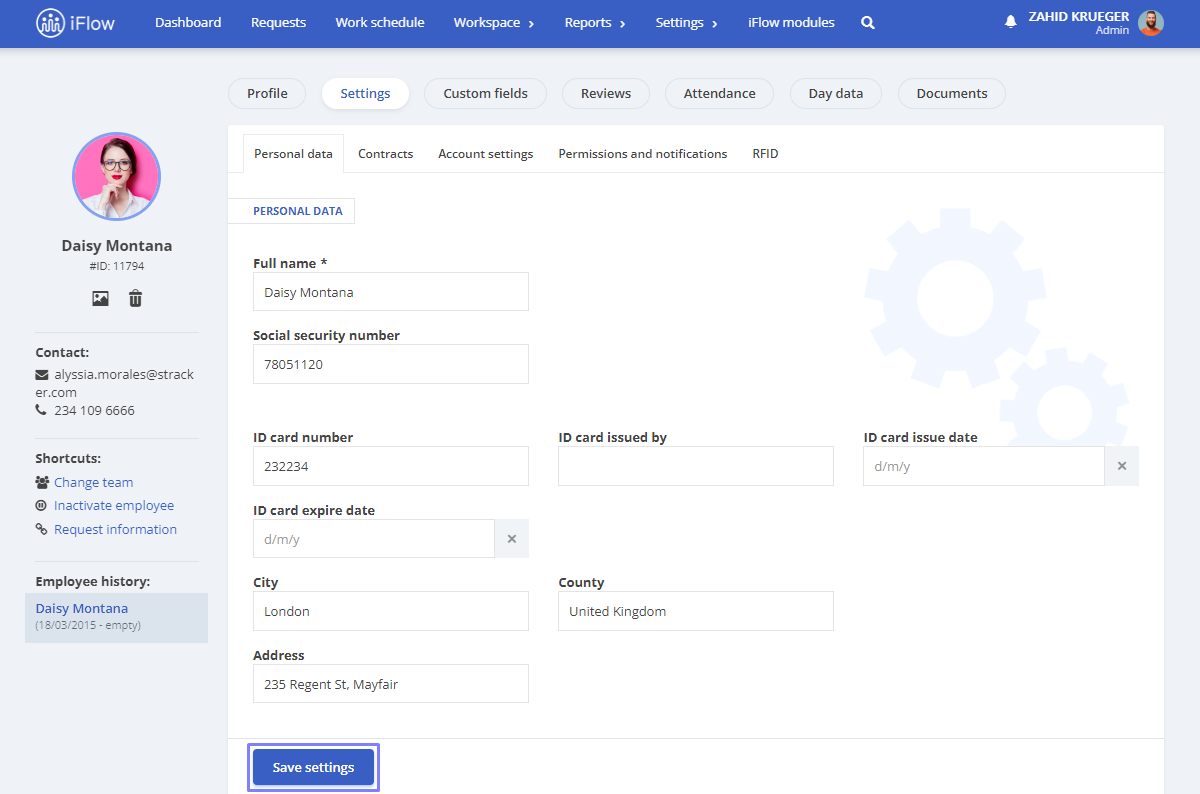
How to fill in custom fields for users
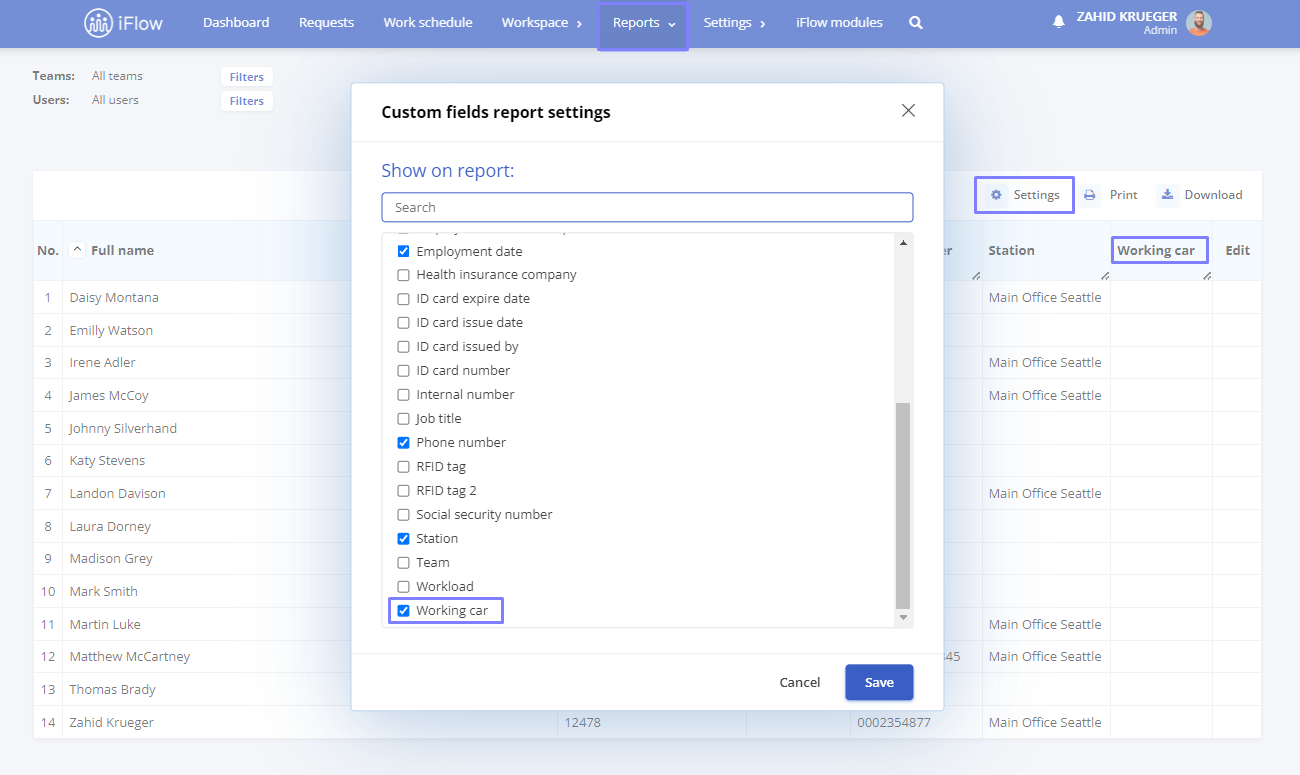
- Go to the Reports menu
- Select the Custom fields report
- Click the Edit button next to the employee whose data you want to complete
- Fill in the fields with the desired information
- To finish, click the Save settings button
Important!
If a field is not filled with data, it will be saved without content.
Custom fields can be sorted, and the order in which they are arranged will be the order in which they appear in the employee profile.
How to view the Custom fields report
This report will be complete once you have filled in the custom fields for all employees. To access it, follow the steps below:
- Go to the Reports section from the main menu
- Navigate to the Custom fields section
Custom fields for Events
Custom fields for events can be used to record additional information about an event.
How to create custom fields for events
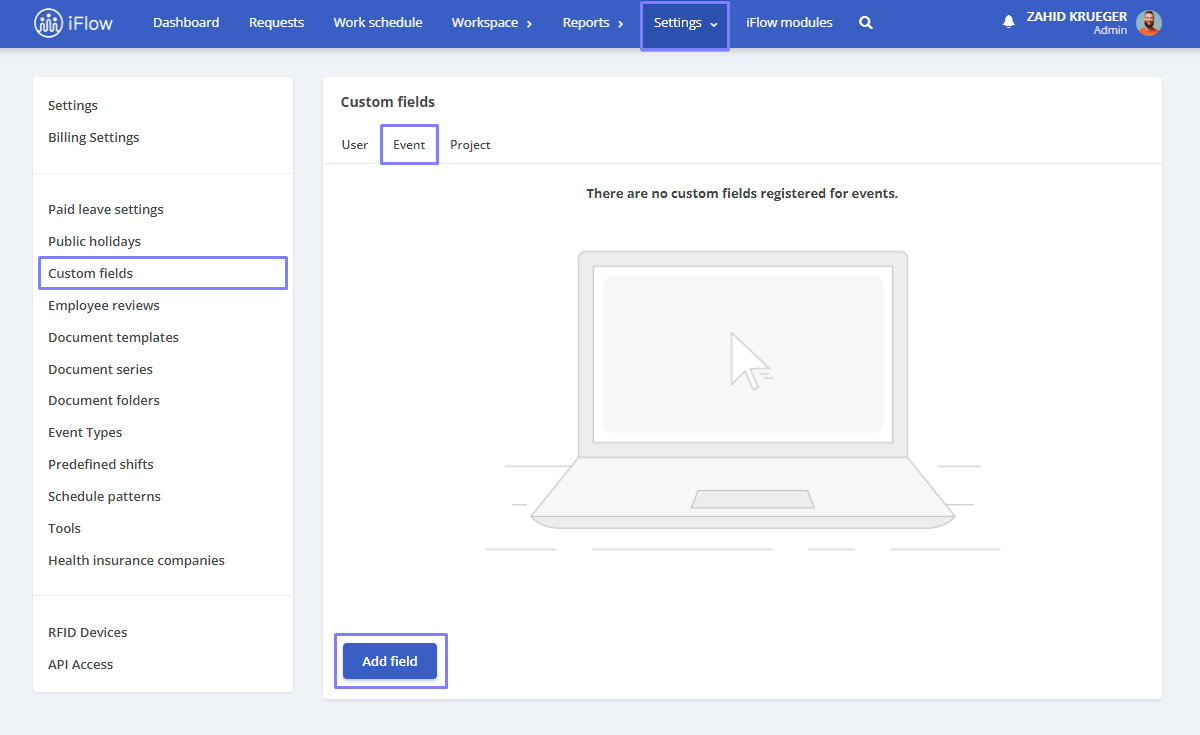
- Go to the Settings menu from the main menu
- Navigate to the Custom fields section
- Select the Event submenu
- Click the Add field button
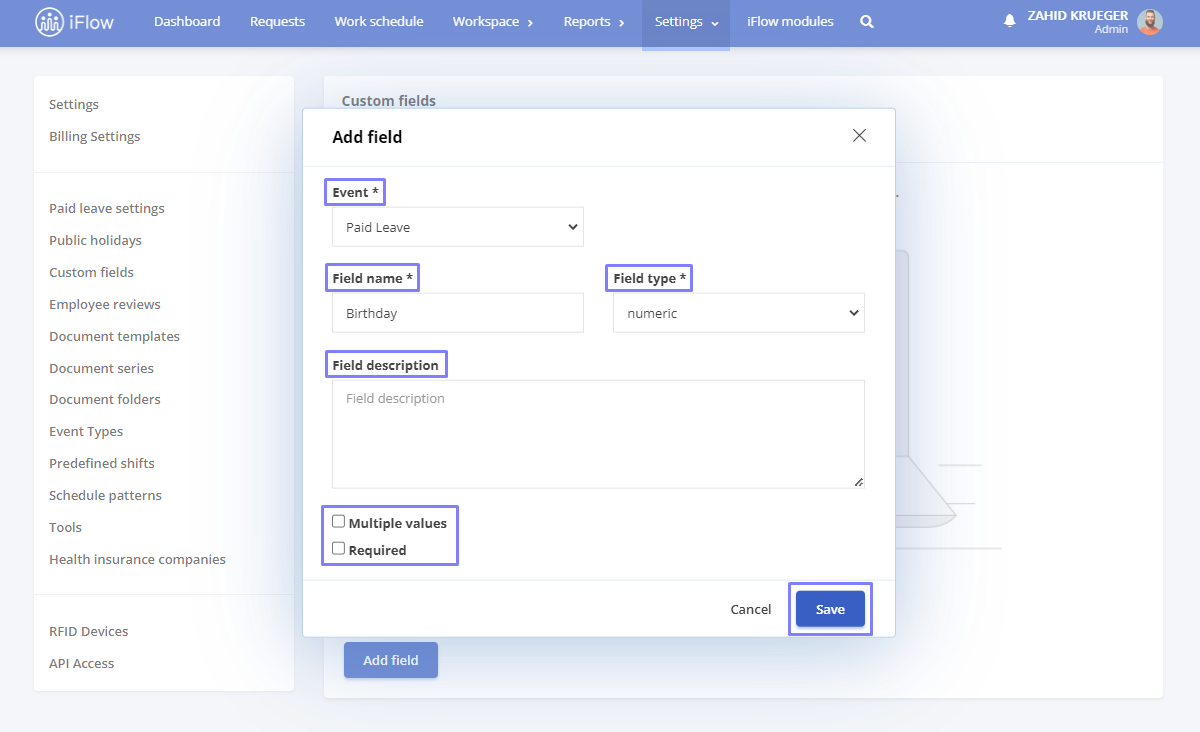
- Choose the event for which you want to create the field
- Enter the Field name
- Select the Field type
- Optionally, fill in the Field description
- Check the Multiple values box if you want to allow this field to be duplicated for the employee
- Check Required to make this field mandatory
- To finish, click the Save button
How to fill in custom fields for events
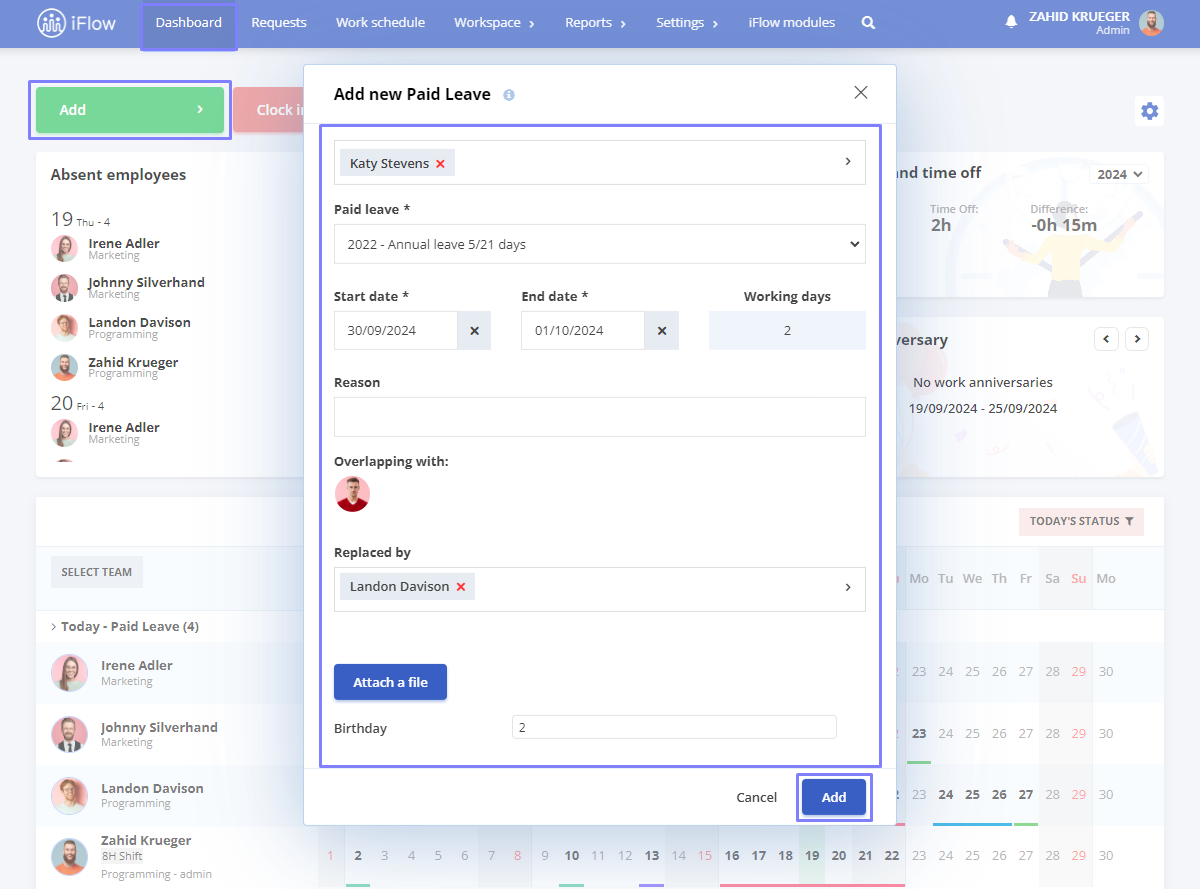
- Go to Dashboard
- Click on the Add events button
- Select the event for which you created the custom fields
- Enter the event details along with the data for the custom fields
Custom fields for Reviews
Custom review fields are specific questions or values you can include in a review template. In addition to question and value types such as scale, numeric, text, etc. Also, you can add a custom signature field, which is useful when a review session requires this element.
Follow these steps to add a signature field in employee reviews:
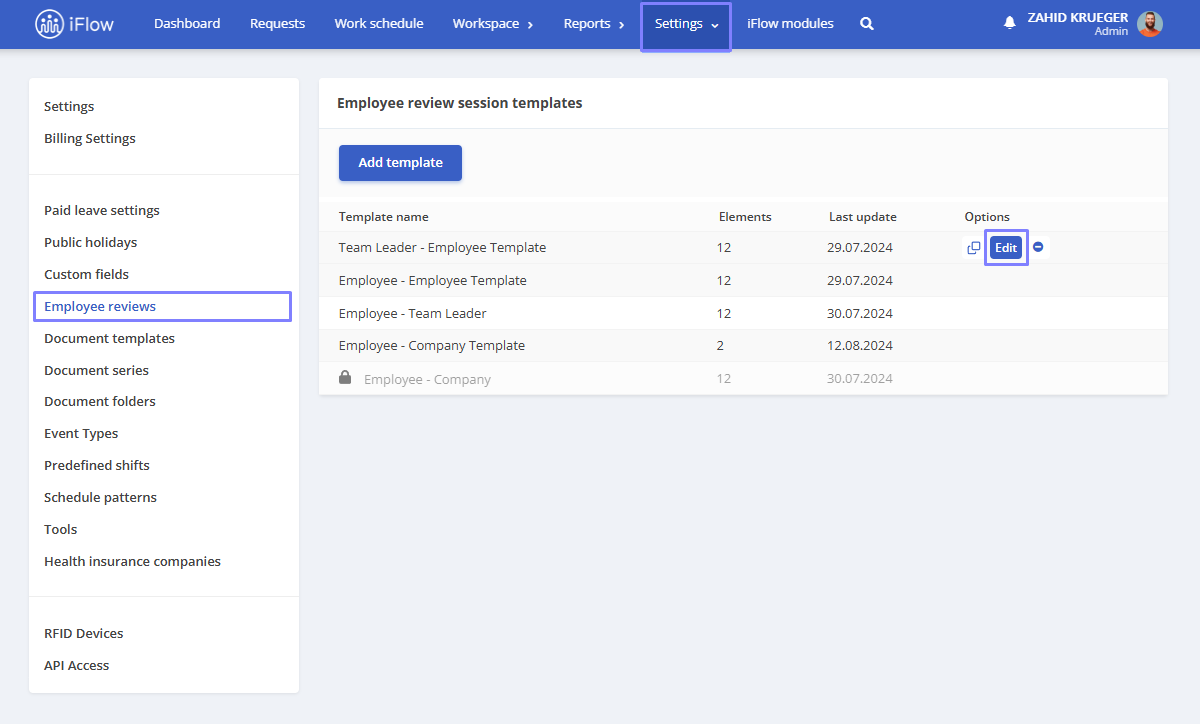
- From the main menu, go to Settings – Employee review
- Edit the evaluation template where you want to include the signature
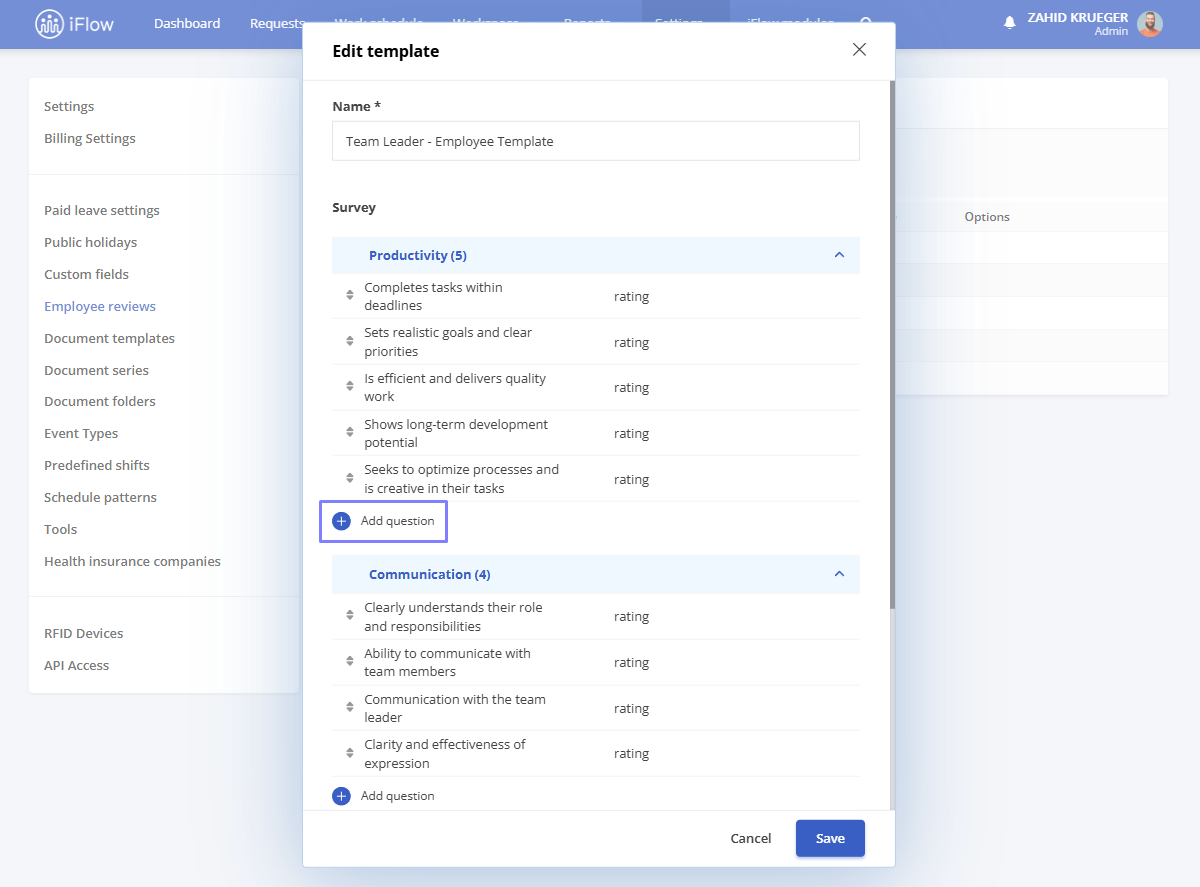
- Navigate to the evaluation section requiring a signature and click Add question
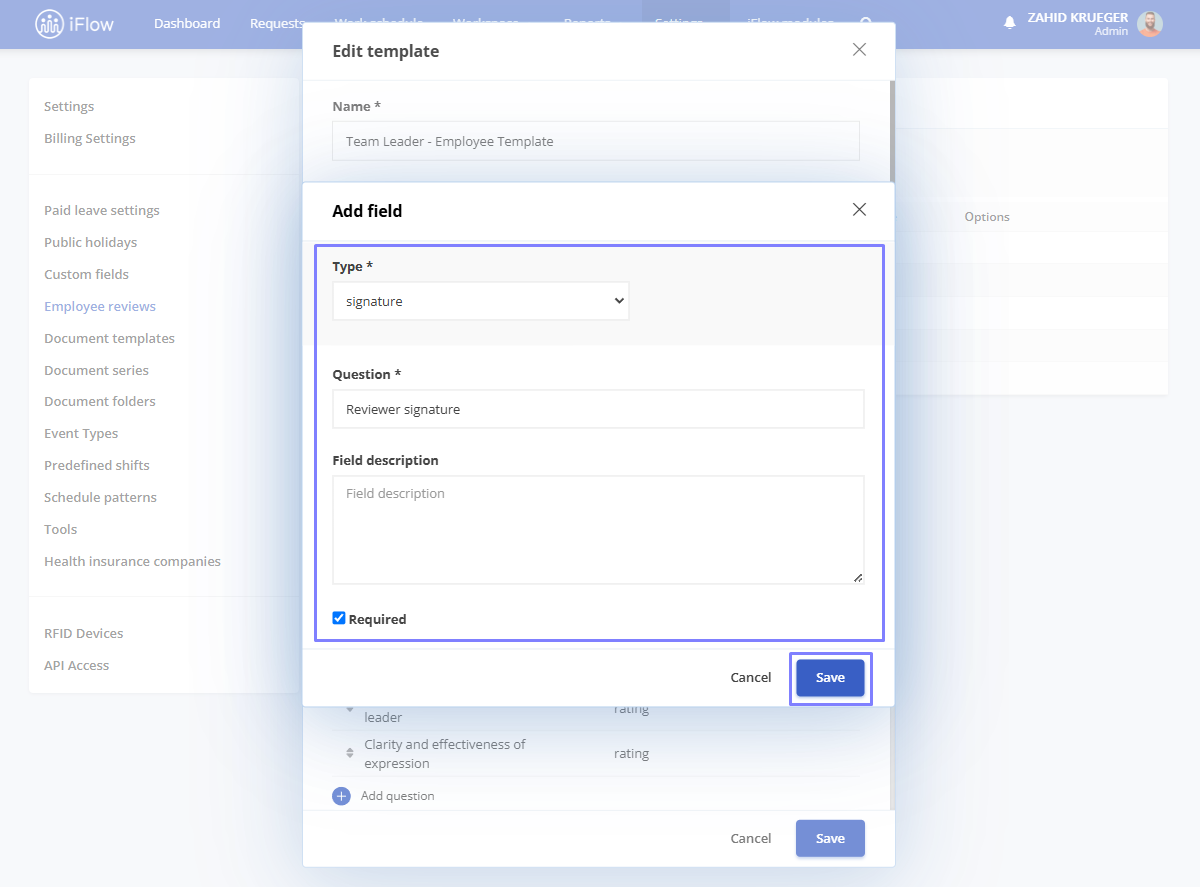
- In the question Type selection, choose Signature
- Enter the title, Description (optional), and, if necessary, mark the field as Required
- Click Save to finalize
How to sign a review
When completing the review users can sign via the custom field if this field is enabled.
- Below the signature field, you will find the Sign button
- Choose the type of signature you want to use and sign
- Click Save to complete the process
There are three available signature options:
- Written – the signature is automatically generated from the text
- Drawn – the signature is manually created directly on the device
- Uploaded – a pre-existing signature can be imported from a file

Custom fields for Projects
Custom fields for projects help you allocate additional information to a project or subproject. They can be instrumental if you need unique information, such as a project code for identification or additional details, like a description.
How to create a custom field for projects
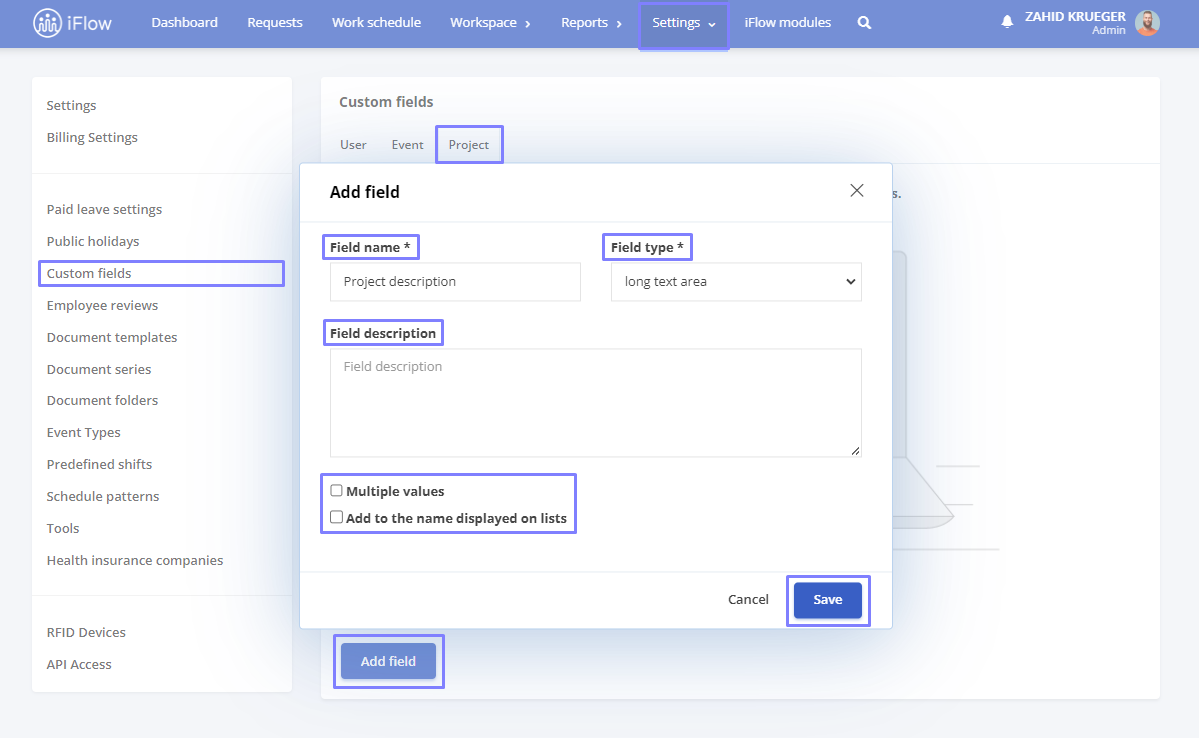
- Go to the Settings menu from the main menu and select Custom fields
- Choose the Project submenu
- Click the Add field button
- Enter the Field name
- Choose the Field type
- Optionally, fill in the Field description
- Check the Multiple values box if you want to allow this field to be duplicated for the employee
- Check the Add to the name displayed on lists box if you want the value entered to be attached to the name
- Click Save
If you select the Single value or Multiple values field type, fill in the available options for response variants in the designated box.
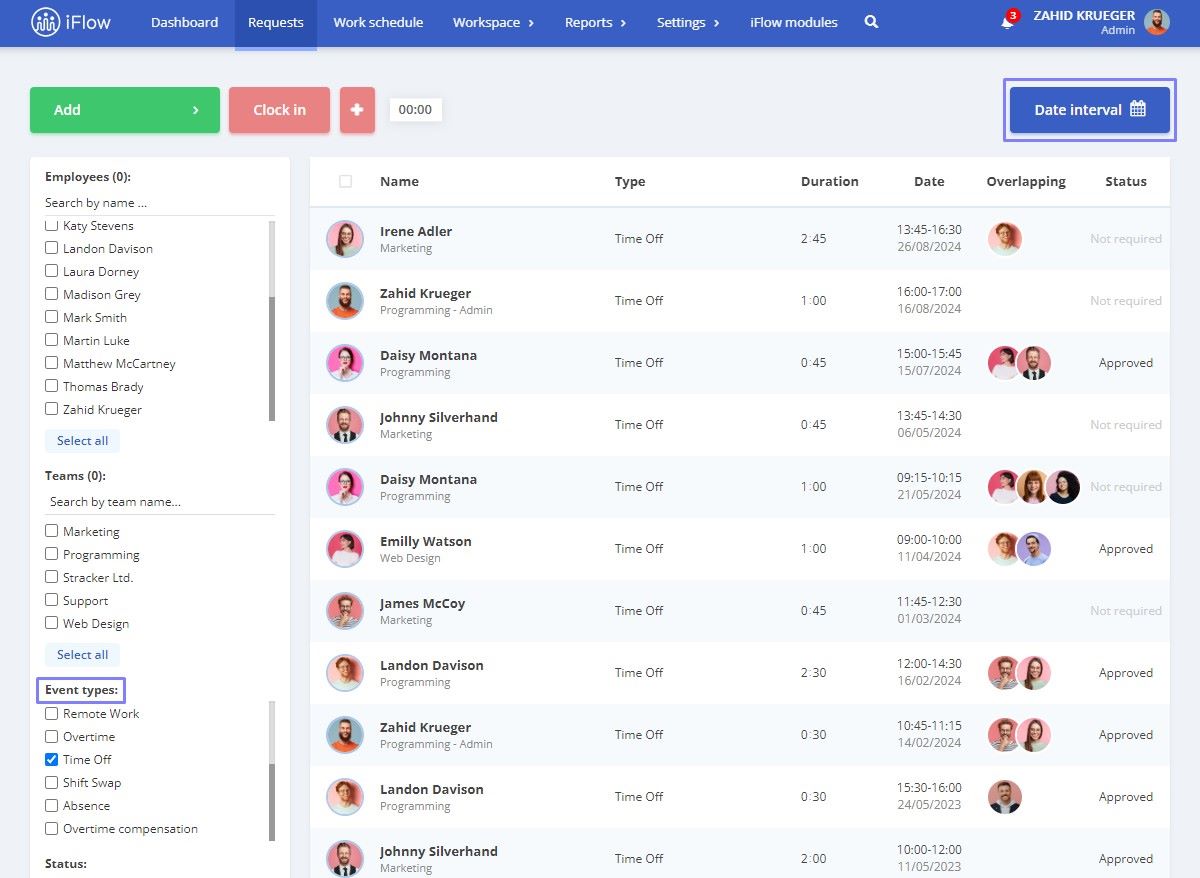
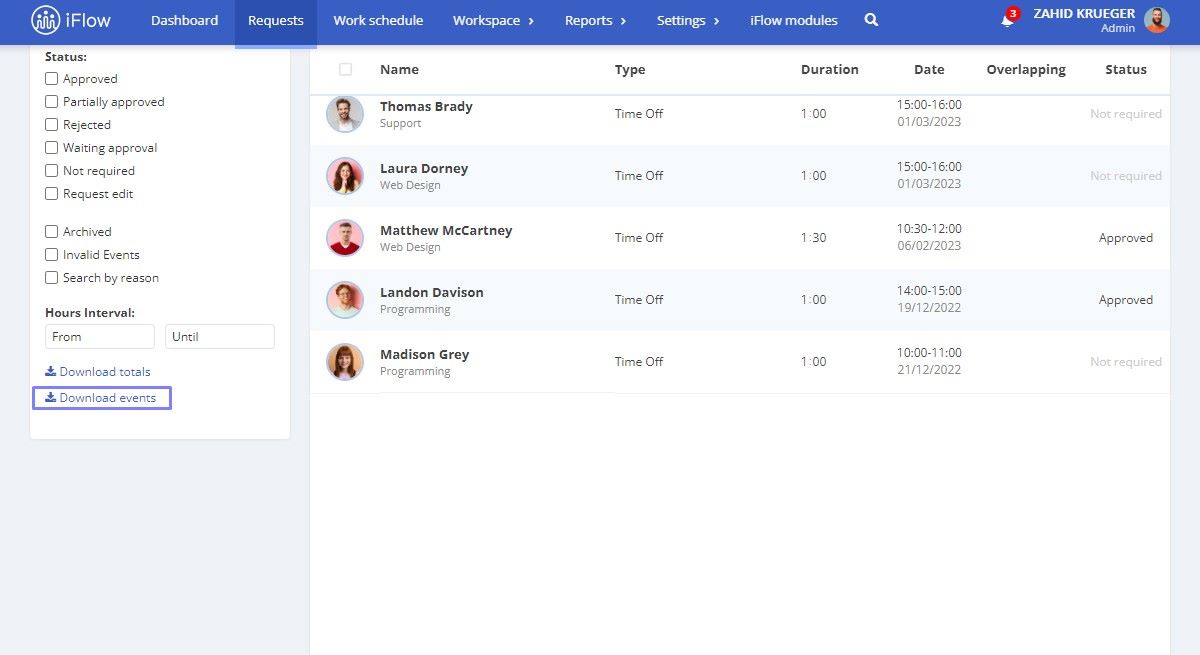
How to download an event report with custom fields
If you have created custom fields for one or more events, you can generate a report that includes these events.
- Click on the Requests menu from the main menu
- Check the box next to the event(s) with custom fields
- Select the desired period and any other filters
- Click on Download events
Additional information – Custom fields event report
- The custom fields event report can only be generated for one event at a time. You must generate reports for each event separately if you have multiple events.
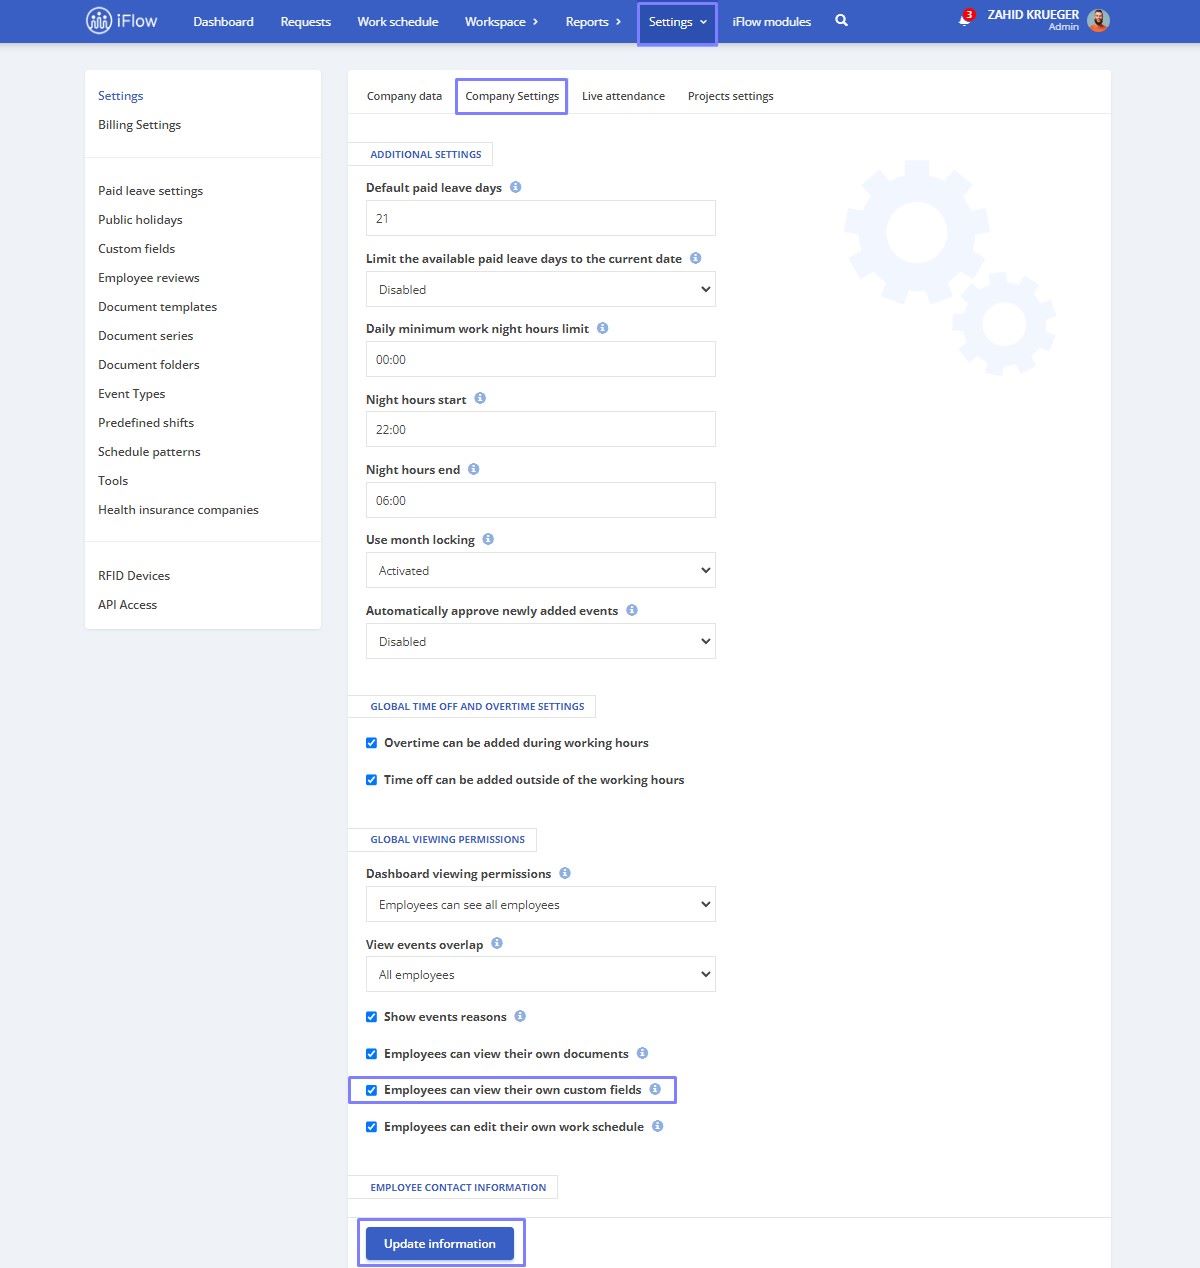
Visibility of custom fields
This setting controls whether employees can view and complete the custom fields you have created.
- Go to the Settings menu from the main menu and select Company
- Choose the Company settings submenu
- Check the box for Employees can view their own custom fields
- Click Update information
When you grant employees access to custom fields, they can view and complete them independently.