How to create custom events
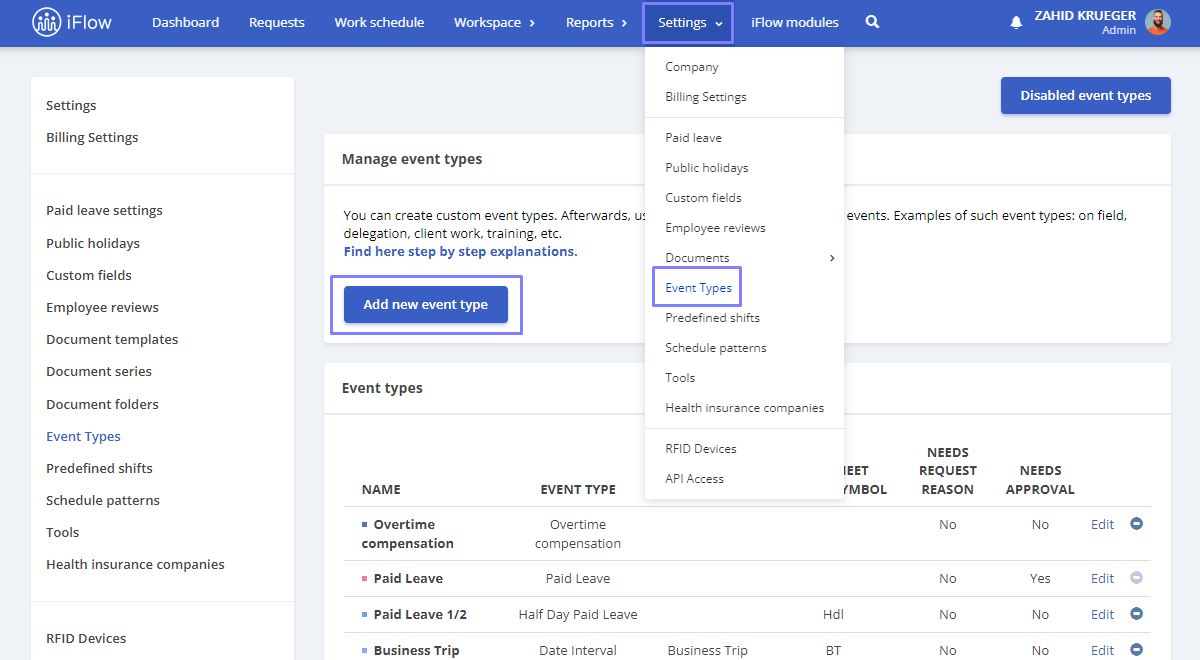
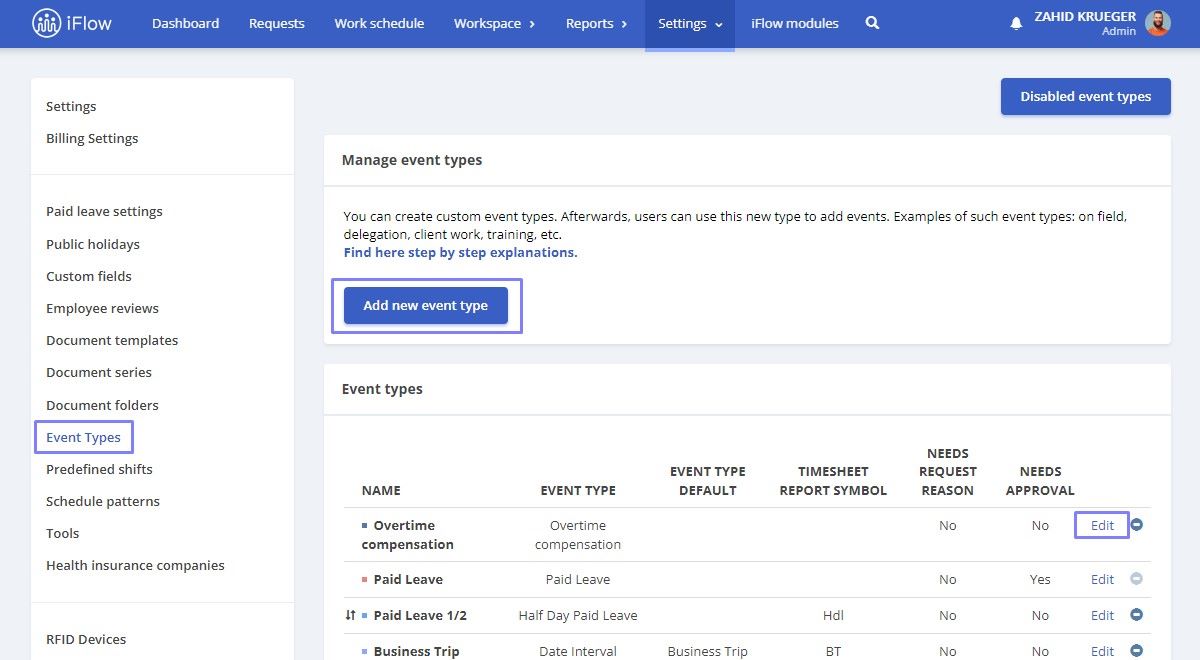
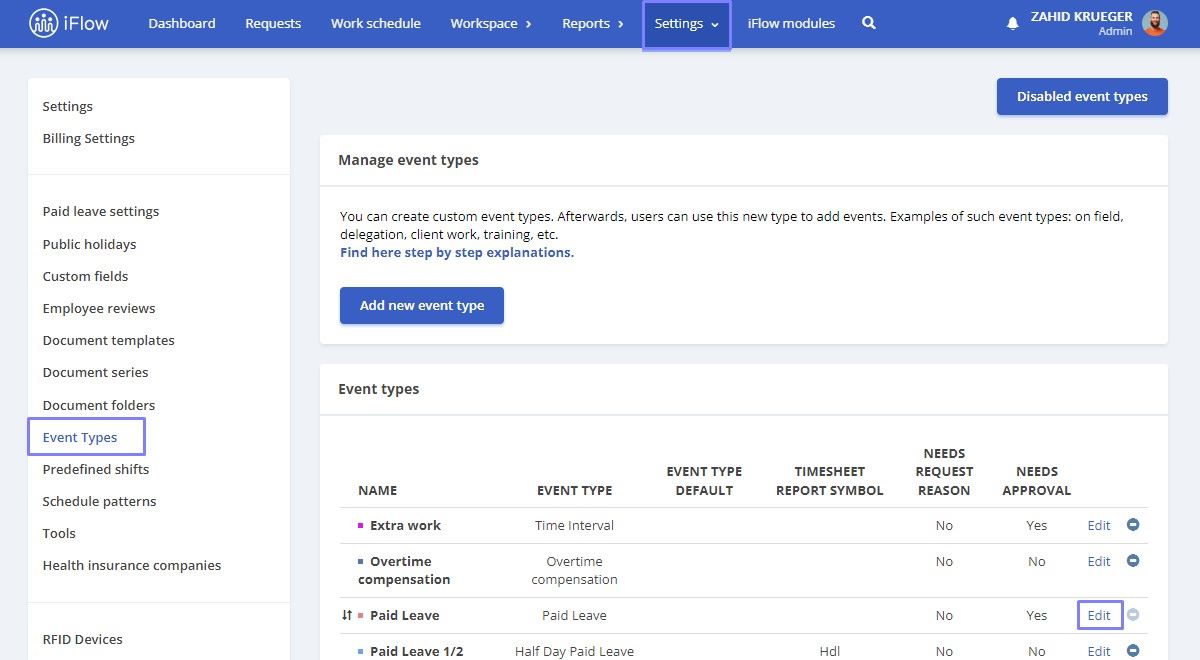
- From the main menu select Settings – Event Type
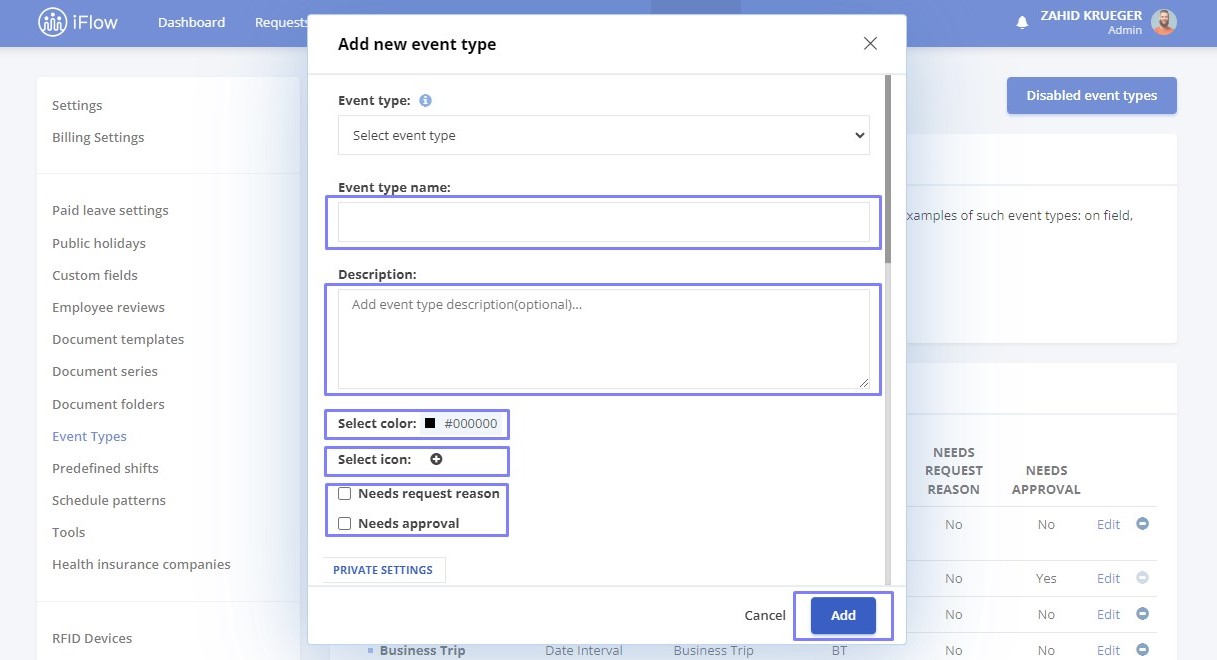
- Click on the button Add new event type
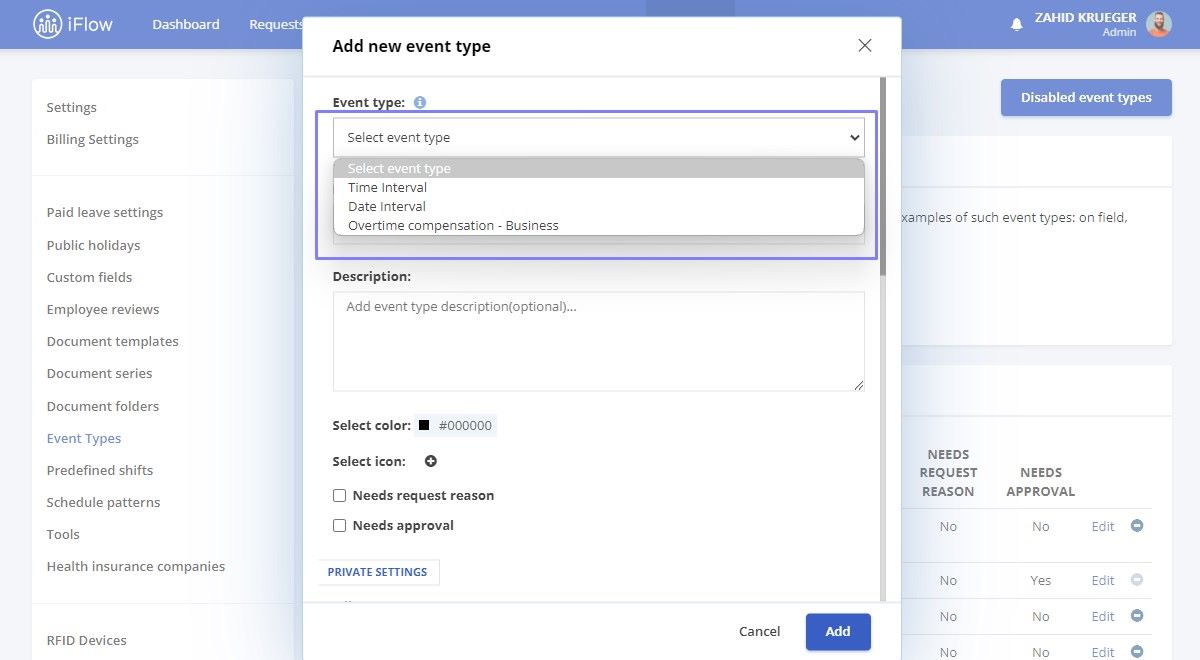
- Select Event Type: Time Interval (occurs hourly), Date Interval (occurs daily), Overtime Compensation – Business
- Write the event Name
- Optionally, you can add an Event Description
- Select the color and icon that will represent the event
- Choose whether the event will require Request reason or Approval
Private and permission settings differ based on the type of event you choose.
Time interval
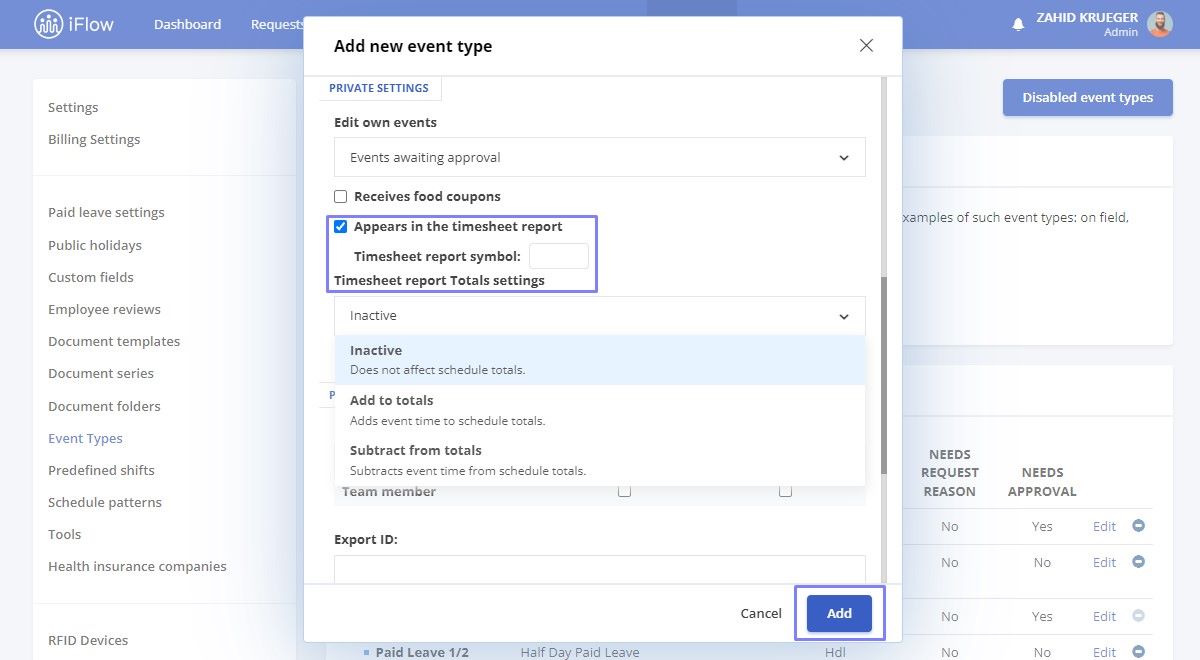
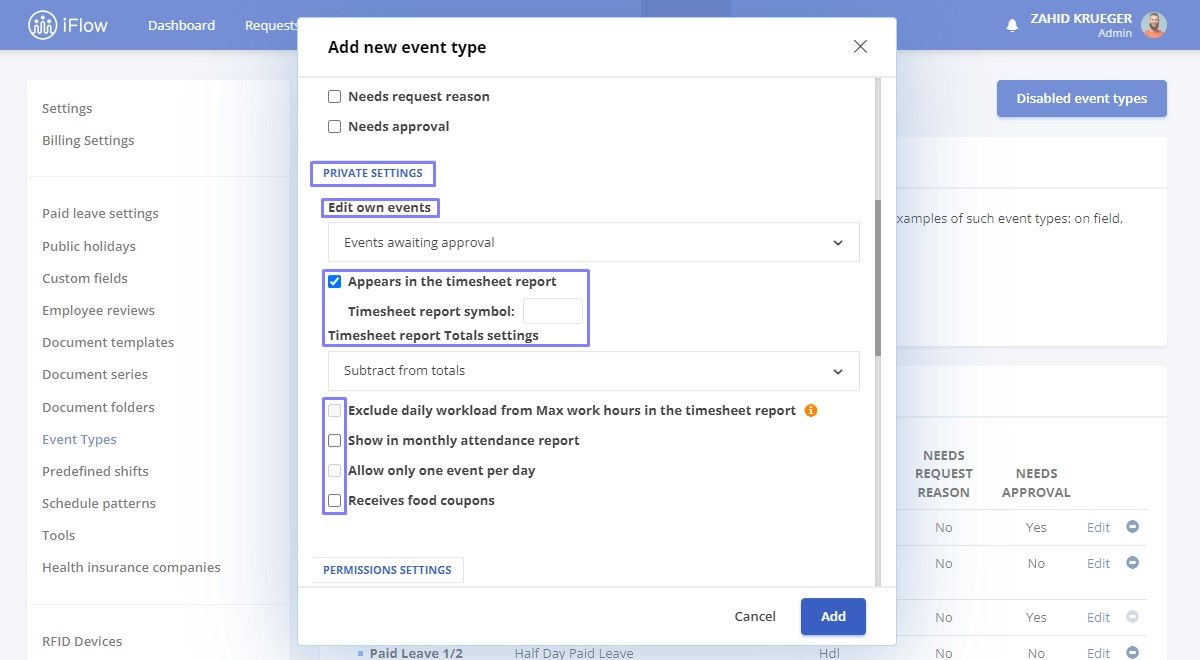
Select private settings:
- Allow editing of own events: Events awaiting approval, Approved events, Approved events – team leaders
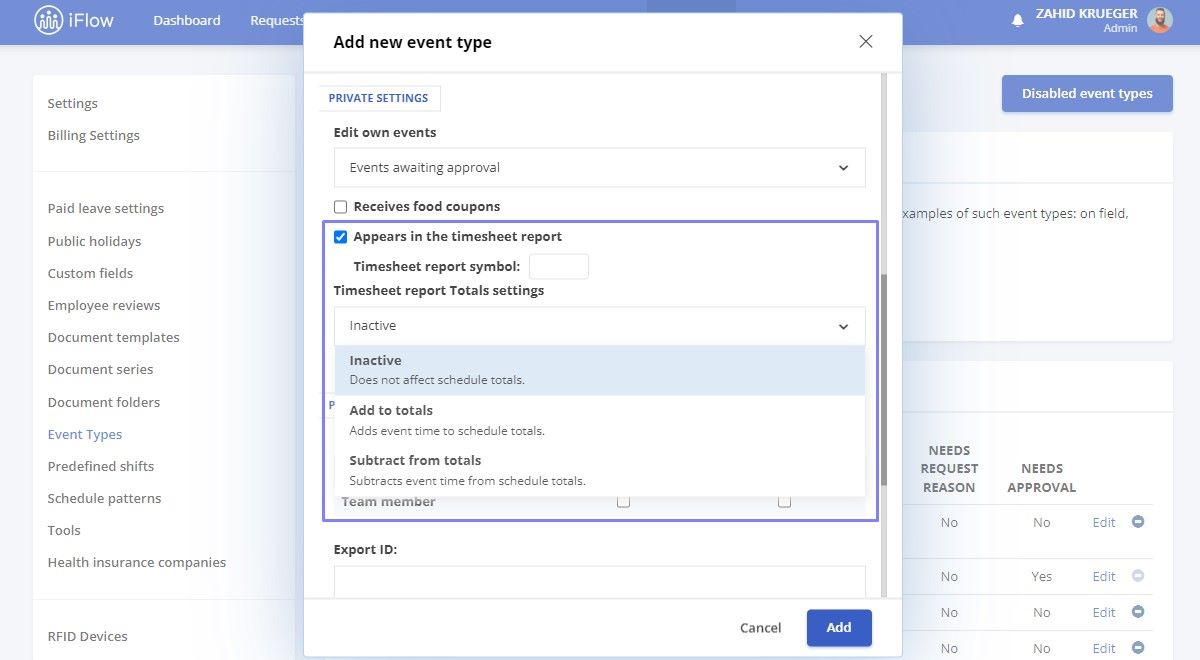
- Check the box for Appears in the timesheet report if you want the event to be shown on the timesheet and choose a timesheet report symbol to represent the event
- Select Timesheet report Total settings, based on the option selected will affect or not the schedule totals: Inactive, Add to totals, or Subtract from totals
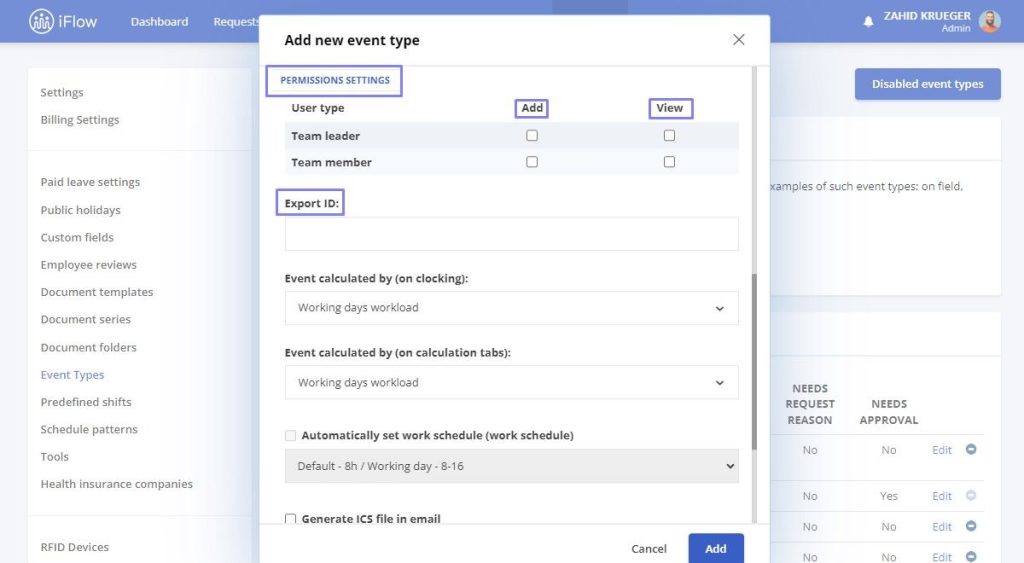
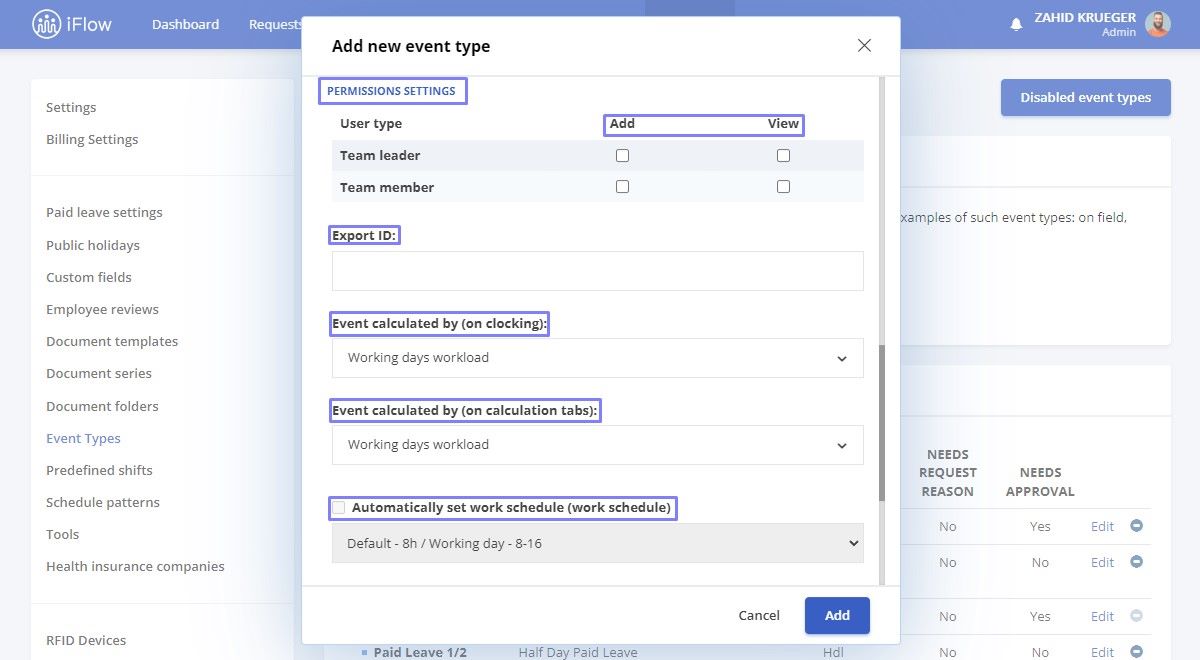
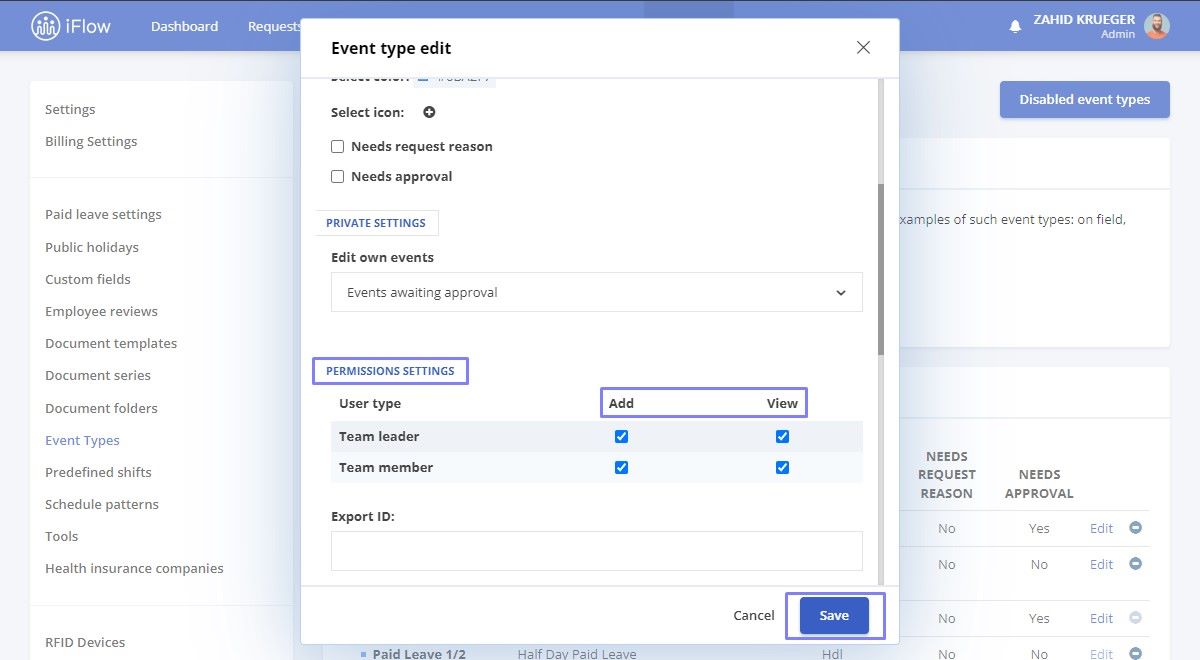
Select permissions settings:
- Choose who you grant Add and View permissions, Team Leader, Team Member or both by checking the boxes
- Select the Export ID that will represent the event on the timesheet
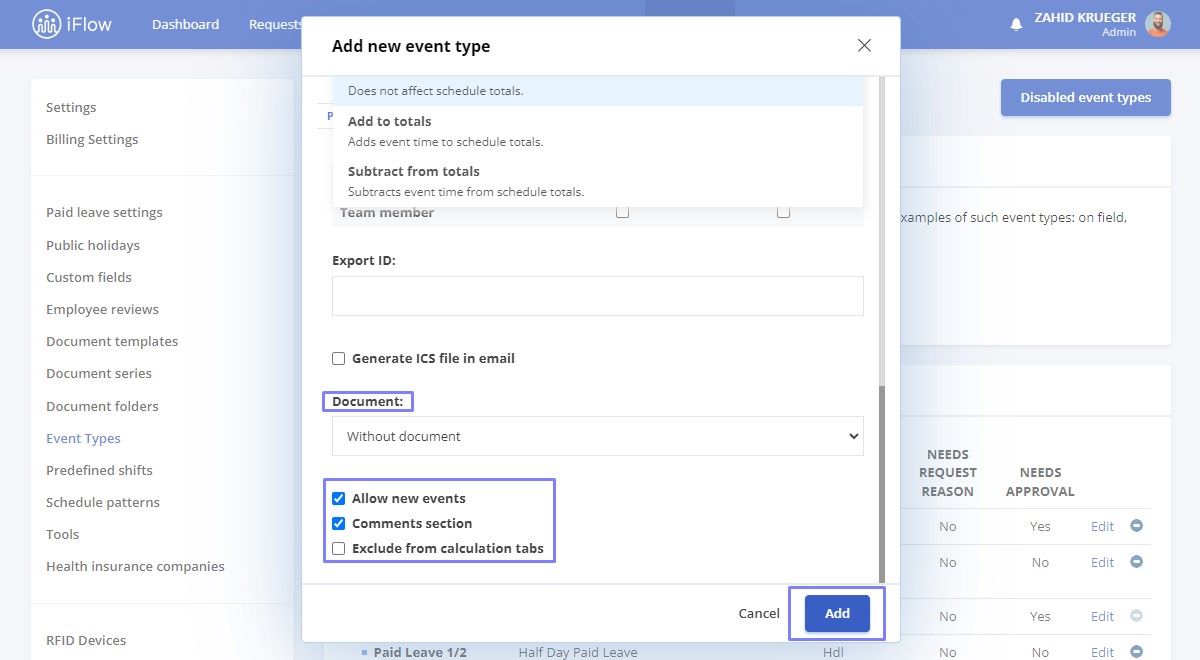
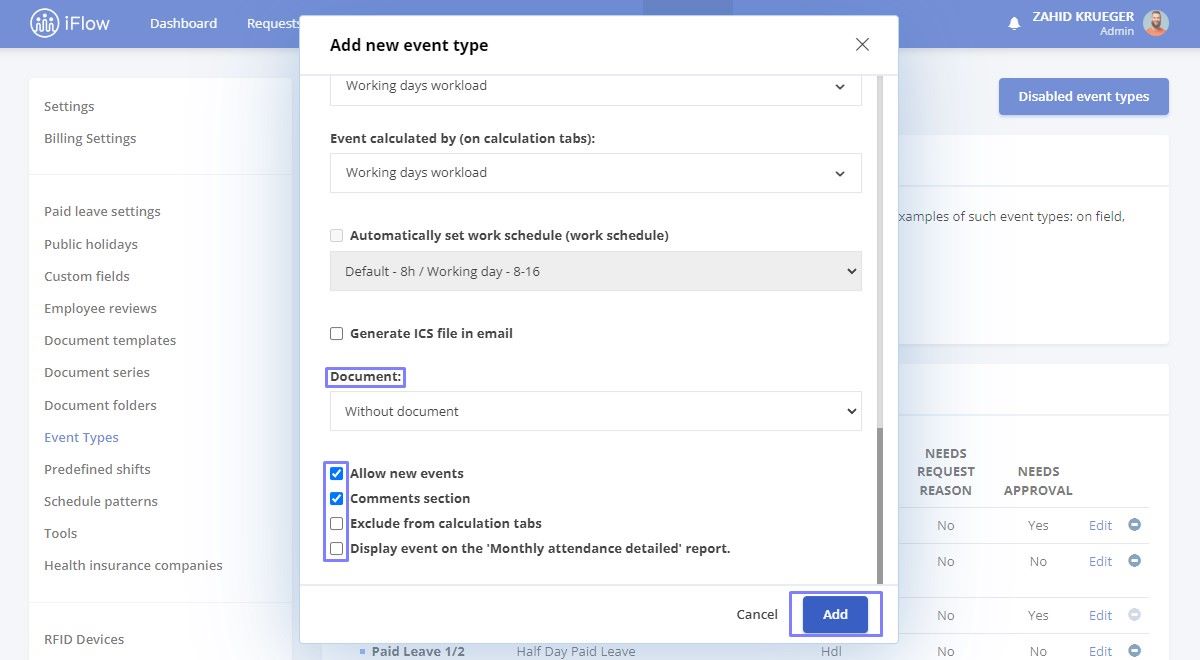
- Attach a Document
- Check the options you want to assign to this event: Allow new events, Comments section, or Exclude from calculation tabs
- Click on the Add button to add the new event
Note:
Events can be configured to start at 00:00 or extend up to 24:00.
For events that span overnight (e.g. 22:00–02:00), it is recommended to split them into two separate entries:
- one event for the first day, from 22:00 to 24:00
- another event for the next day, from 00:00 to 02:00
This approach ensures correct display and clear organization in the timesheet.
Date interval
Select the private settings:
- Allow editing of own events: Events awaiting approval, Approved events, Approved events – team leaders
- Check the box for Appears in the timesheet report if you want the event to be shown on the timesheet and choose a timesheet symbol to represent the event
- Select Timesheet report Total settings, based on the option selected will affect or not the schedule totals : Inactive or Subtract from totals
- Check the boxes you want to assign to this event: Exclude daily workload from Max work hours in the timesheet report, Show in monthly attendance report, Allow only one event per day, Receive food coupons
Select permissions settings:
- Choose who you grant Add and View permissions, Team Leader, Team Member or both by checking the boxes
- Select the Export ID that will represent the event on the timesheet
- Select Event calculated by (on clocking) and Event calculated by (on calculation tab): Working days workload, Daily workload or Work schedule
- Choose Work schedule
- Attach a Document
- Check the boxes with options you want to assign to this event: Allow new events, Comments section, or Exclude from calculation tabs
- Click on the Add button to add the new event
How to add custom events to the timesheet report
Custom events can be displayed in the total hours worked timesheet.
To add a custom event and set it to appear in the timesheet, go to Settings – Event Types and click on Add new event type button or Edit an existing event.
Important: The setting is valid only for Time interval events.
- Check the box for Appears in the timesheet report
- Select one of the three options from the Timesheet report Totals settings:
- Inactive – the event does not affect the timesheet
- Add to totals – the event is added to the total number of hours on the timesheet
- Subtract from totals – the event is subtracted from the total hours
- Click on Add
How to set permissions on events
HR iFlow allows you to set permissions on events.
Permission Has access to reviews grants an employee access to all events and the right to: view, add, edit, delete, approve, or reject both their own events and those of other employees.
Here are the steps to grant this permission to an employee:
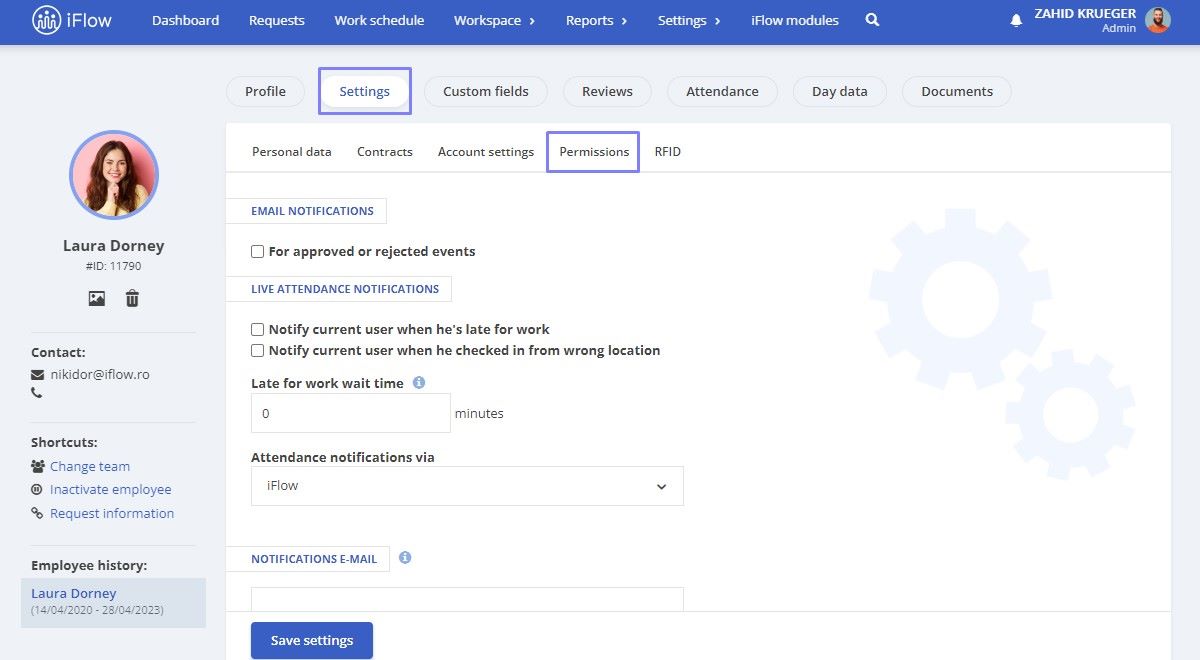
- From the Dashboard click on the name of the employee you want to grant this permission to
- From employee’s profile click on Settings
- Click on Permissions
- Check the box for Has access to all events
- To finalize, click on Save settings
This setting is used when a user needs access to all company events but should not be designated as an Administrator or Team Leader.

How to set permissions for adding and viewing events
- Click on Settings – Event Types
- To edit an event, click on the Edit button next to it
- In the Permissions Settings section, checkboxes can be ticked next to Team Leaders or Team Members to Add or View events
- Click Save
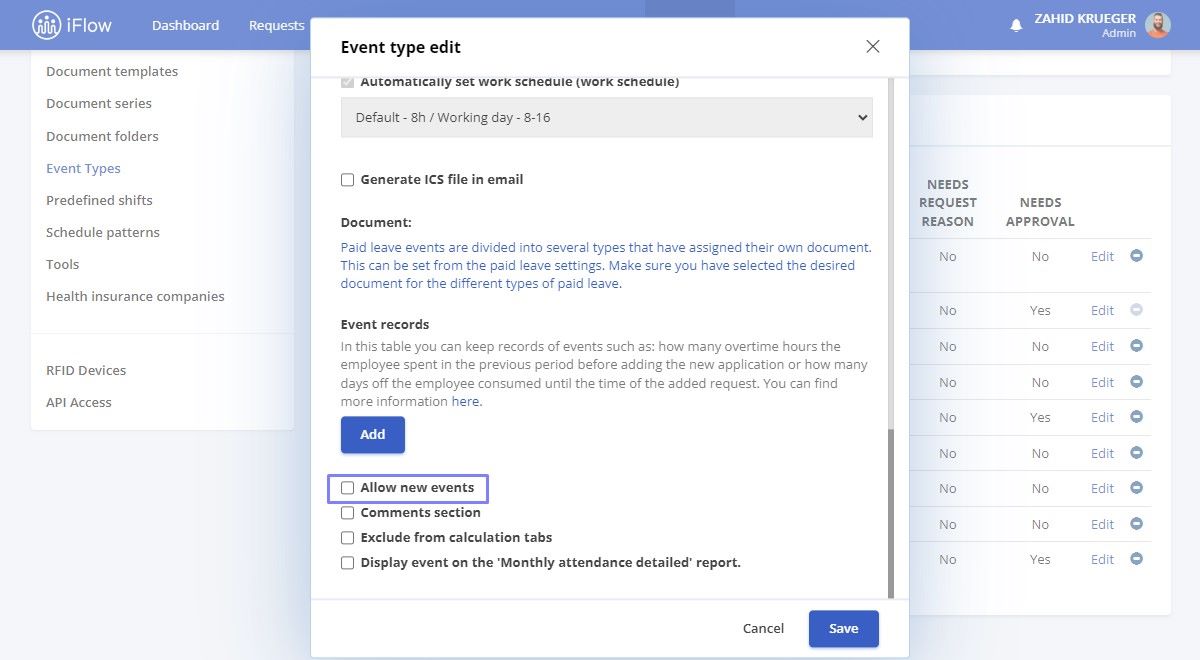
Hide Event
Any type of event can be hidden to prevent employees from using it within a company but the history of the event remains in the system.
To do this, follow these steps:
- Settings – Event Types – Edit on a type of event (for example, Paid Leave)
- You can uncheck the option for Allow new events, and leave will no longer be available for employees to add from that moment on (it’s a setting at the event level)

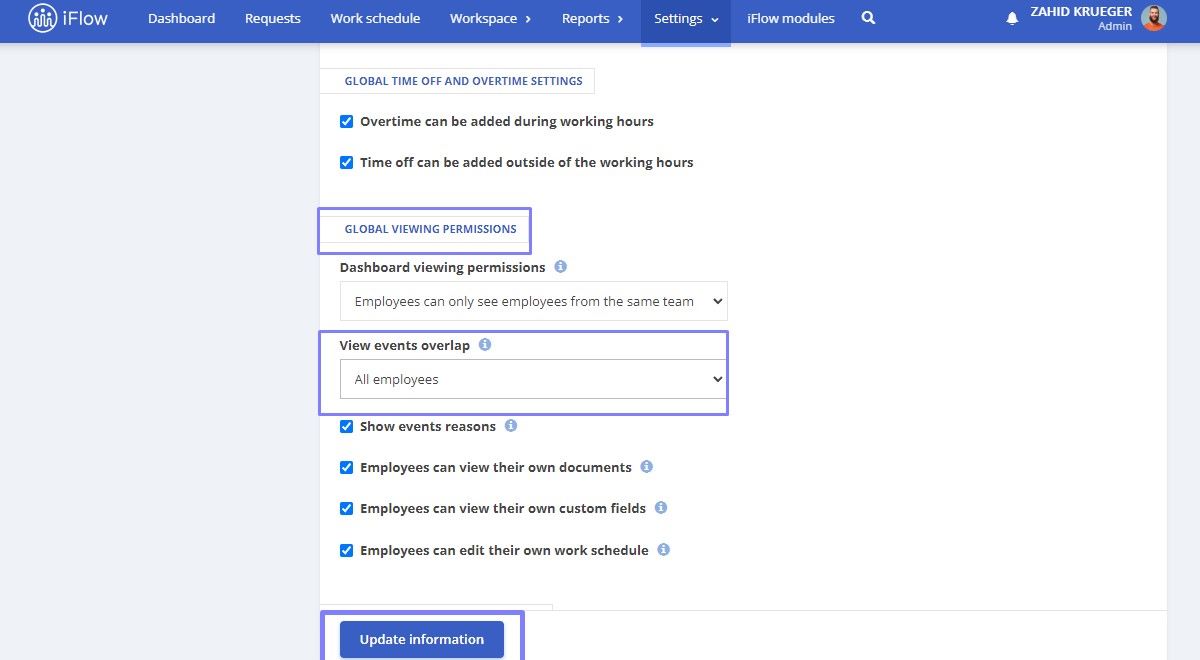
Overlap of events
Warning for overlapping events
- Settings – Company Settings
- Global Viewing permission
- Choose who can view the events
- Click on the Update Information button
Restriction of events
- Settings – Event Types
- Edit a custom event-type Date Interval that does not appear on the timesheet
- Check/uncheck the option “Allow only one event per day” after the option is checked, it will not allow another event of the same type on that day to be added
- To finalize, click on Save


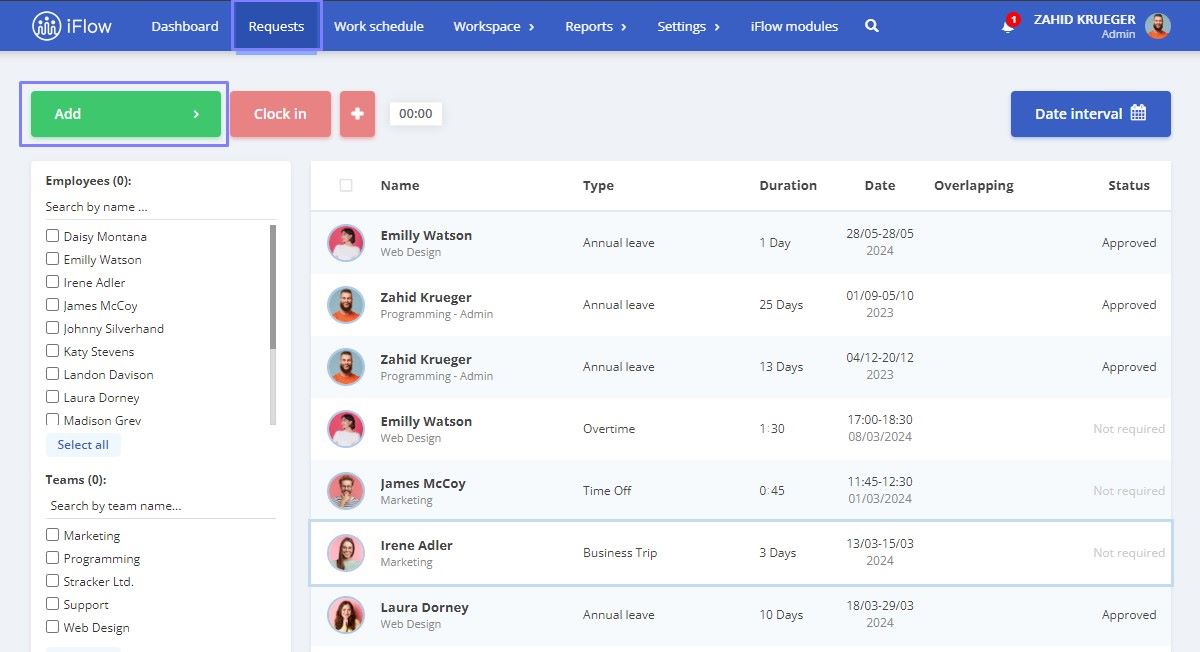
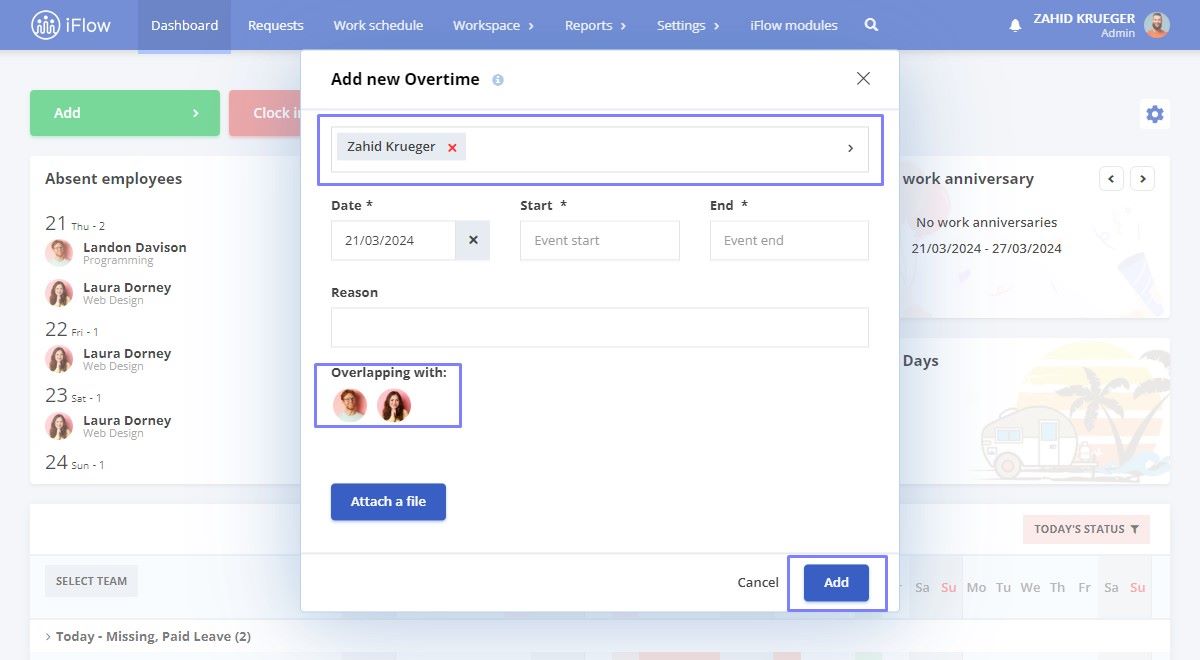
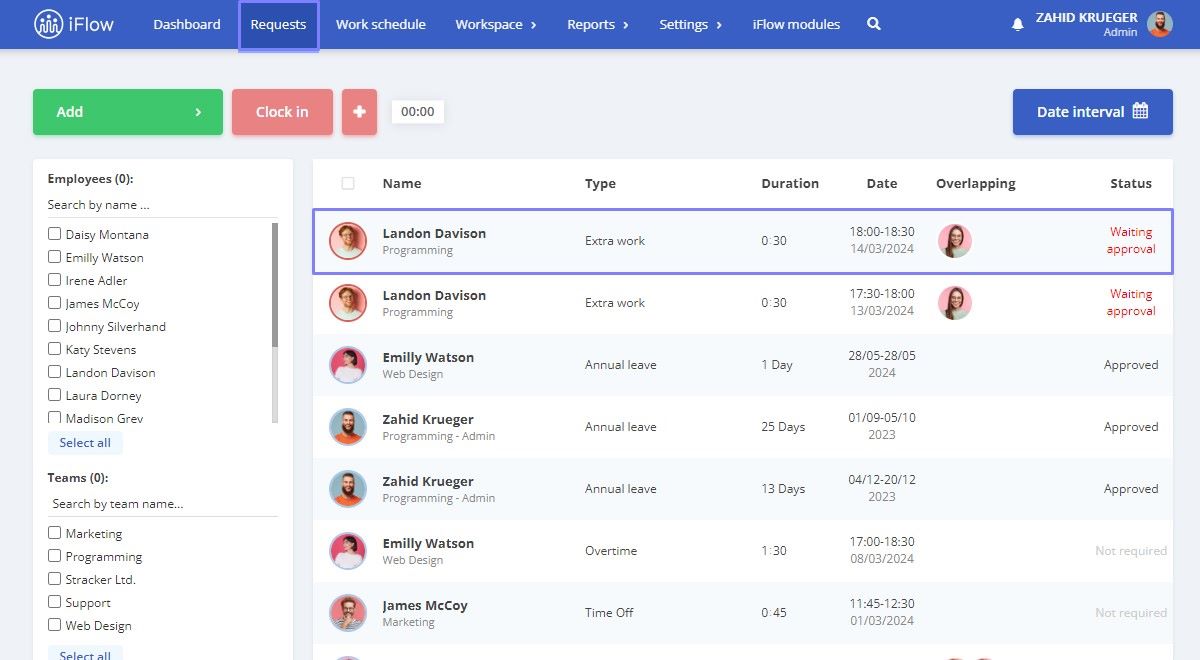
How to view overlapping events
When adding a new event in HR iFlow, you can see which other events your request overlaps with.
This option requires activation. Here’s how:
- Access Requests from the main menu
- Click on the Add button and select the event
- Choose an employee and fill in the necessary details
- In the Overlaps With section, you will see the employee(s) with whom it overlaps
- This information can also be viewed when the event has the status: Pending Approval/Approved/Rejected
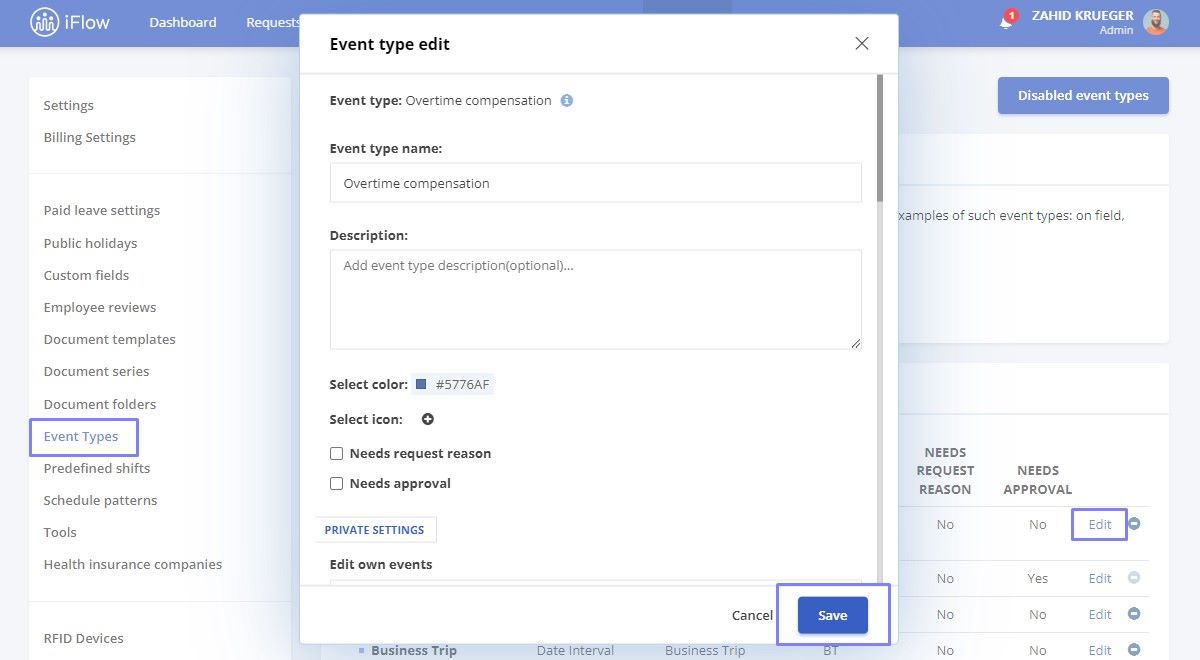
How to edit an event category
- Access the Settings – Event Types
- To edit an event, click on the Edit button next to it
- After making the necessary modifications, click the Save button
How to add an icon to an event category
- Settings – Event Types
- Edit the type of event you want to add an icon to
- Choose the icon you want to add
- Click the Save button
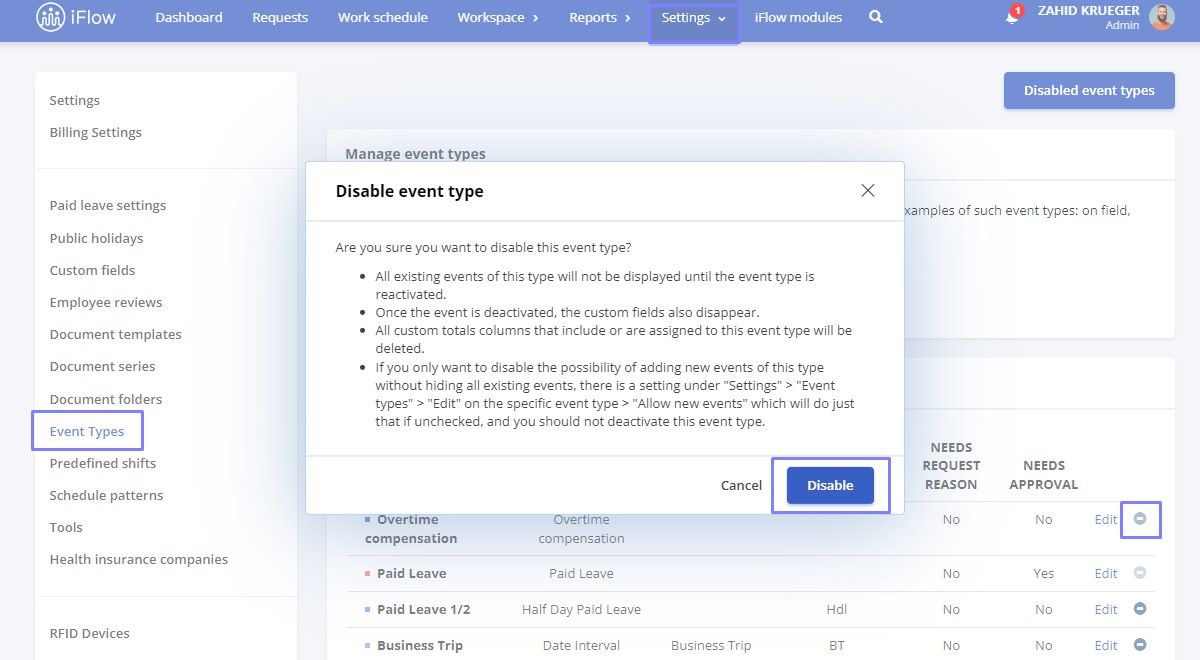
How to deactivate an event types
- Access the Settings from the main menu – Event Types
- Click on the circle next to the event
- Then, select the Disable button
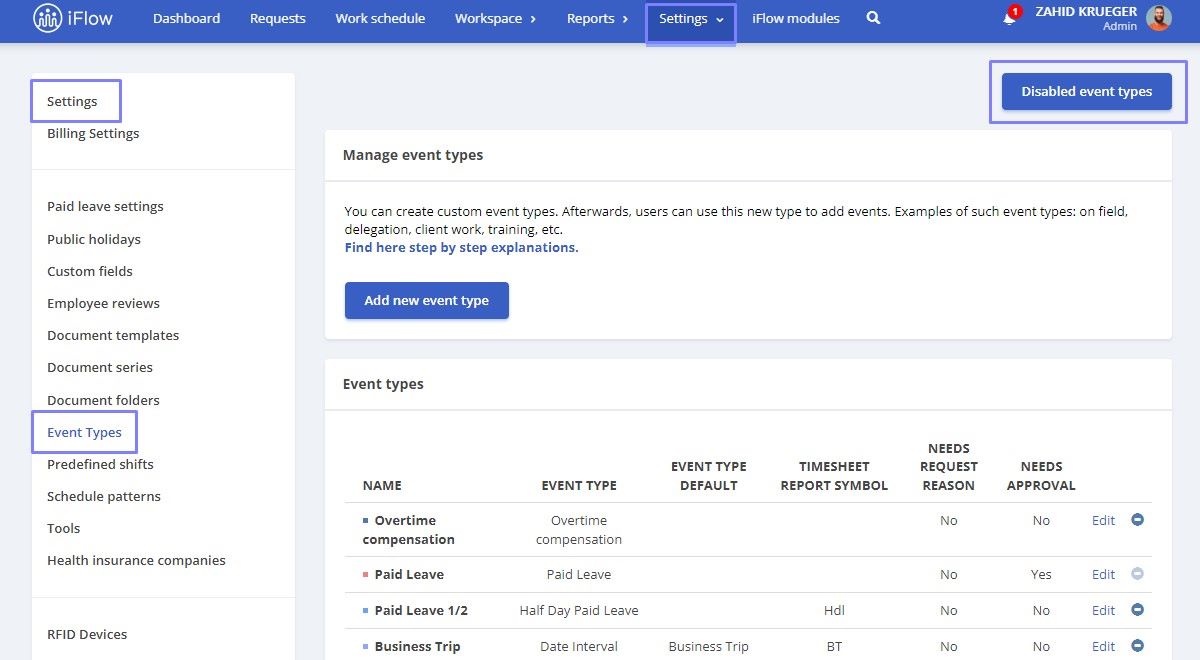
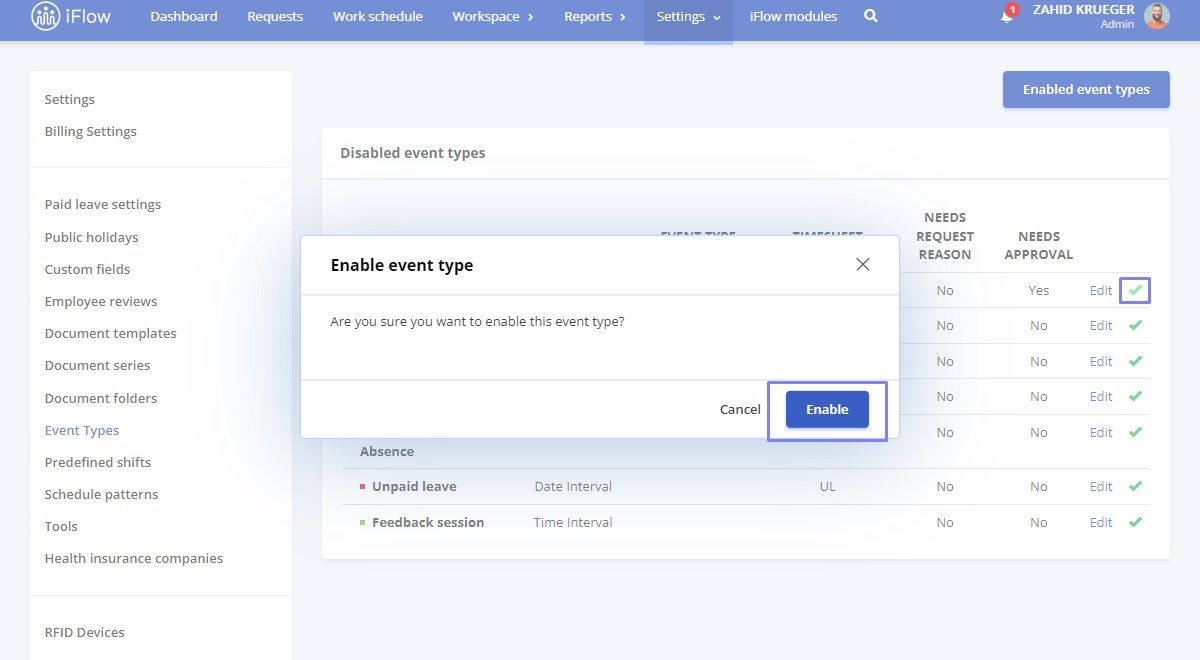
How to activate event types after deactivation
- From the main menu, click on Settings, select Event Types
- On the right side of the page, click on the Disabled event Types button
- Check the box next to the event you want to activate
- To complete, click on Enable
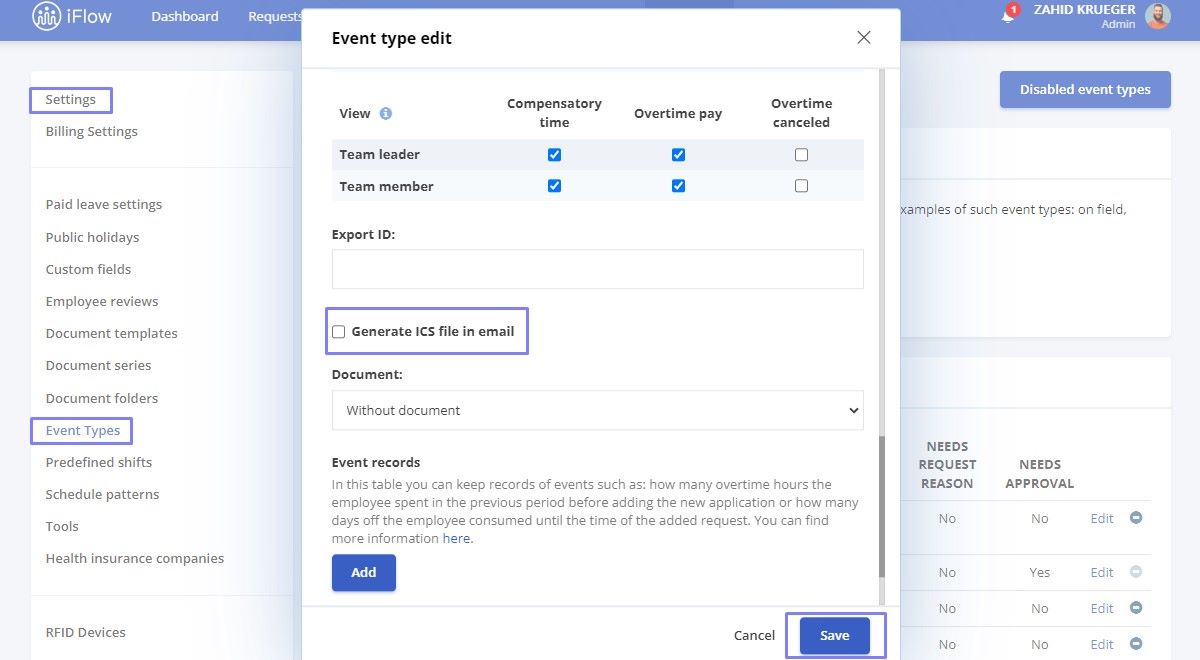
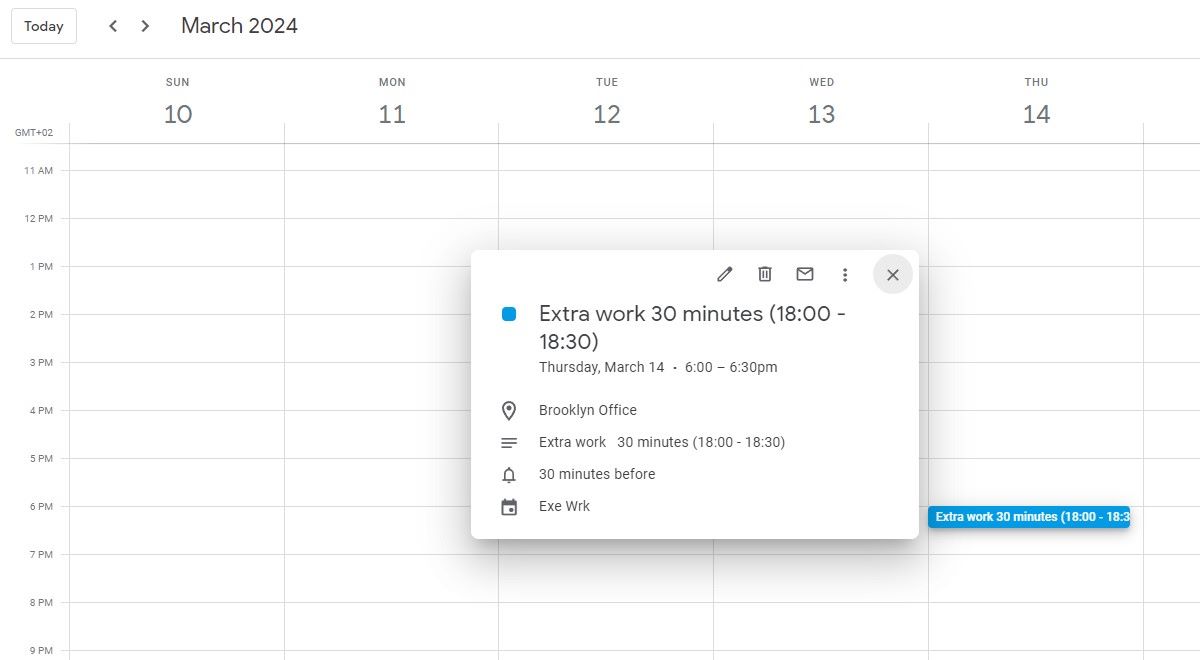
How to enable notifications in Google Calendar and Microsoft Calendar
- From the main menu, click on Settings – Event Types
- Click on the Edit button next to the event
- Check the box next to Generate ICS file in email to receive the file via email
- Click the Save button
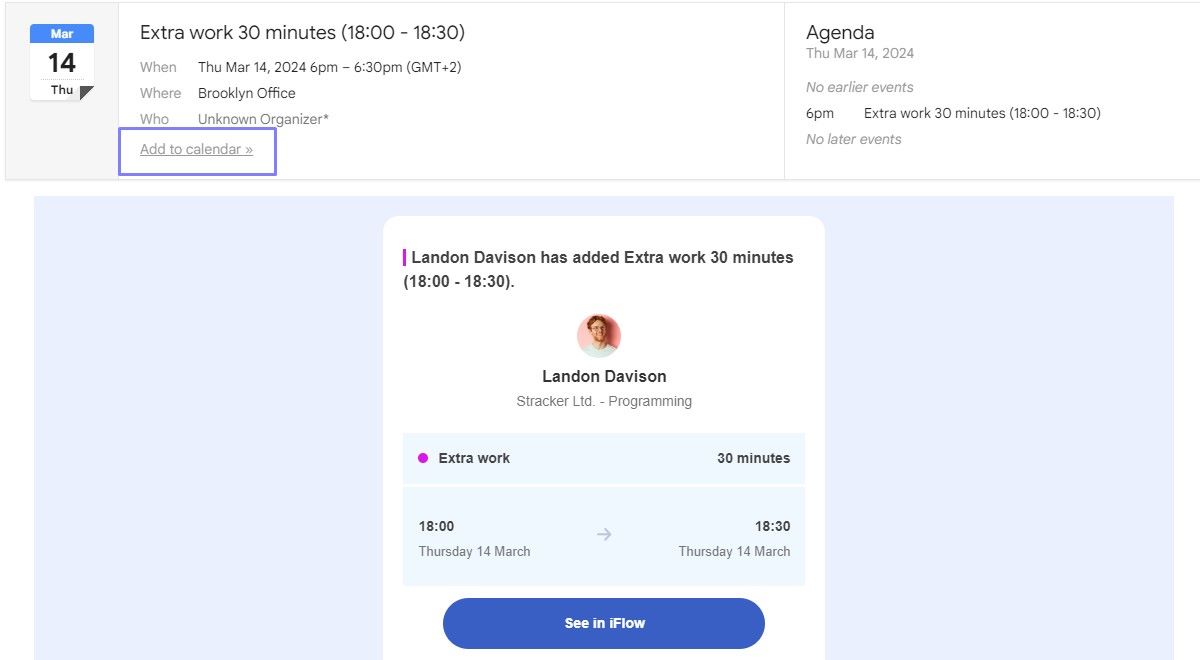
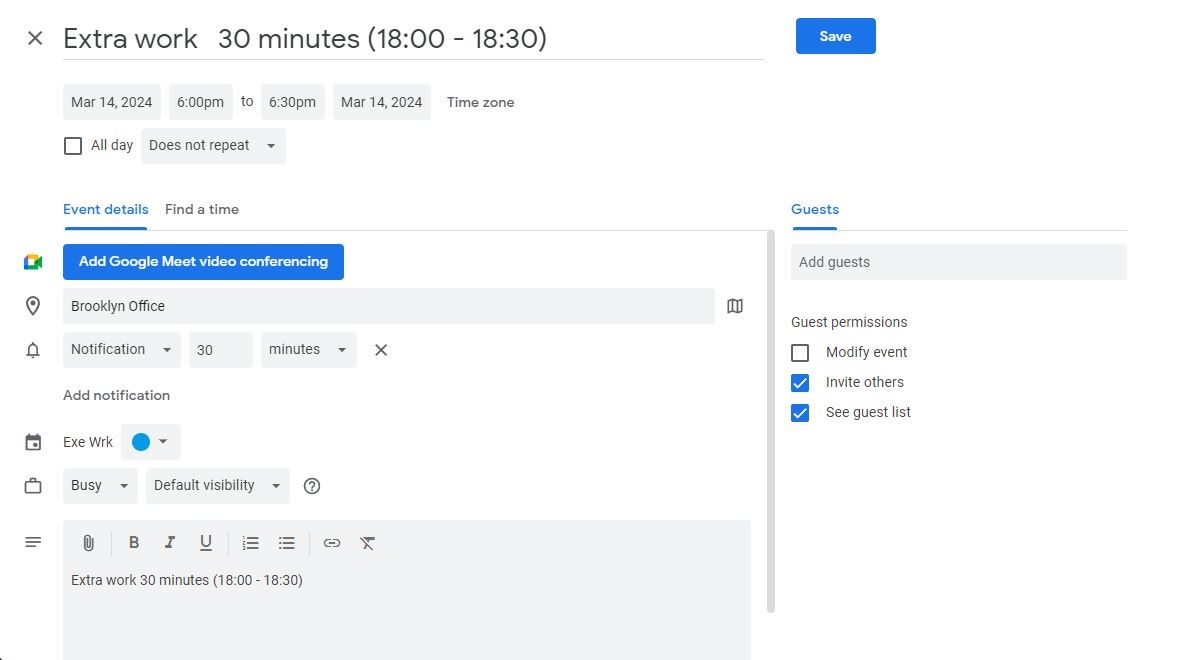
Google Calendar
To add event types to Google Calendar, accept the event request of employee in HR iFlow then click on the Add to calendar button from email.
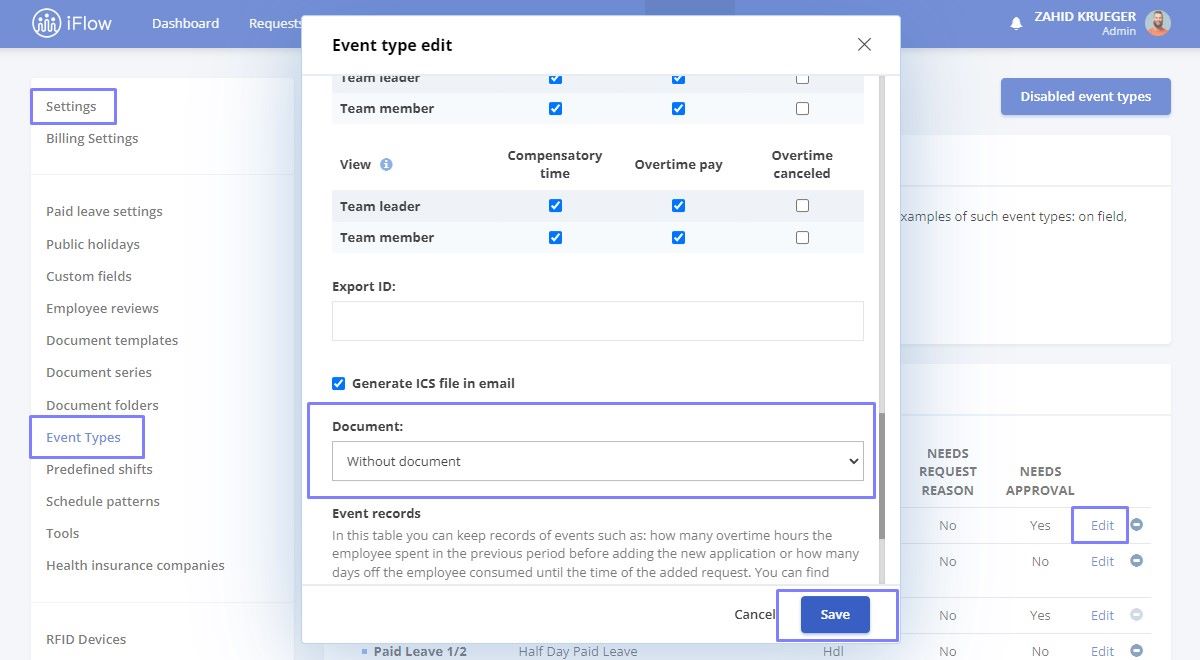
How to automatically set the document to an event category
- Access from the main menu Settings, then click on Event Types
- Select the Edit button
- In the Document section, choose the document
- To complete, click on the Save button
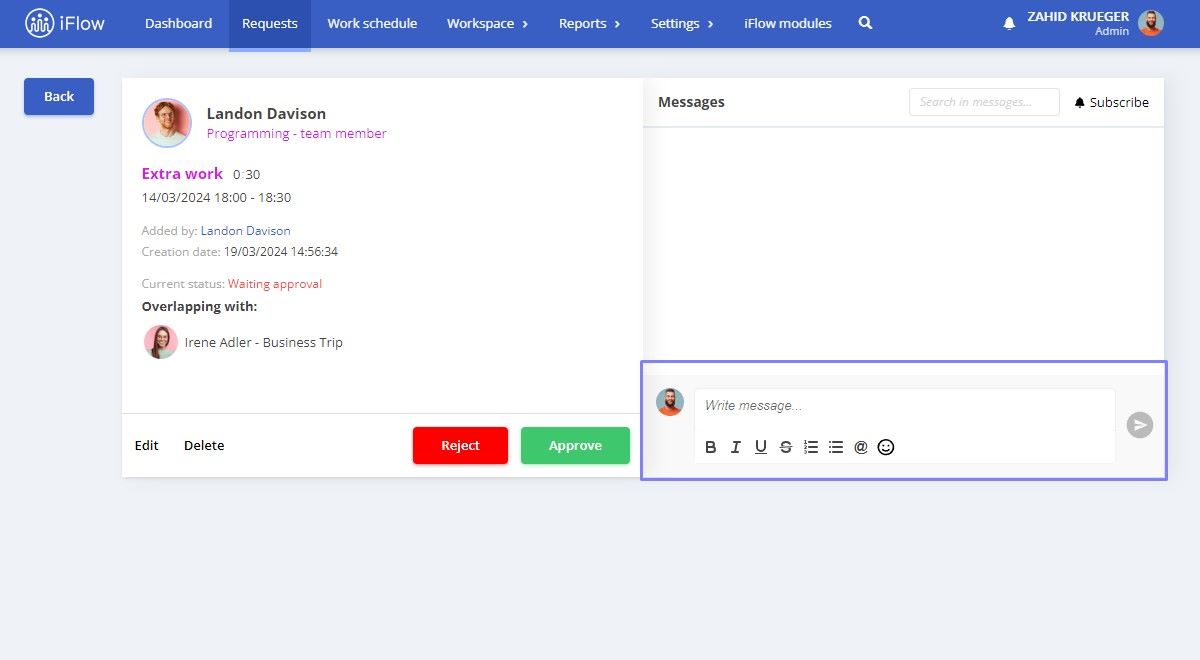
How to add comments to events
After the event is added, follow these steps:
- Access the Requests from the main menu
- Click on the event you want to add the comments
- On the right side of the page, you will find the section where you can leave comments
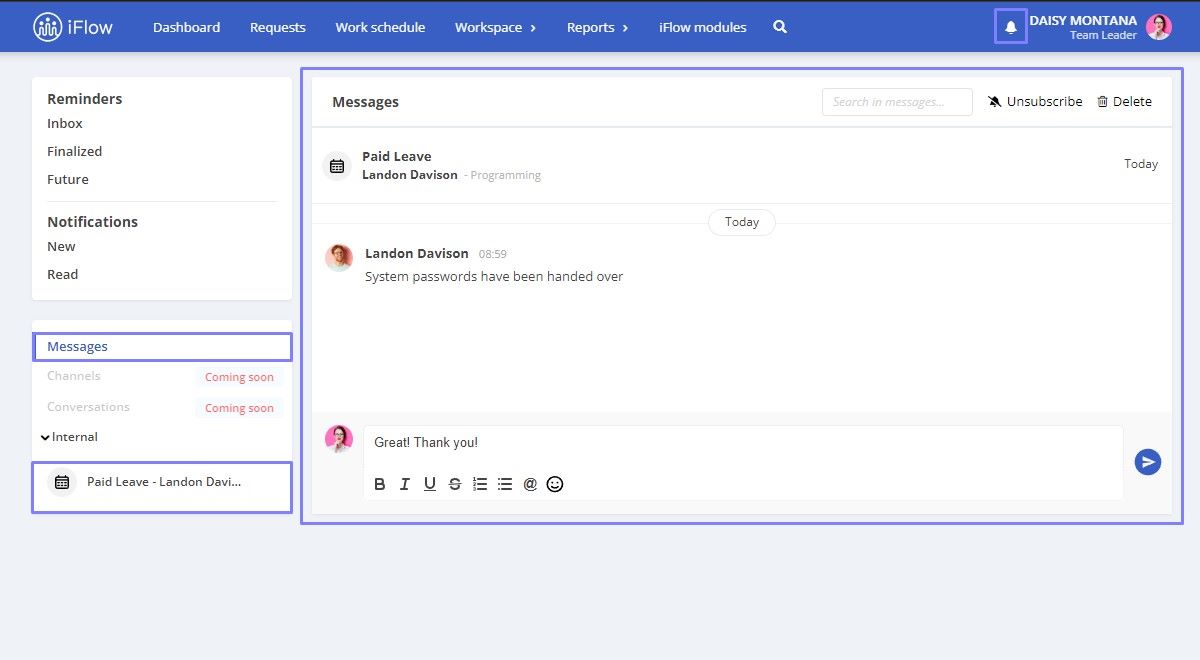
How to view notifications on events
You will receive notifications every time an event is approved, modified, or rejected, and you will also be notified when you receive a message in the comments section.
- Access the notification bell icon
- Select the Messages section; you will see the comment sent by the employee
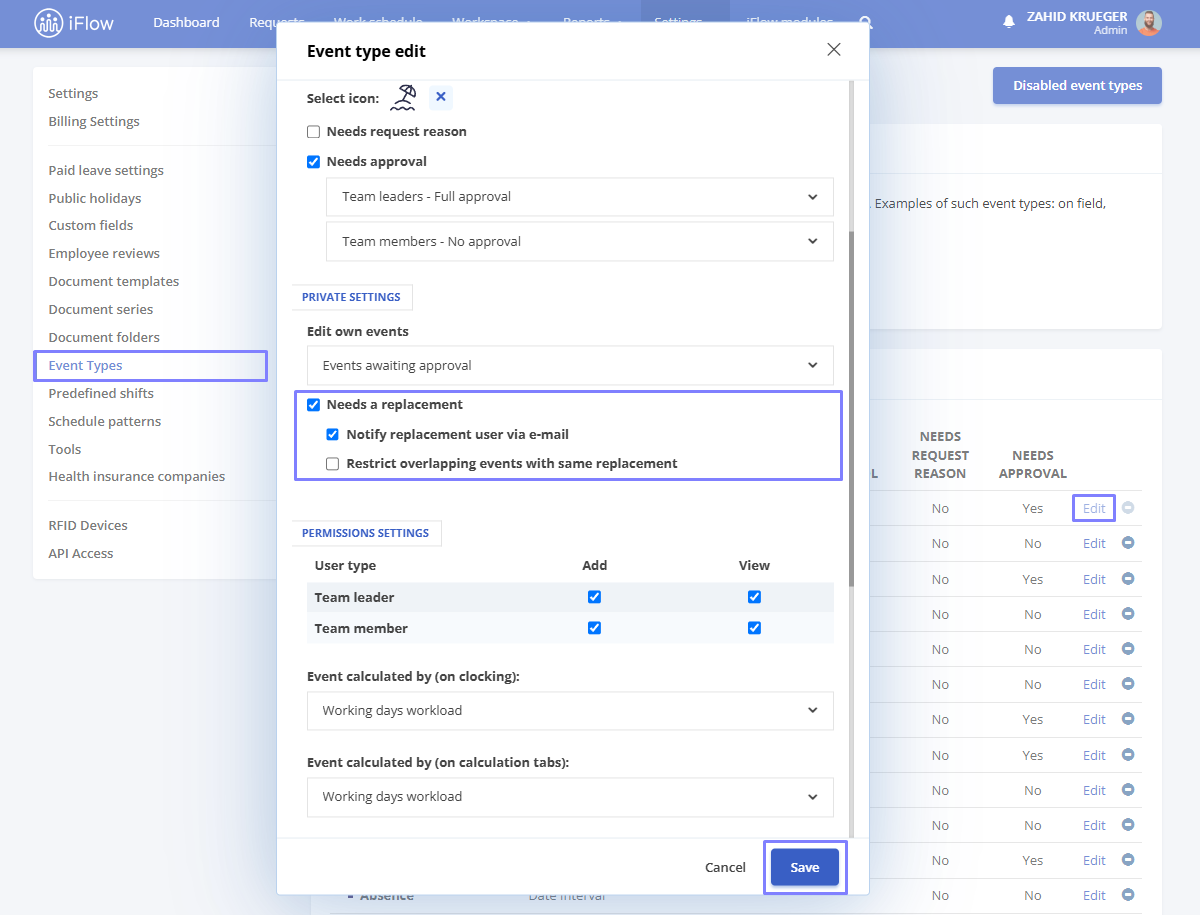
How to enable e-mail notifications for replacements
- Go to the Settings menu – Event Types
- Click Edit next to the Paid Leave event
- Check the box for Needs a replacement
- Check the box Notify replacement user via e-mail – this way, the employee selected as a replacement will be notified by e-mail
You will also find the option Restrict overlapping events with the same replacement. By selecting this option, you can ensure that the same replacement is not assigned to two or more overlapping leave periods.
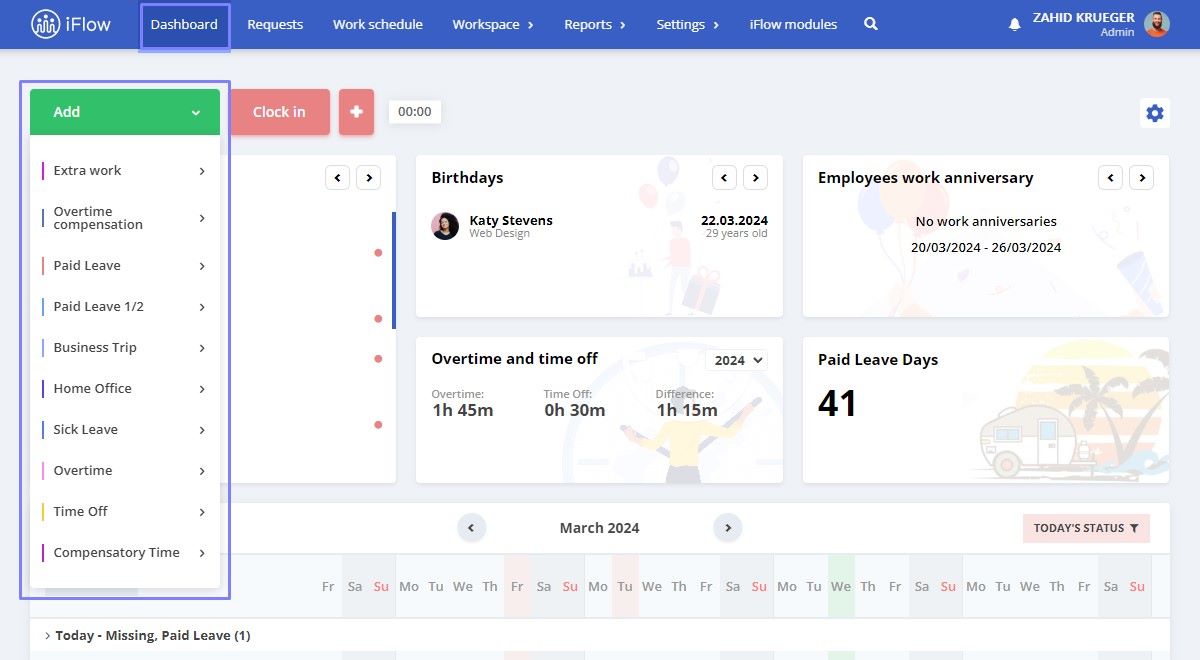
How to add an event for an employee
- Access the Dashboard from the main menu, then select the Add button
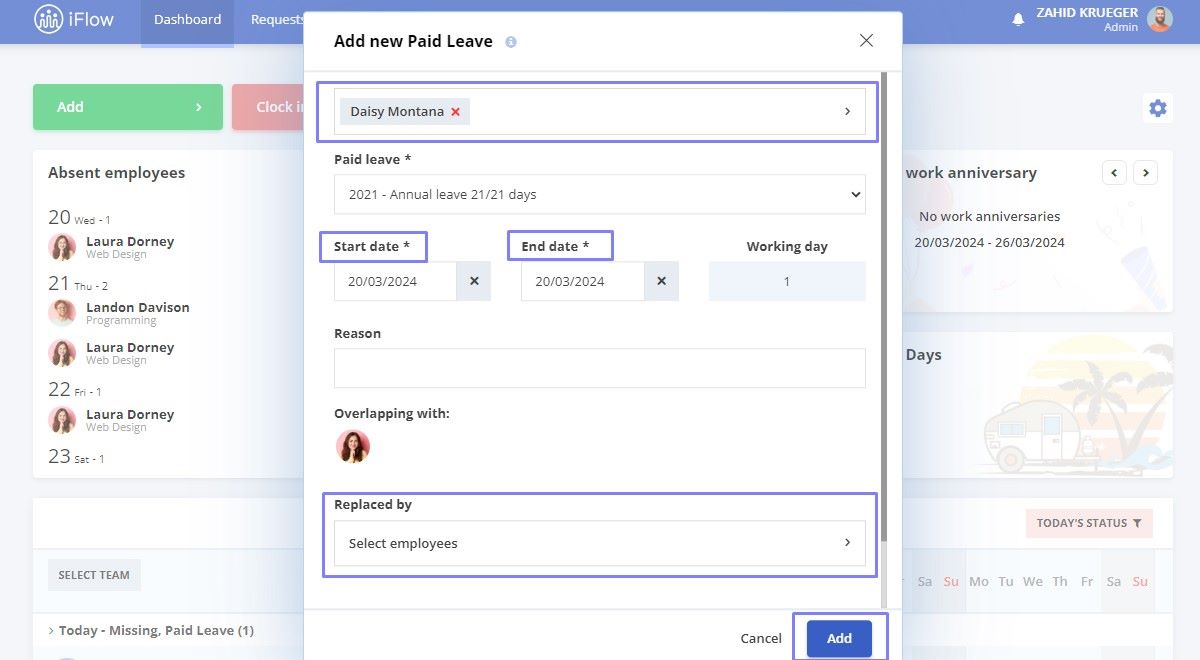
- Choose the event you want
- Select the employee(s)
- Set the Start Date and End Date
- Choose the employee who will replace them
- Optionally, Attach a file
- To complete, click on the Add button
How to limit vacation days
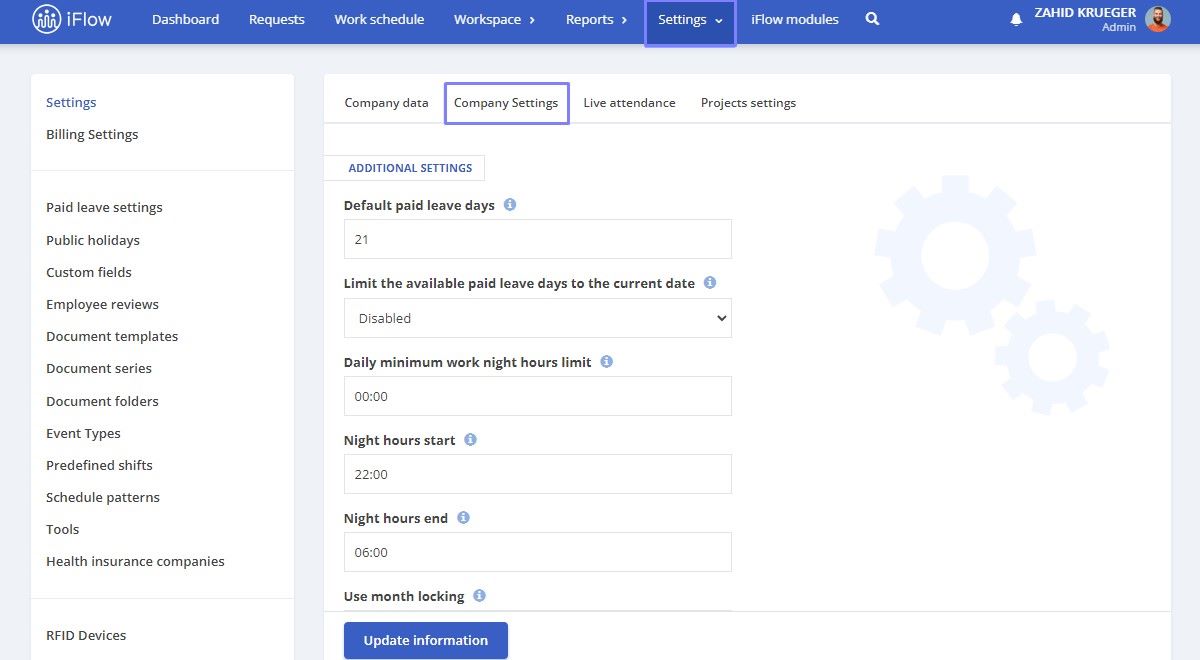
How to limit vacation days for the company
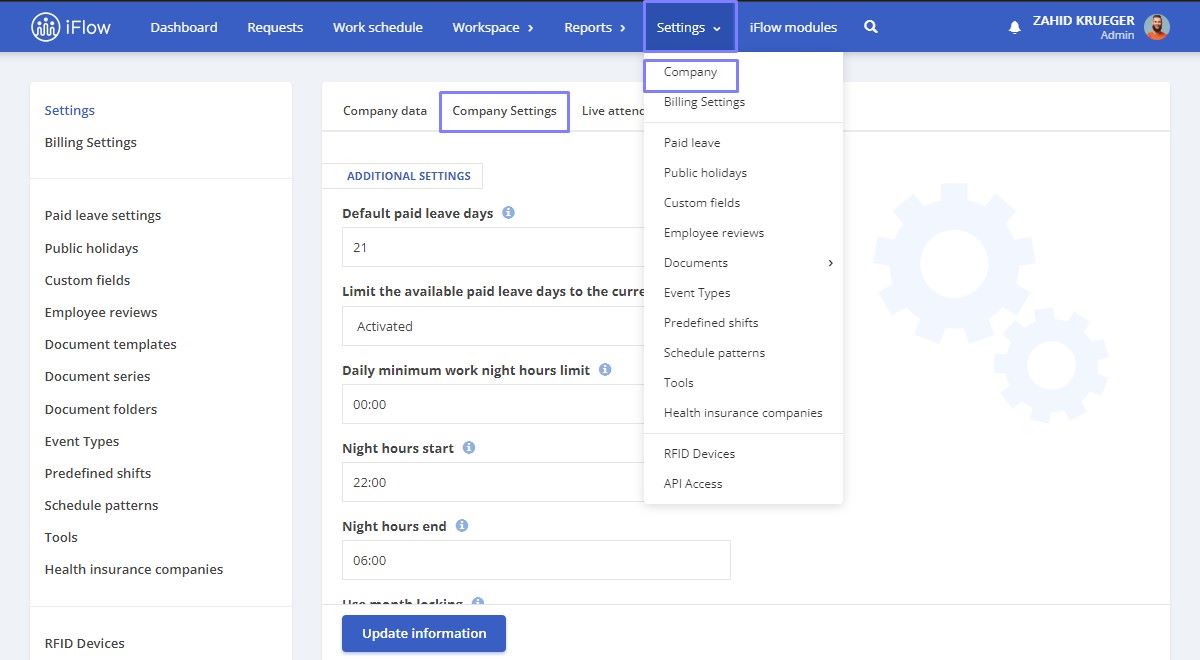
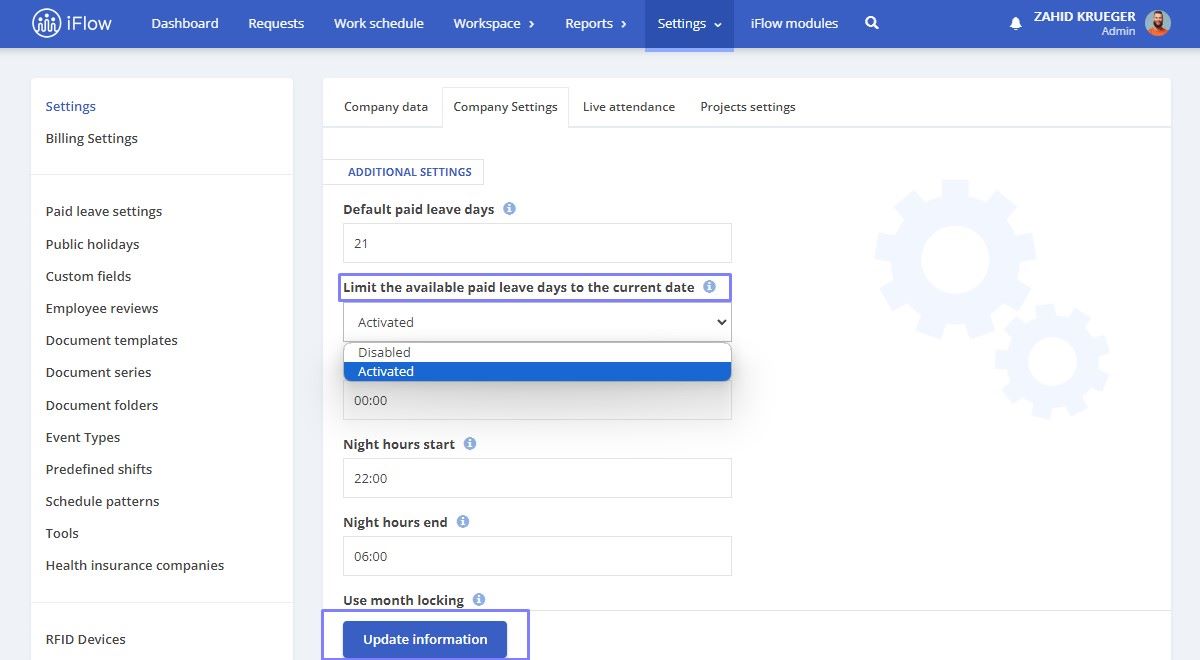
- Access the Settings from main menu, then click on Company
- Select Company Settings
- Select Activated to Limit the available paid leave days to the current date
- To complete, click on the Update Information button
How to limit vacation days for an employee
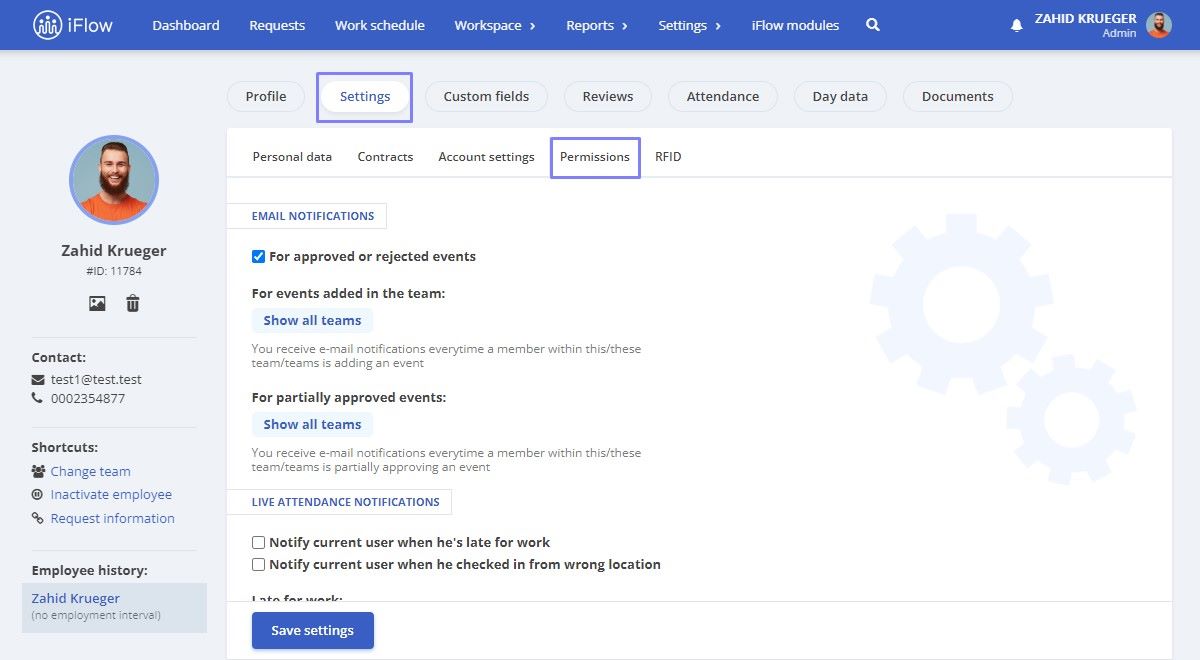
- Access the employee’s profile
- Click on the Settings button
- Choose Permissions
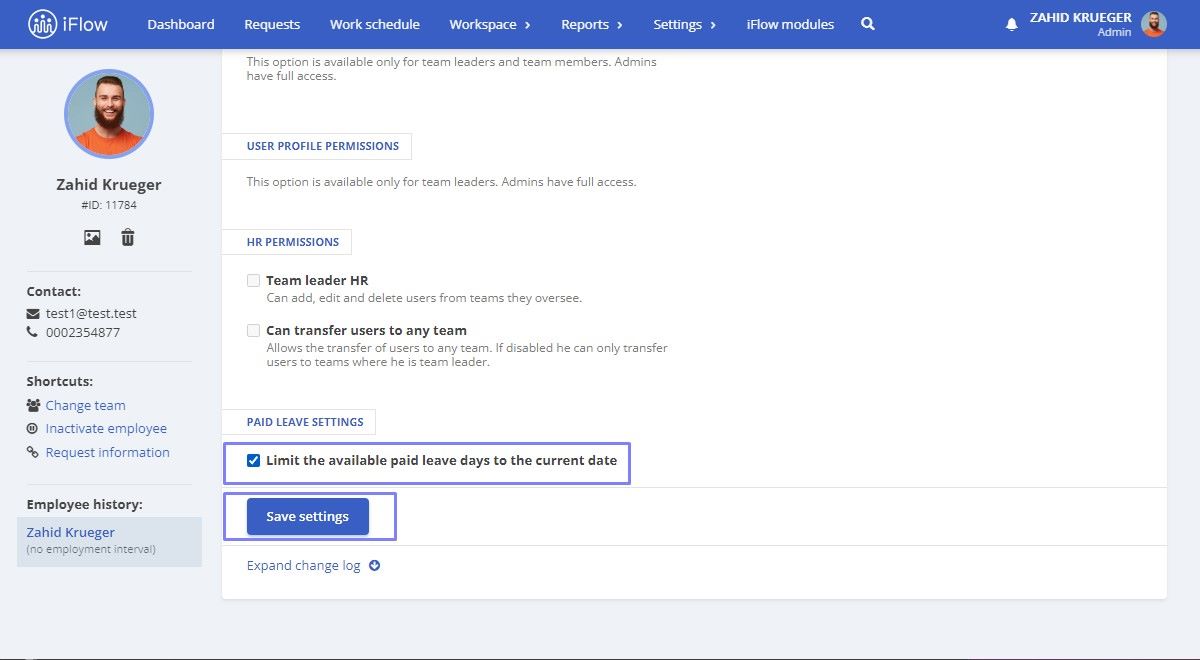
- At the bottom of the page, check the box for Limit the available paid leave days to the current date
- To complete, click on the Save Settings button
How to use the “Shift Swap” event
The “Shift swap” functionality allows employees to help each other by swapping their work shifts. It also enables the work schedule to be adjusted so that employees can better manage their day-to-day lives.
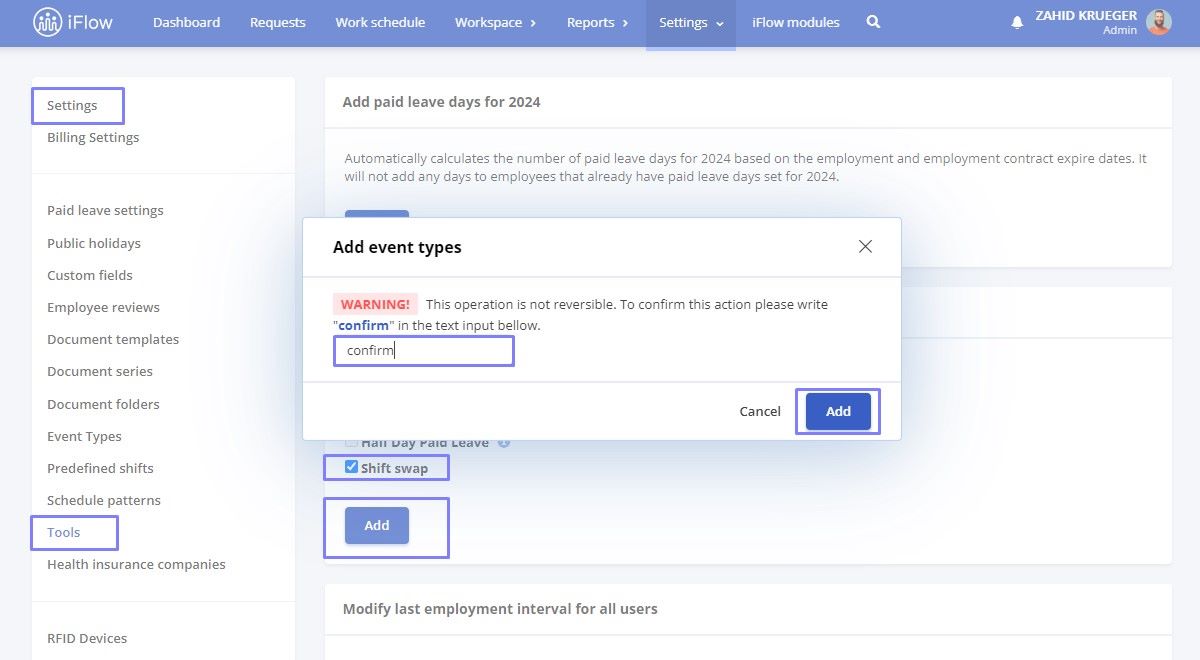
To activate this event in your company, click on Settings from the main menu – Tools.
- In the Add event types section, check the Shift Swap option
- Click Add
- Type “confirm” in the pop-up box
- To complete, click the Add button
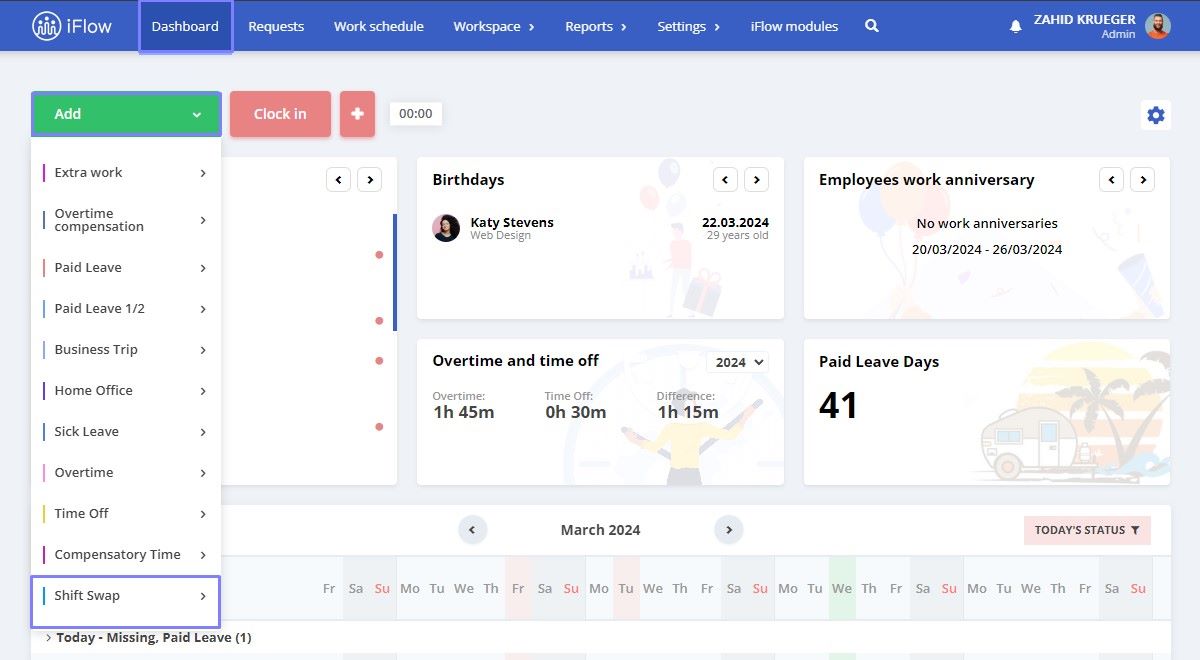
The event will be added to the dashboard using the Add button.
- From the main menu, select Dashboard, then click on Add button
- Click on Shift Swap
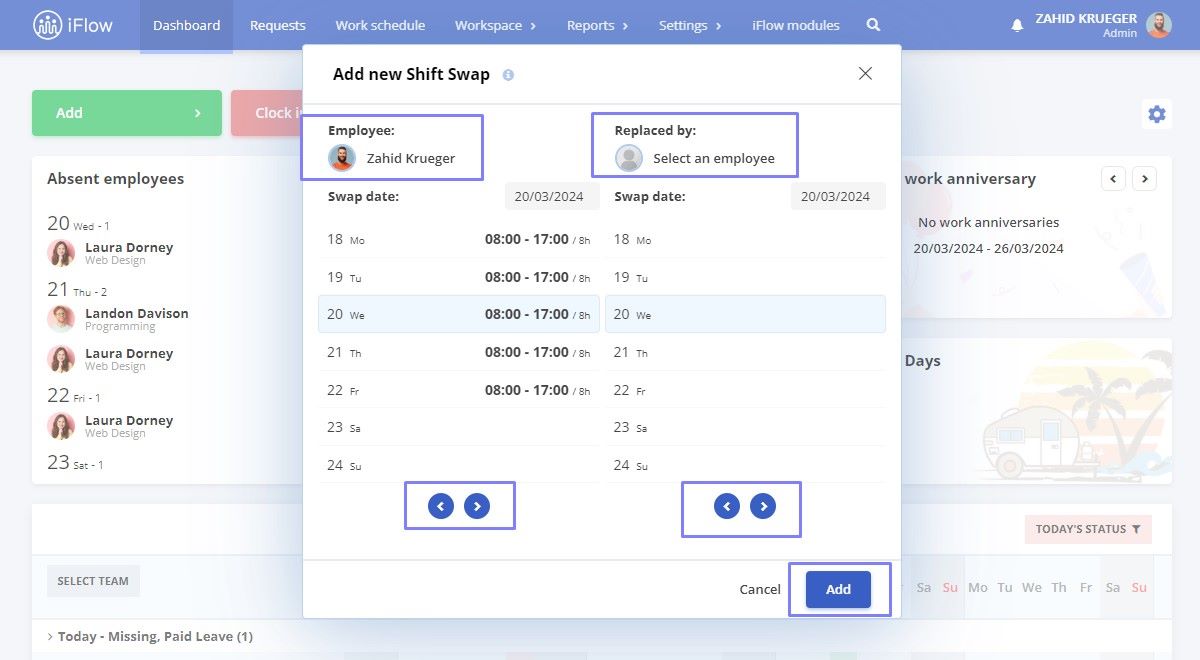
- Choose the employees and the days when the shift swap will take place
- Click Add
After clicking on the name of the first employee displayed in the options, the list of employees will open. You can change the displayed workdays using the forward/backward arrows.
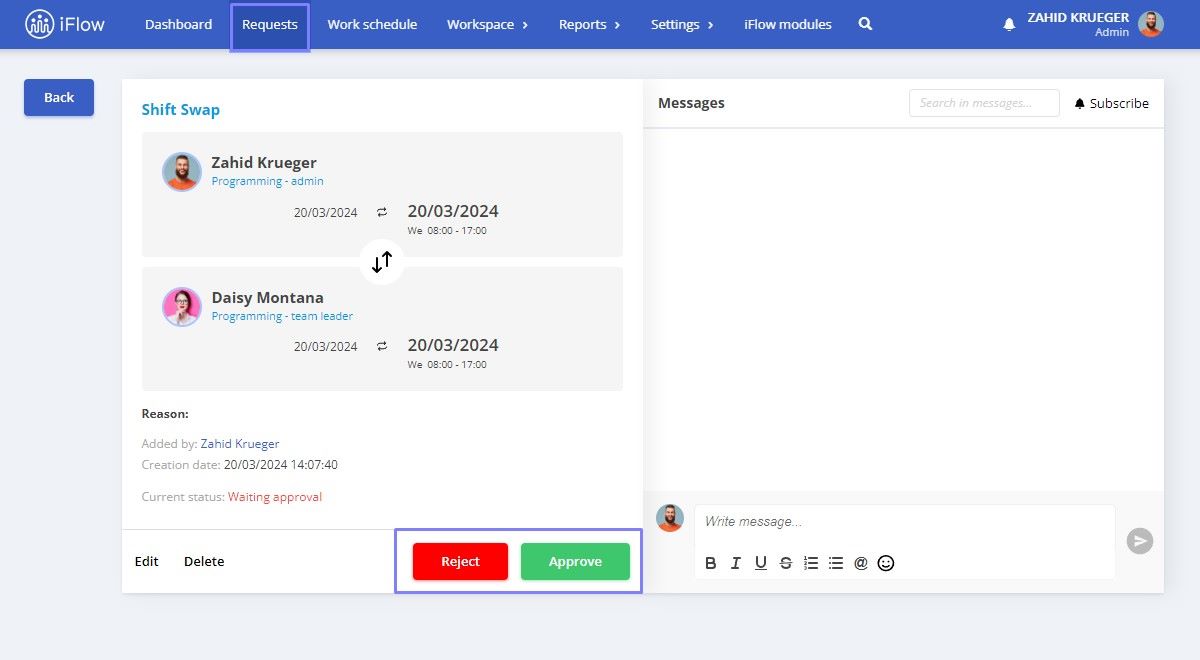
The event will be displayed in both Dashboard and Requests and after approval, the changes will automatically be reflected in the Work Schedule.
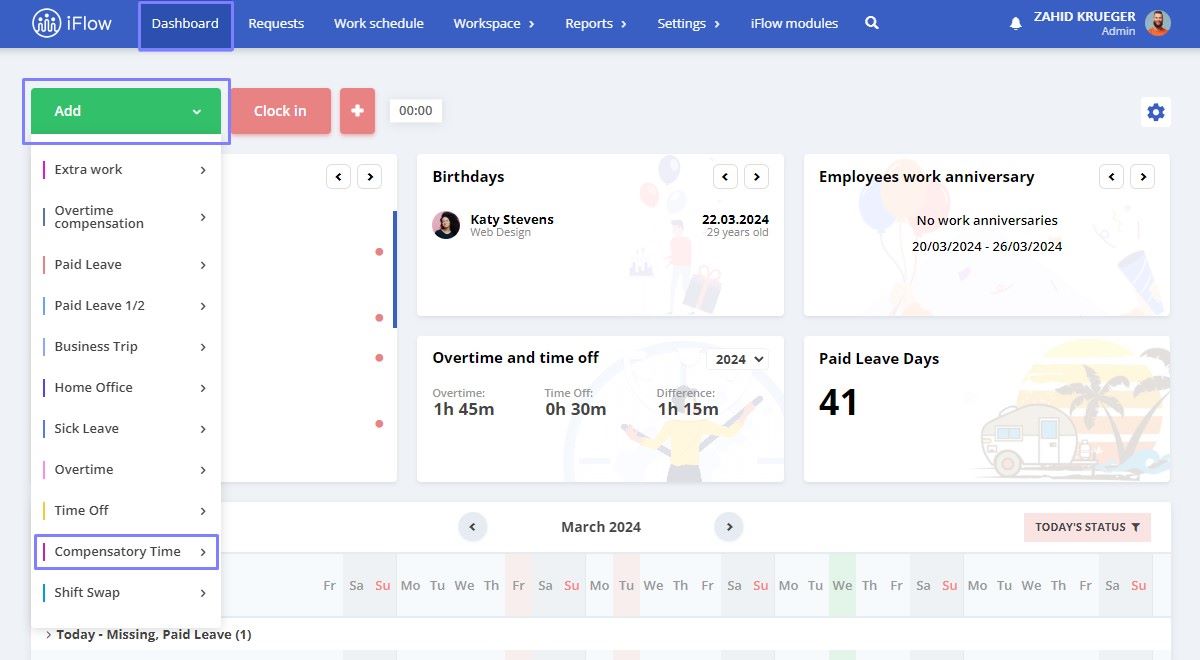
How to use the “Compensatory Time” event
Before adding this event, it is necessary to set the work schedule for employees on holidays when they work.
- From the main menu, click on Dashboard
- Click on the Add button
- Choose the Compensatory Time event
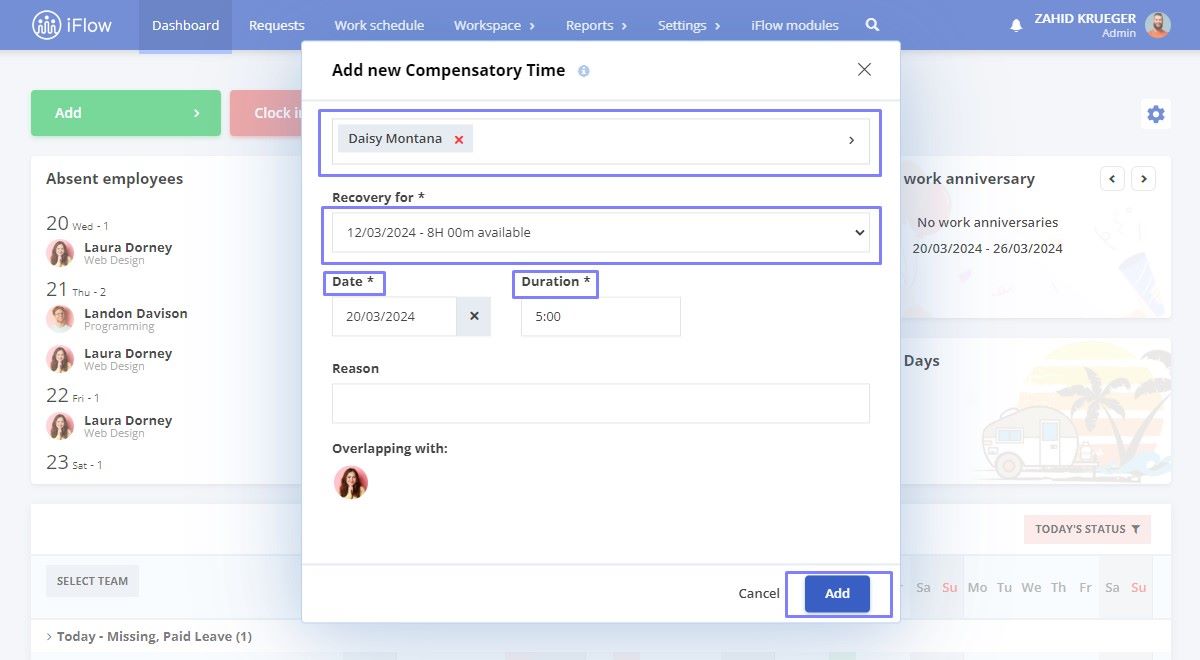
- Select the employee(s)
- Set the holiday for which the time off is provided by clicking on the Recovery for
- Select the Date when the time off is taken
- Enter the number of hours off from Duration
- Enter the Reason (optional)
- To complete, click on the Add button
Note! When adding the recovery event, all holidays on which your employees worked will be displayed in the available holiday list. However, you can only add the event for employees who worked on that particular day.
Example: Employee 1 worked on 01.02.2020, and employee 2 worked on 24.01.2020. When adding the event for employee 1, both 01.01.2020 and 24.01.2020 will be displayed in the available holiday list. However, you can only add recovery for employee 1 for the holiday on 01.01.2020 (the day they have a work shift).