

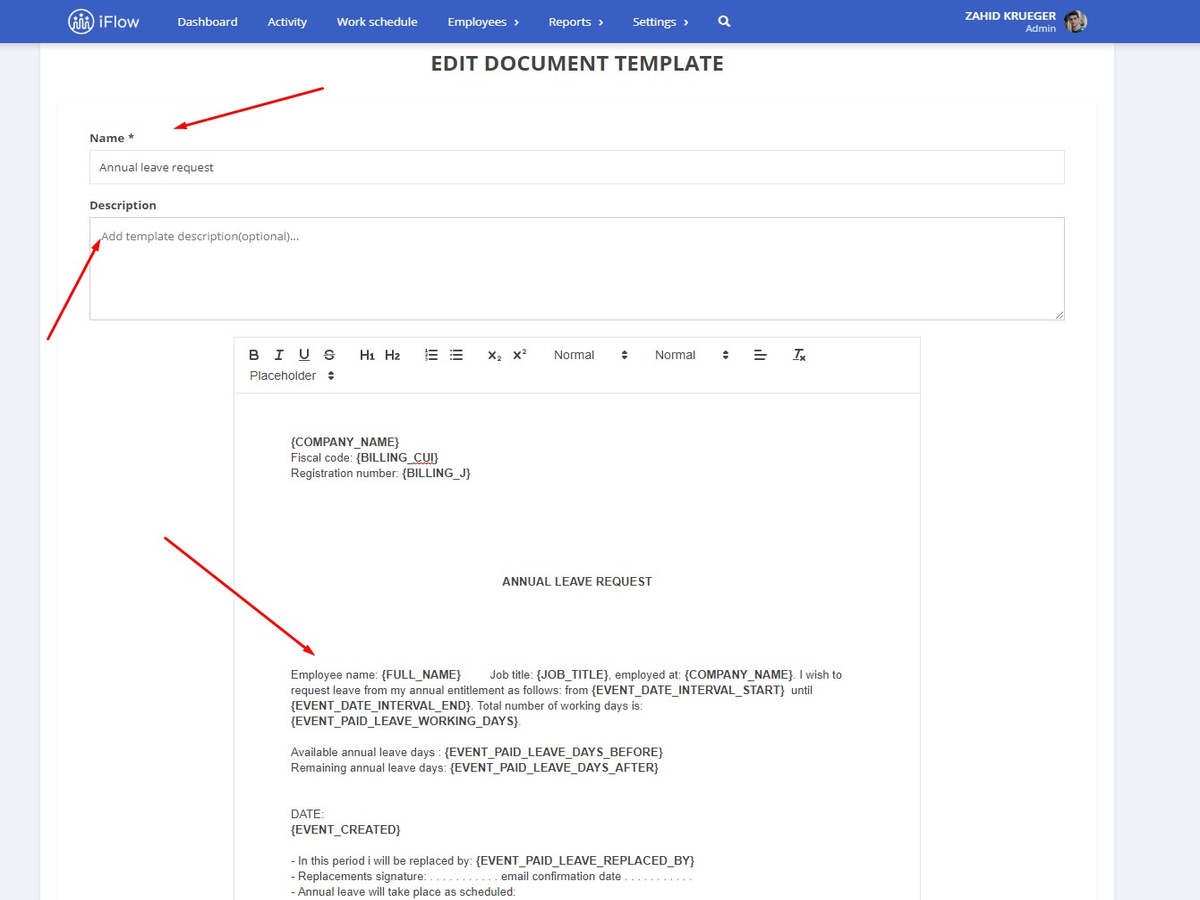
The app allows you to create your own document templates. If you set the right functions (placeholder), then your documents will be completed automatically with your employee’s information.
You can edit the standard templates in the app or create new ones. Below you can read all about how to create document templates.
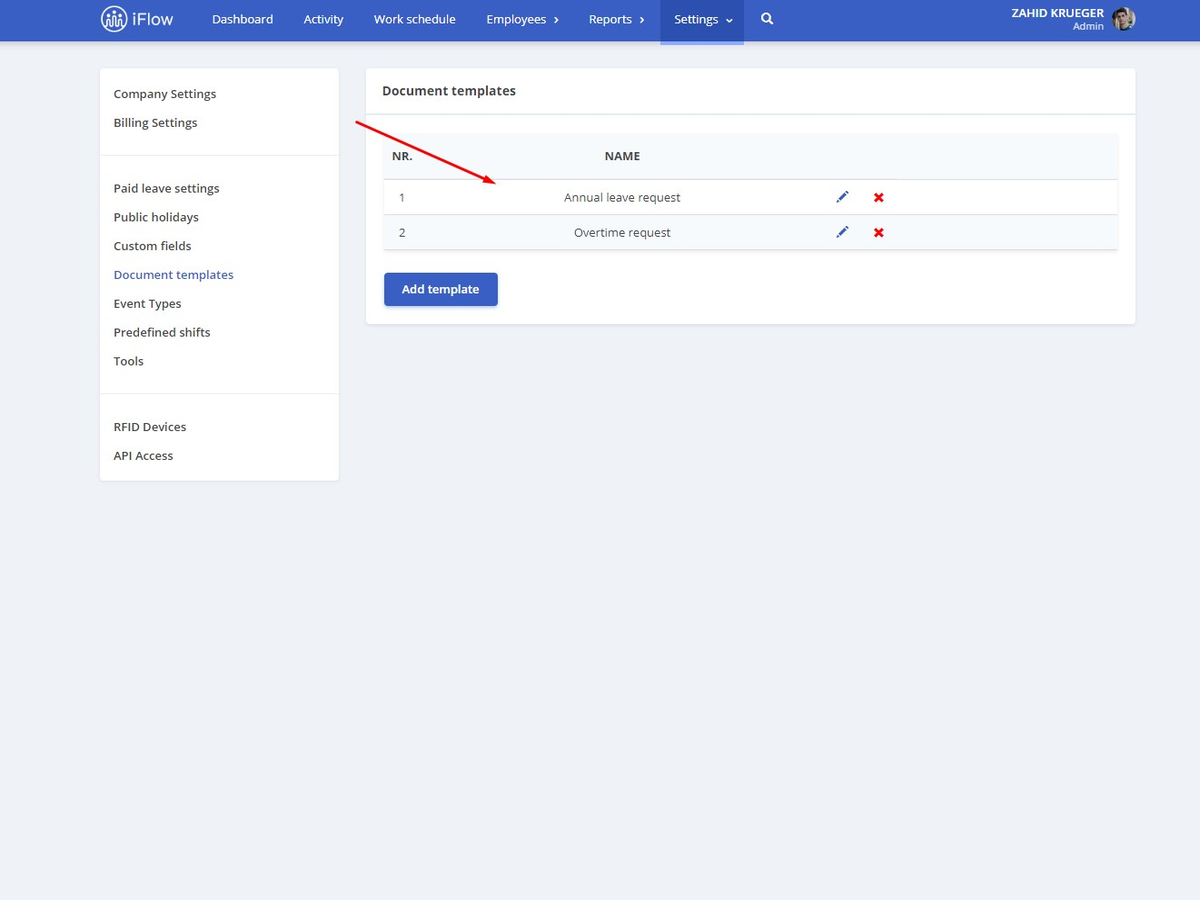
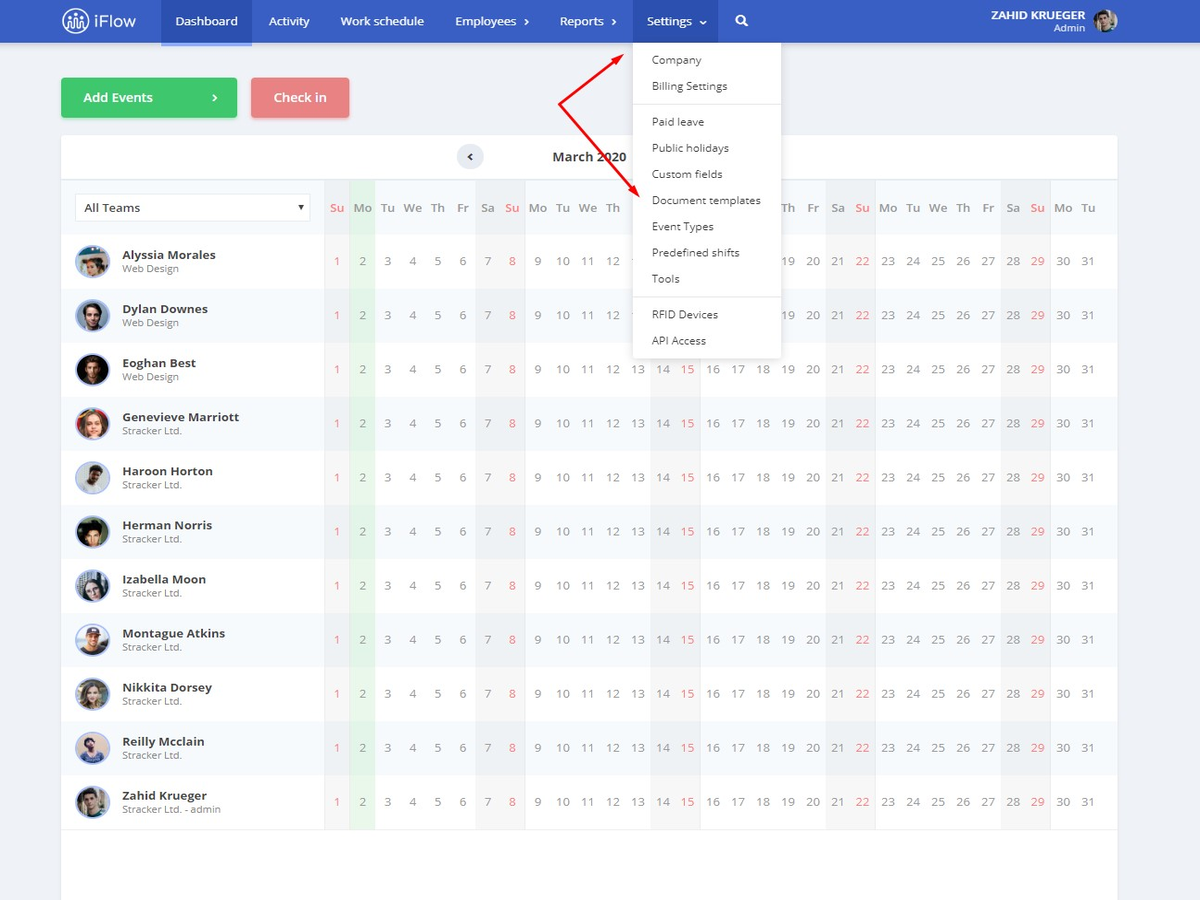
- “Settings” in the main menu
- Select “Document templates”
- Click on “Add template”
- Choose “Empty template” or a model from the app
- Click on “Submit”
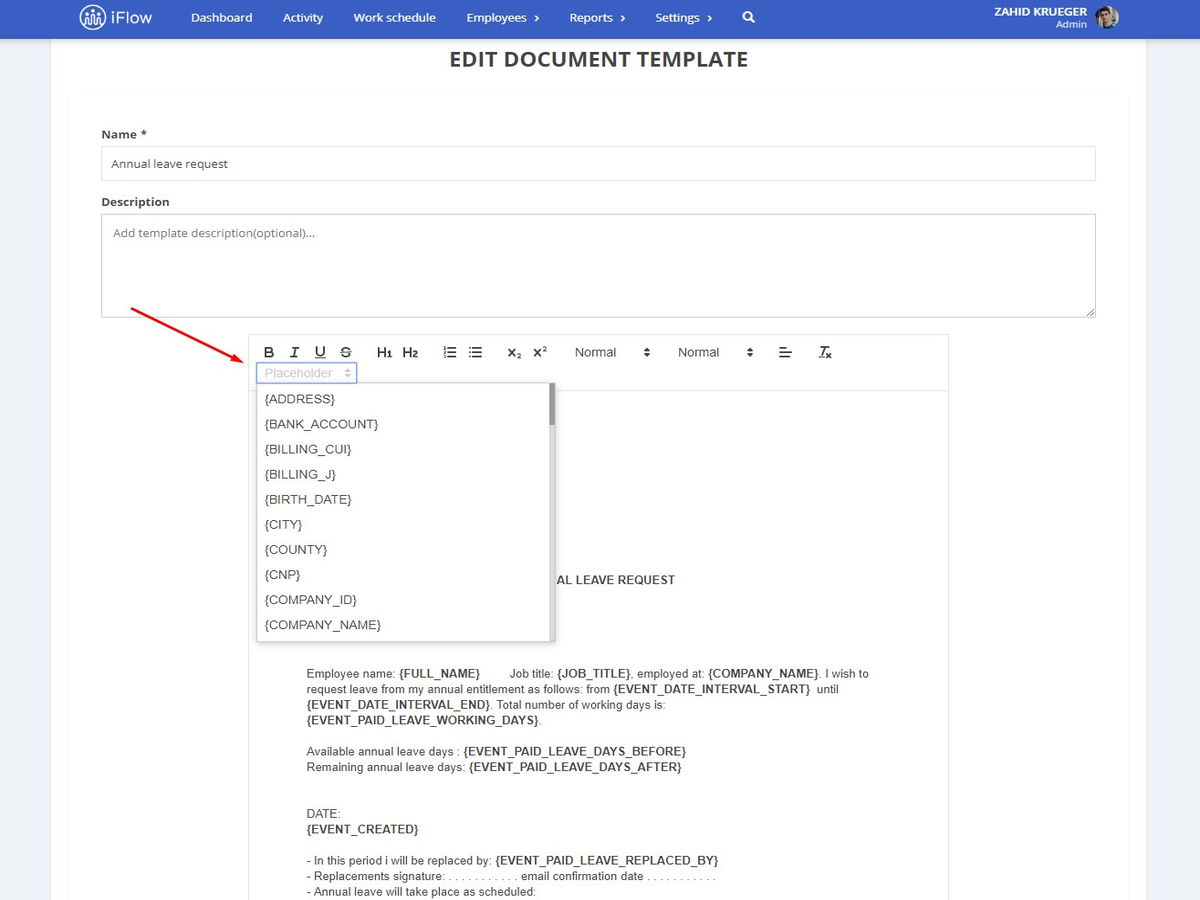
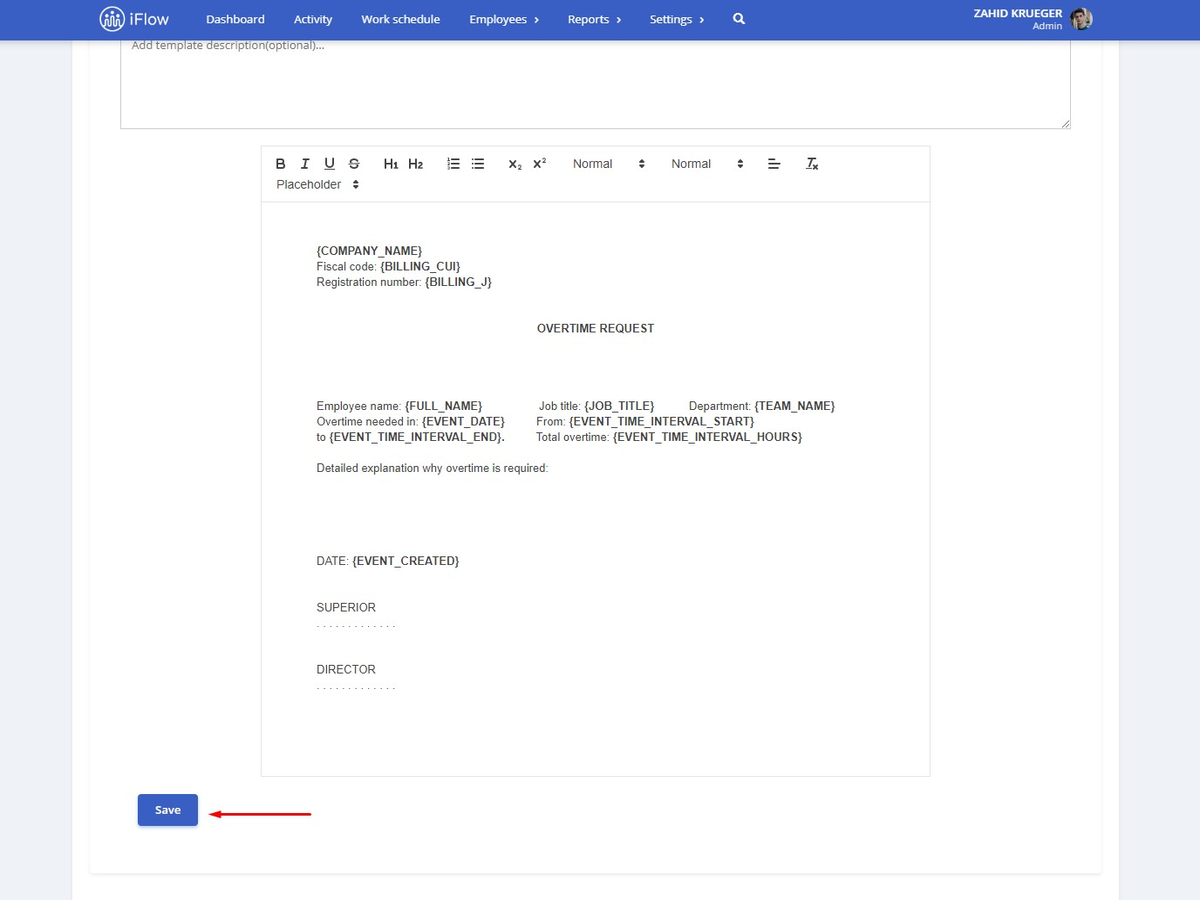
- Compose the document – Write the name. To make a word/phrase a placeholder, you need to select it and then click on “Placeholder” and choose the type of placeholder
- Click on “Save”


Which are the placeholders and what do they mean?
- {ADDRESS} – Address of the employee
- {BANK_ACCOUNT} – back account of the employee
- {BILLING_CUI} – tax identification number
- {BILLING_J} – trade registry number
- {BIRTH_DATE} – birth date of the employee
- {CITY} – city of the employee
- {COUNTY} – county of the employee
- {CNP} – social security number
- {COMPANY_ID} – ID of the company
- {COMPANY_NAME} – name of the company
- {CONTRACT_NUMBER} – number of the employment contract
- {COUNTRY_CODE} – country code
- {CURRENT_DATE} – current date
- {CURRENT_USER} – current user
- {DATE_FORMAT} – date format
- {DEFAULT_TIMEZONE} – default timezone
- {DISABLE_DATE} – deactivating date of employee (end of employment contract)
- {EMAIL} – email address of employee
- {EMPLOYMENT_DATE} – date of employment of employee
- {EVENT_CREATED} – the date when the event was created
- {EVENT_DATE} – the date when the event takes place
- {EVENT_TIME_INTERVAL_START} – the date when the time interval event started
- {EVENT_TIME_INTERVAL_END} – the date when the time interval event ended
- {EVENT_TIME_INTERVAL_HOURS} – the total number of hours for the time interval event
- {EVENT_DATE_INTERVAL_START} – the date when the date interval event started
- {EVENT_DATE_INTERVAL_END} – the date when the date interval event ended
- {EVENT_DATE_INTERVAL_CALENDAR _DAYS} – the number of calendarist days of the date interval event
- {EVENT_PAID_LEAVE_NAME} – the name of the paid leave type of event
- {EVENT_PAID_LEAVE_YEAR} – the year of the paid leave type of event
- {EVENT_PAID_LEAVE_TOTAL_DAYS} – the total number of days of the paid leave type of event
- {EVENT_PAID_LEAVE_DAYS_BEFORE} – the number of days available before the paid leave type of event
- {EVENT_PAID_LEAVE_DAYS_AFTER} – the number of days available after the paid leave type of event
- {EVENT_PAID_LEAVE_DAYS_AFTER_2019} – paid leave days left available from 2019
- {EVENT_PAID_LEAVE_DAYS_AFTER_2020} – paid leave days available for 2020
- {EVENT_PAID_LEAVE_REPLACED_BY} – designated replacement for the paid leave event
- {EVENT_REASON_MESSAGE} – reason for the event
- {EVENT_DURATION} – duration of the event
- {EVENT_SCHEDULE_DATE_DAY_NAME} – the name of the holiday for which the compensatory time is happening
- {EVENT_SCHEDULE_DATE} – the date when the compensatory event is happening
- {FULL_NAME} – full name
- {ID_CARD} – the name of the id card
- {ID_CARD_ISSUED_BY} – the name of the institution that issued the id card
- {ID_CARD_ISSUE_DATE} – issue date of the id card
- {JOB_TITLE} – job title
- {LANGUAGE} – language
- {MARK NUMBER} – mark number
- {MEDICAL_DAYS_IN_PAST_12_MONTHS} – the total number of medical days taken in the last 12 months
- {MEDICAL_EVENTS_IN_PAST_12_MONTHS} – the total number of medical leave type of events taken in the last 12 months
- {PHONE_ONE} – phone number
- {PHONE_TWO} – second phone number
- {SECTION} – section
- {TEAM_ID} – id number of the team
- {TEAM_NAME} – the name of the team
- {TIMEZONE} – timezone
- {USER_ID} – id number of the user
- {USER_TYPE} – type of user
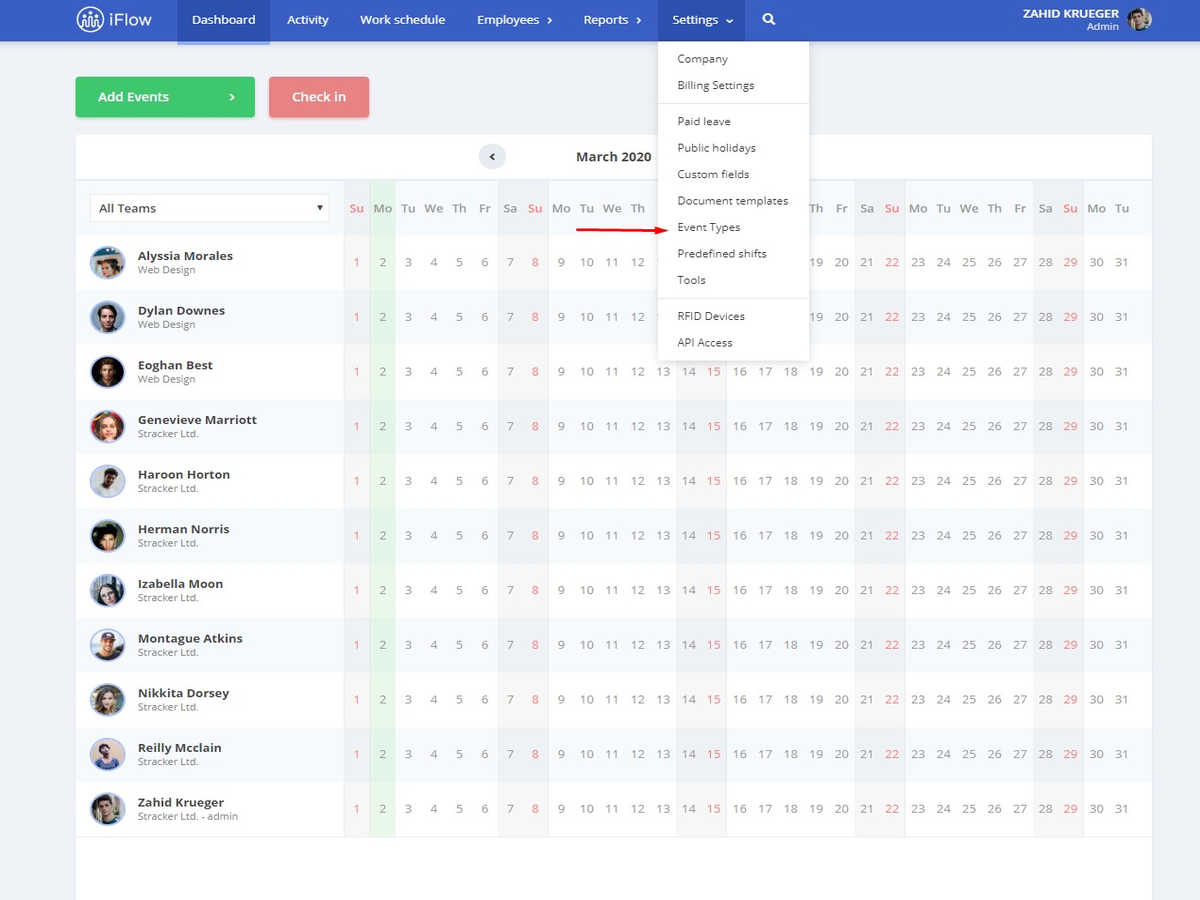
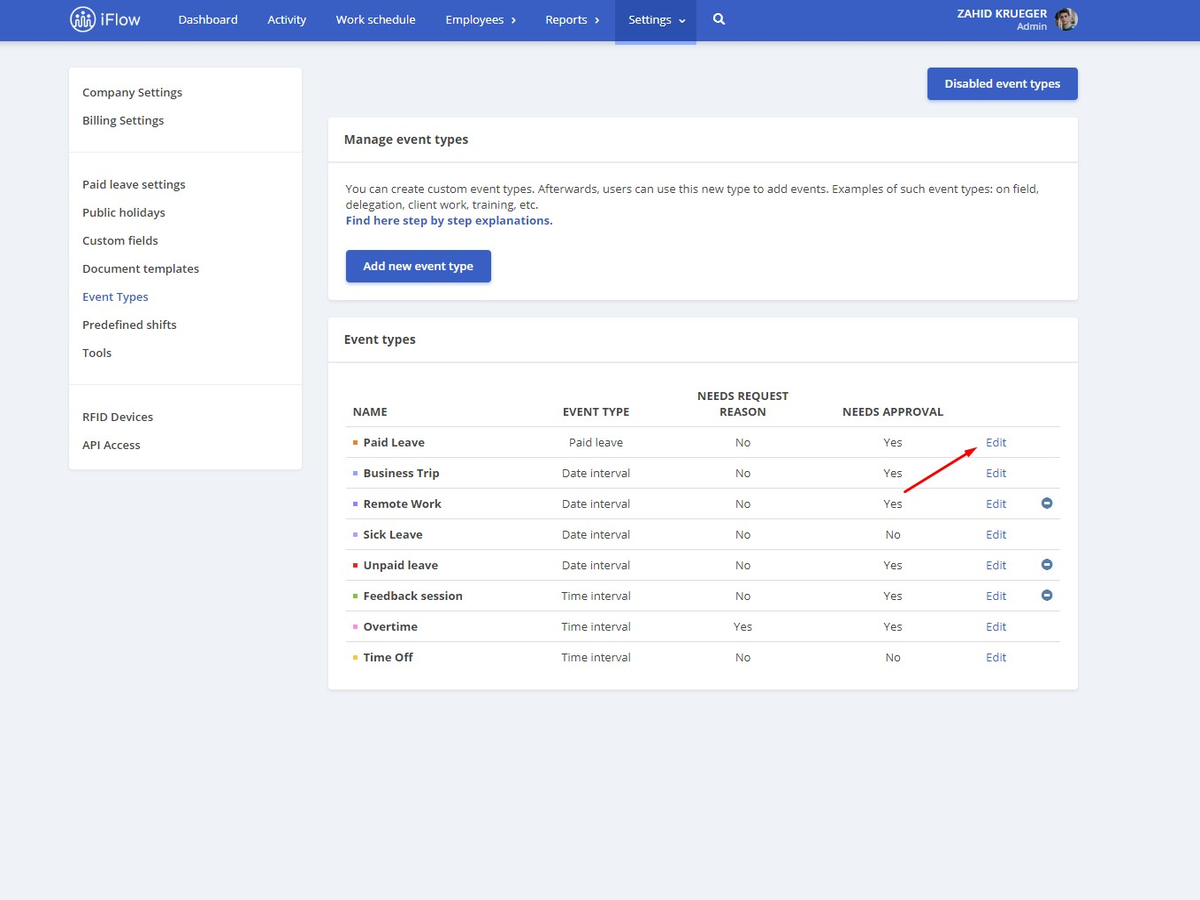
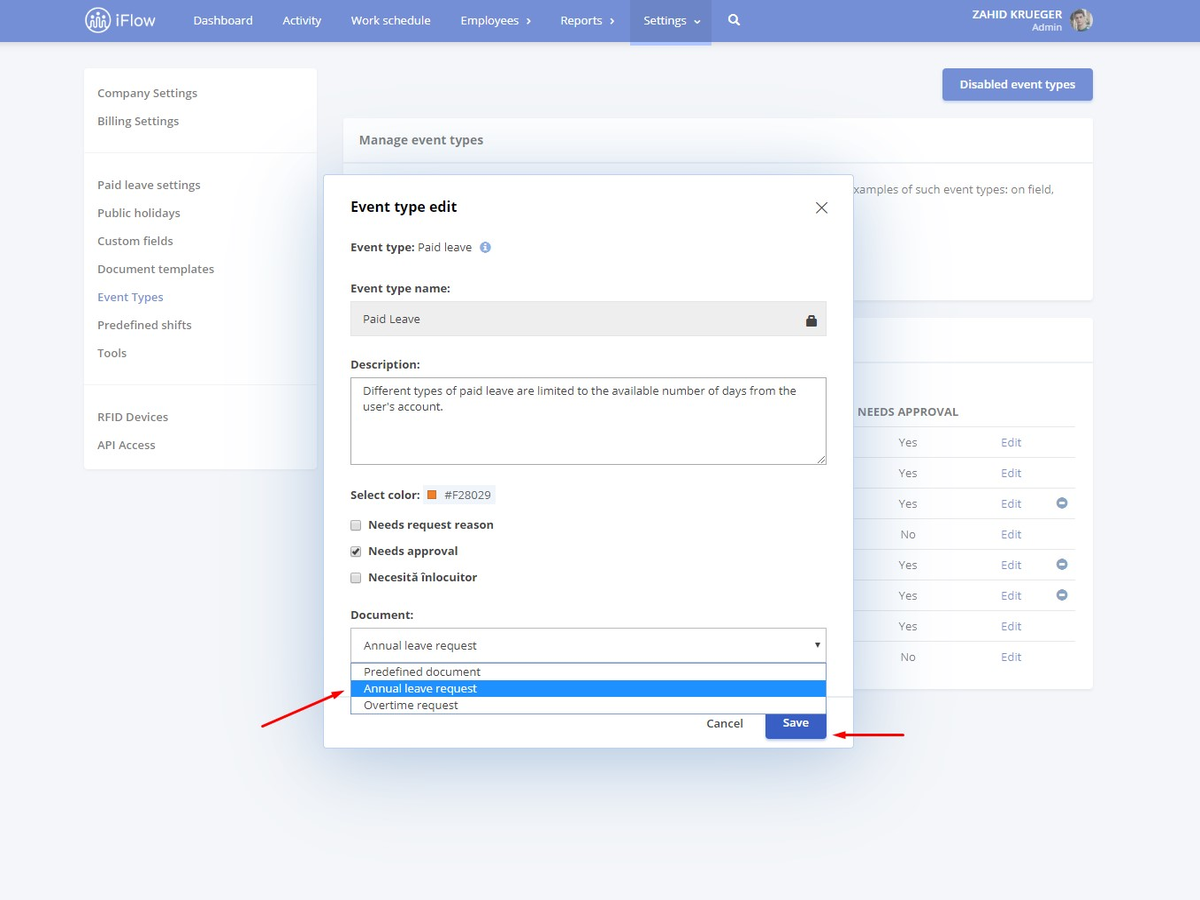
How do I set a custom document template for an event?
Document templates can be set to automatically generate at the moment a certain event is added. For example, an annual leave request when someone added a paid leave event.
Follow these steps to set a document template for an event:
- “Settings” in the main menu
- Select “Event types”
- Click “Edit”
- Select the document you want in the “Document” section
- Click “Save”
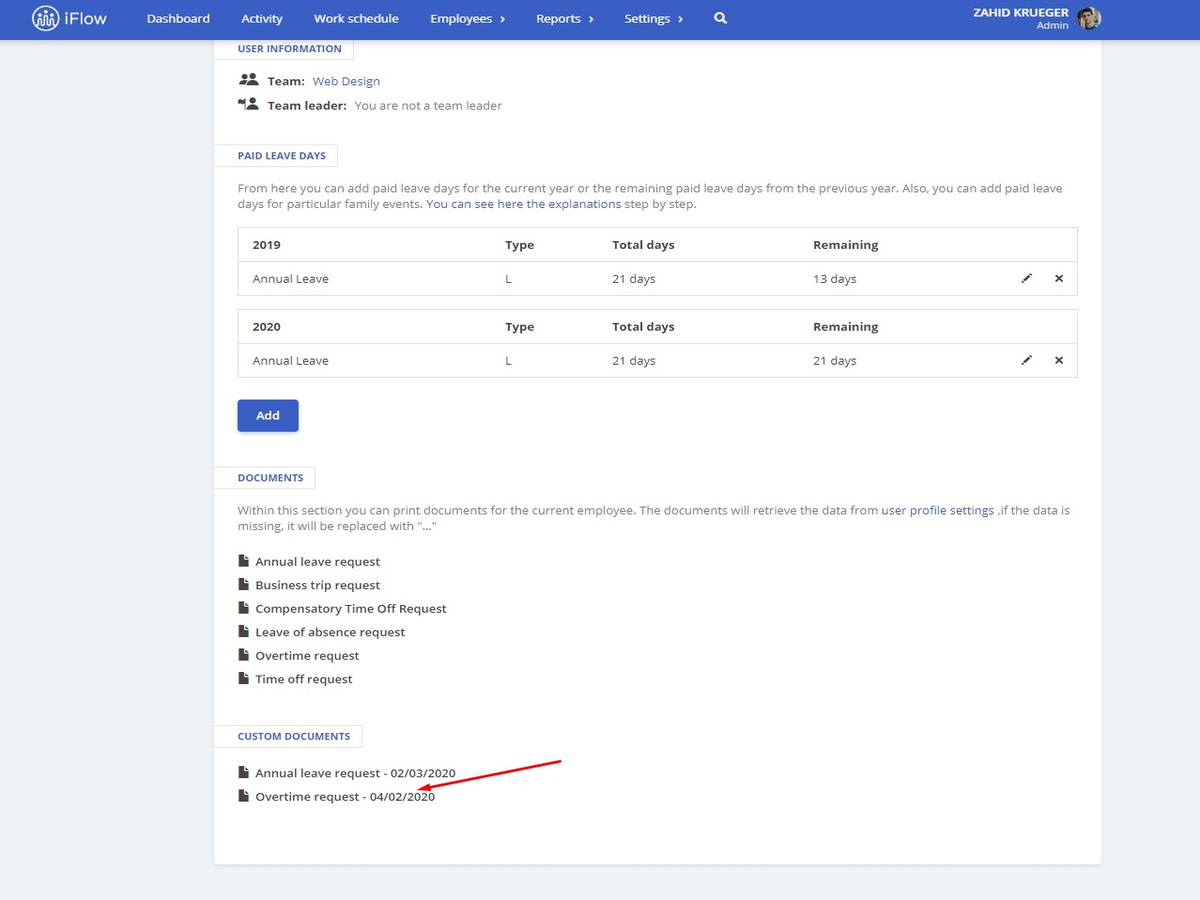
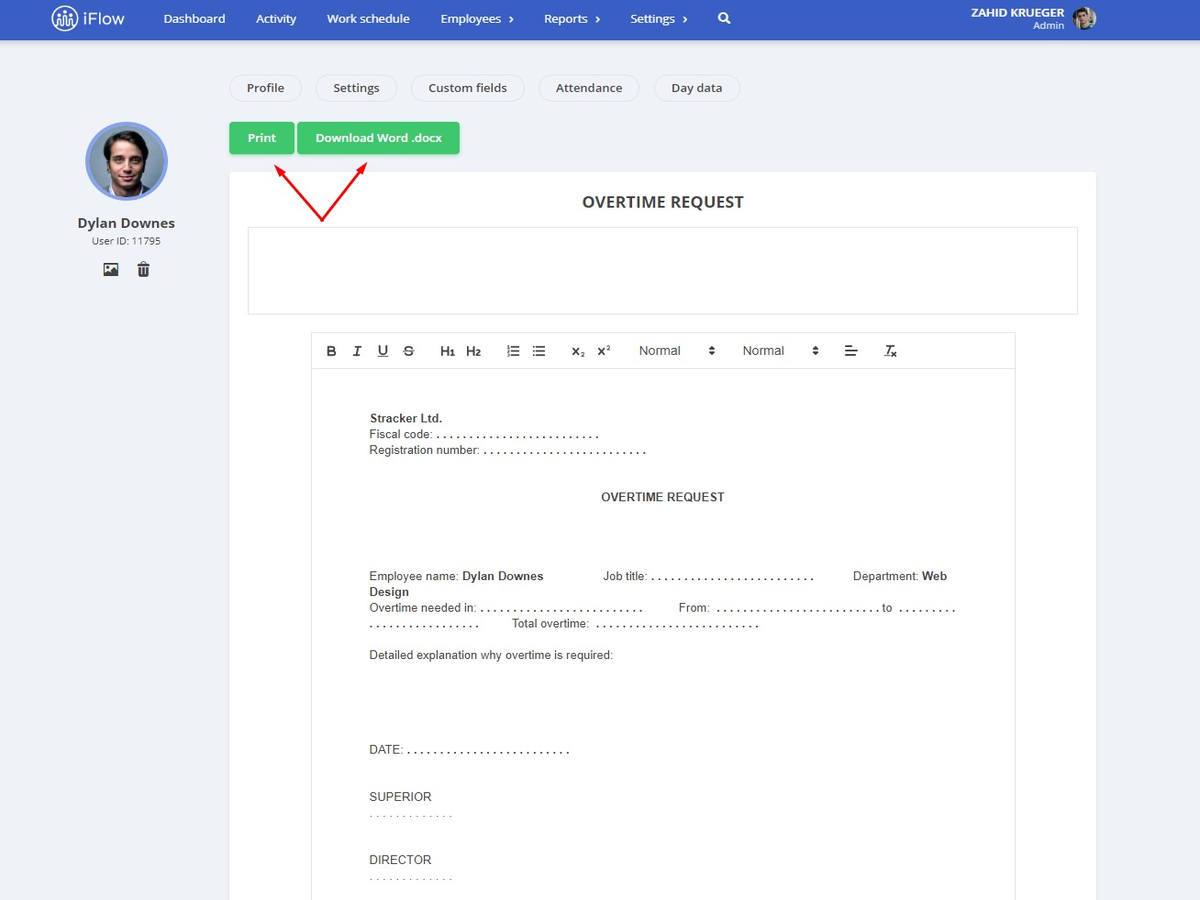
How do I download/print custom document templates?
- Go to the employee’s profile whose document you want to download/print
- At the bottom the of the page you will see the “Custom documents” sections, click on the document you want
- To print click on “Print”
- To download click on “Download word.docx”
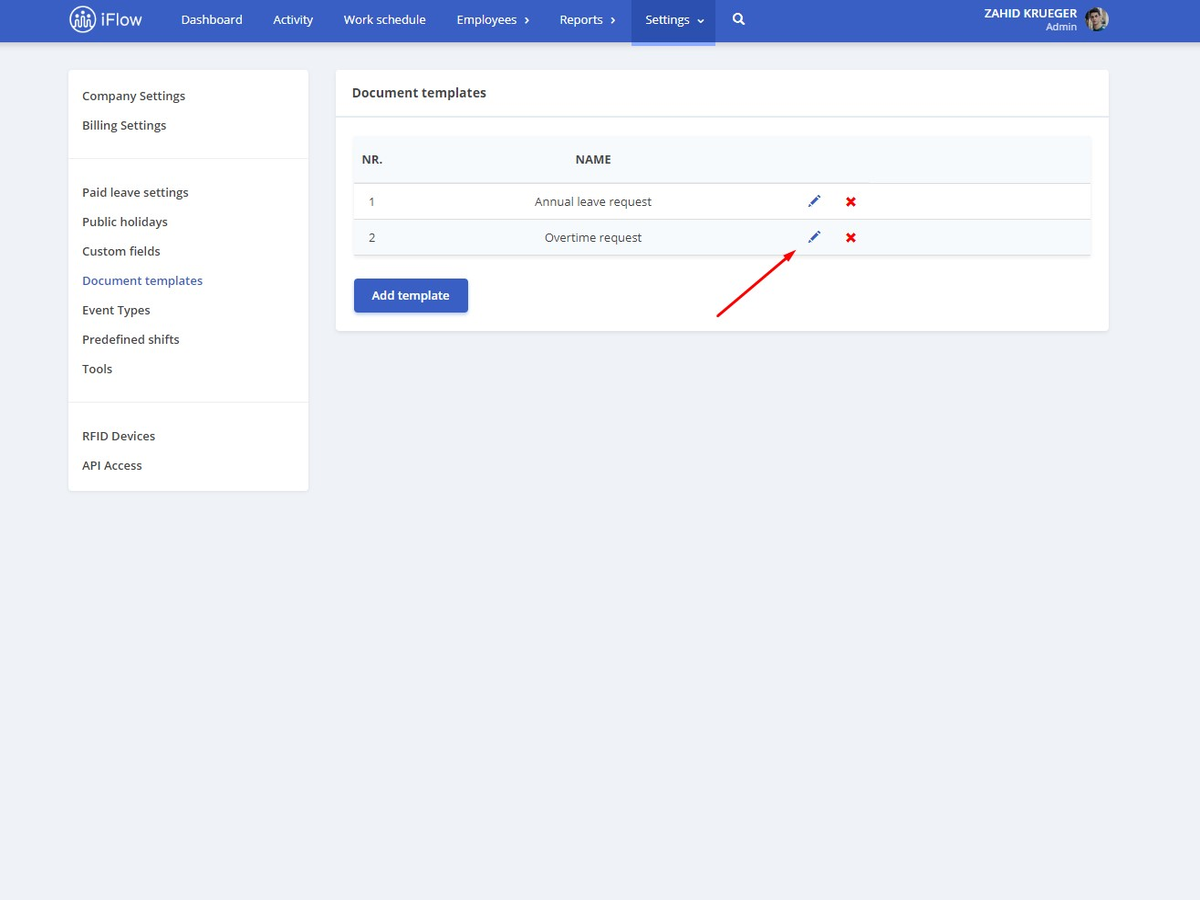
How do I edit custom document templates?
- “Settings” in the main menu
- Select “Document templates”
- Click on the pencil to edit
- Make the changes
- Click “Save”

How do I delete custom document templates?
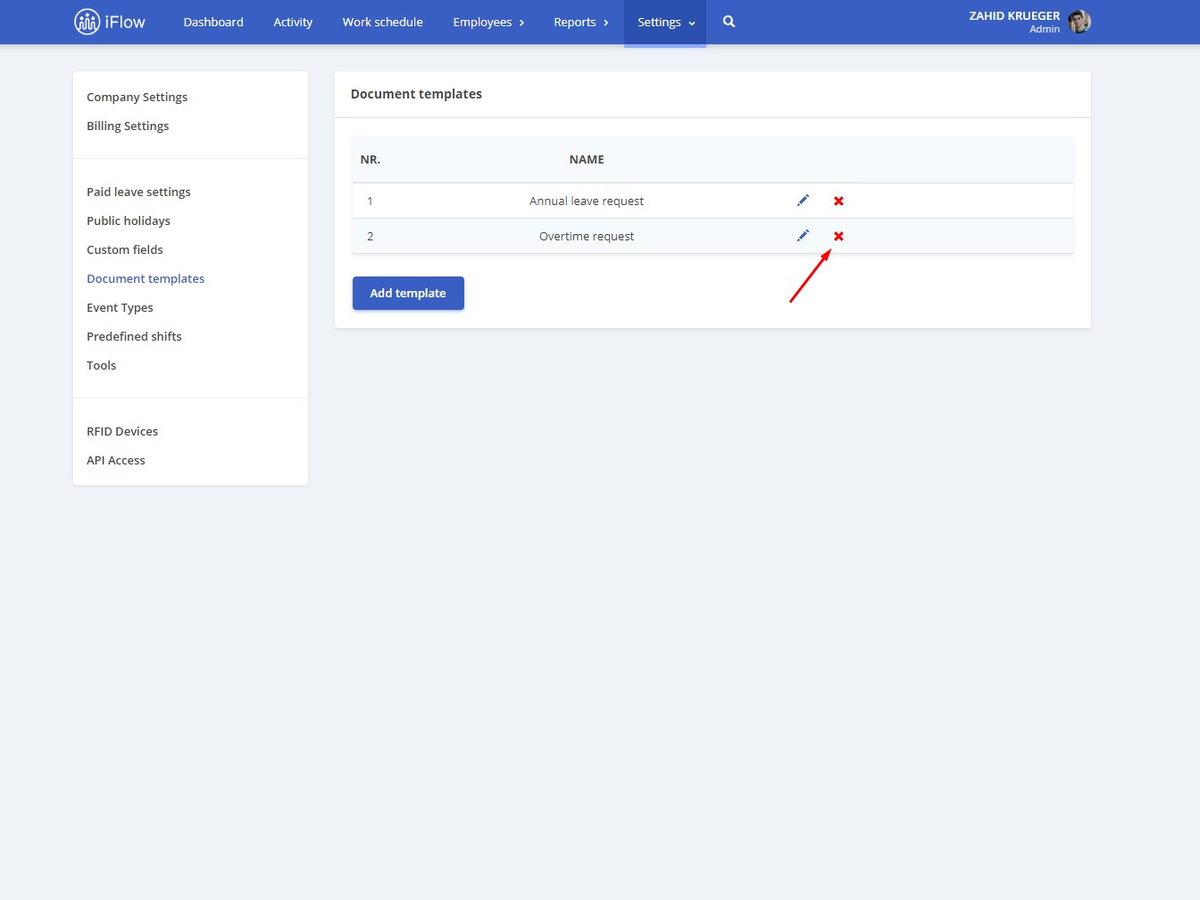
- “Settings” in the main menu
- Select “Document templates”
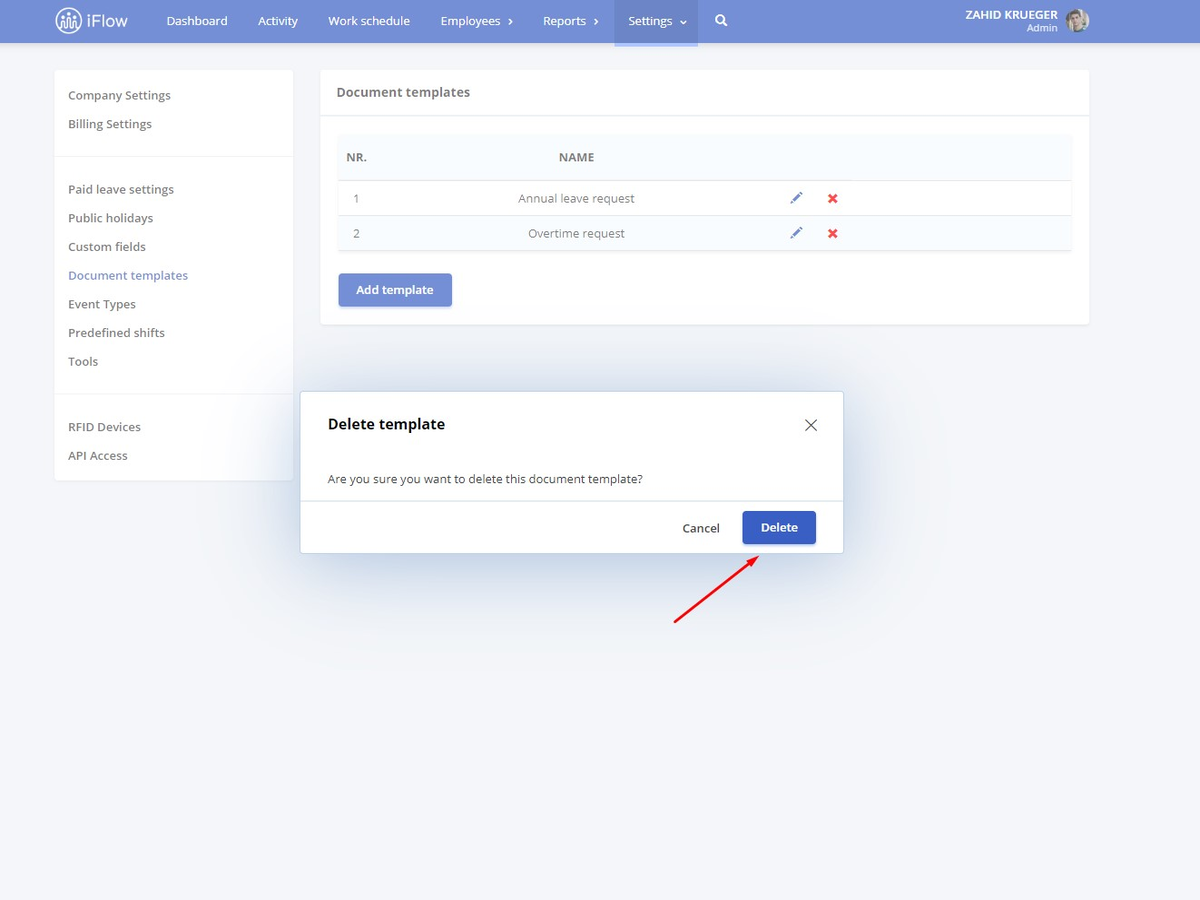
- Click on the “X”
- Click on “Delete”
Keywords: create documents, create a template, personal documents, personalized template, personalized documents, delete documents, edit documents, edit template


