

How to create locations
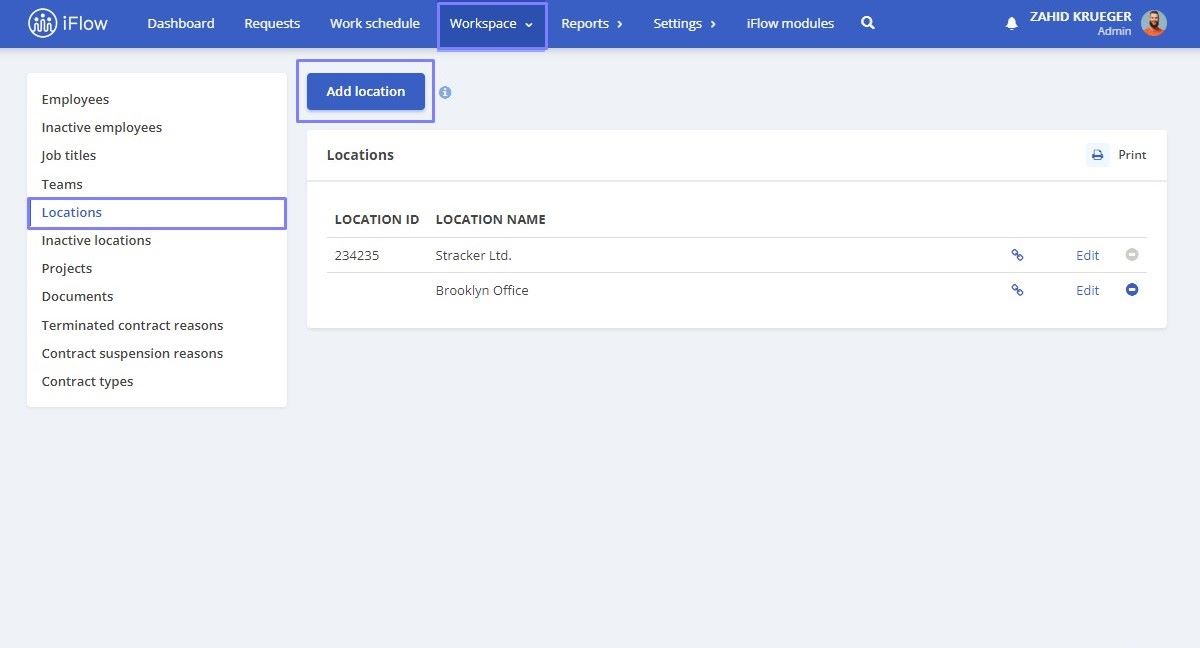
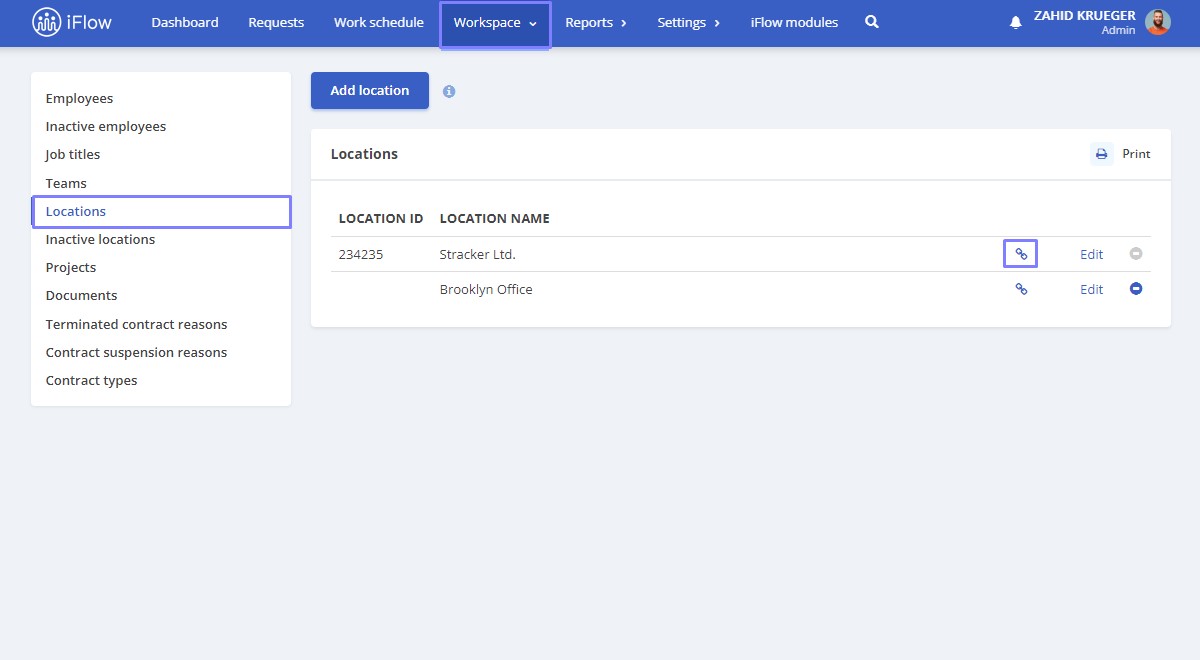
- From the main menu, go to Workspace
- Click on Locations
- Click on the Add Location button
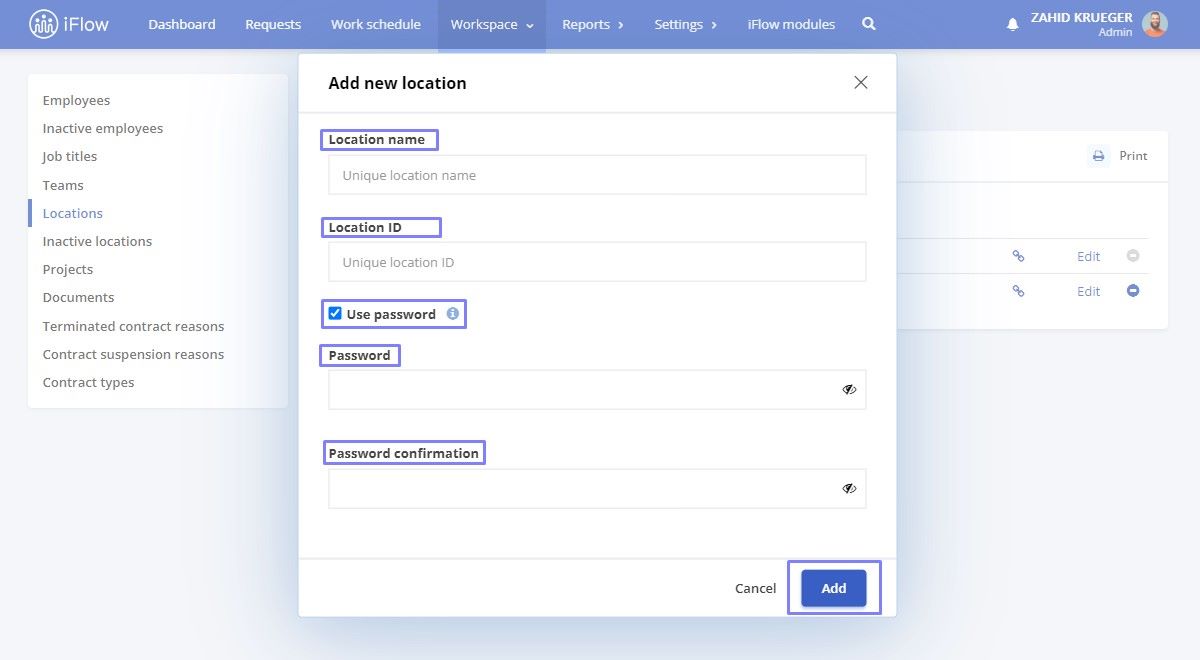
- Fill in the Location Name
- Fill in the Location ID
- Check the option to Use password if you’re using QR code attendance. The password will appear when the location link is accessed
- To finish, click on the Add button
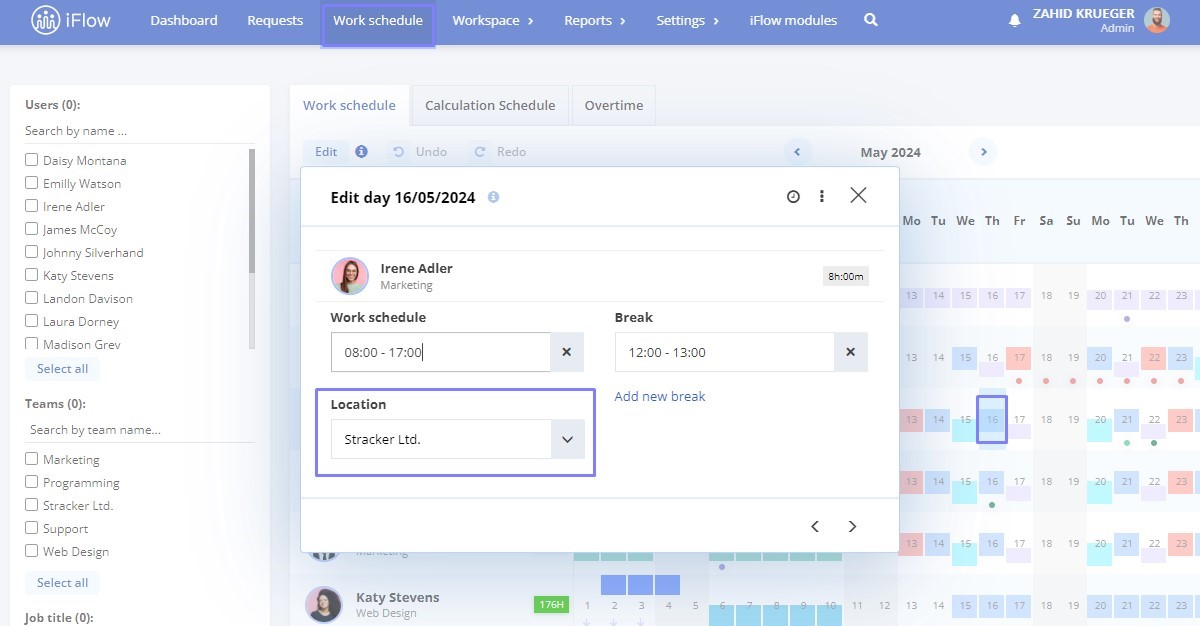
How to add locations to the work schedule
Access Settings – Schedule patterns – edit existing templates by clicking on the edit pencil icon or Add a new template.
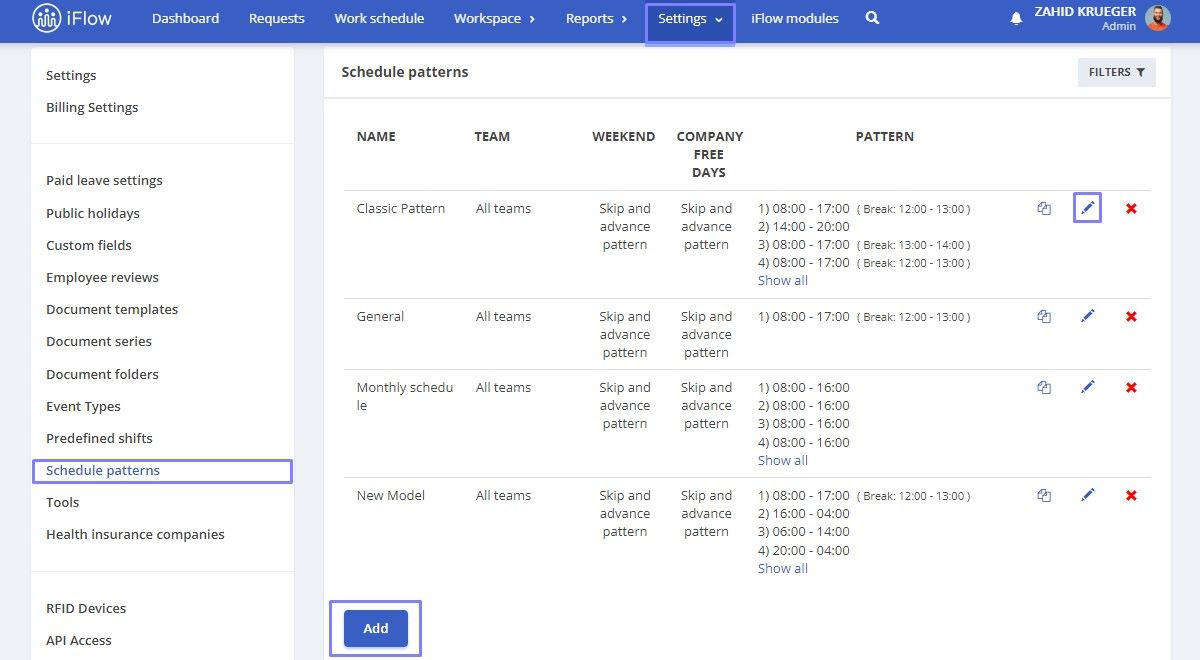
To see how to add work schedule templates, refer to this guide.
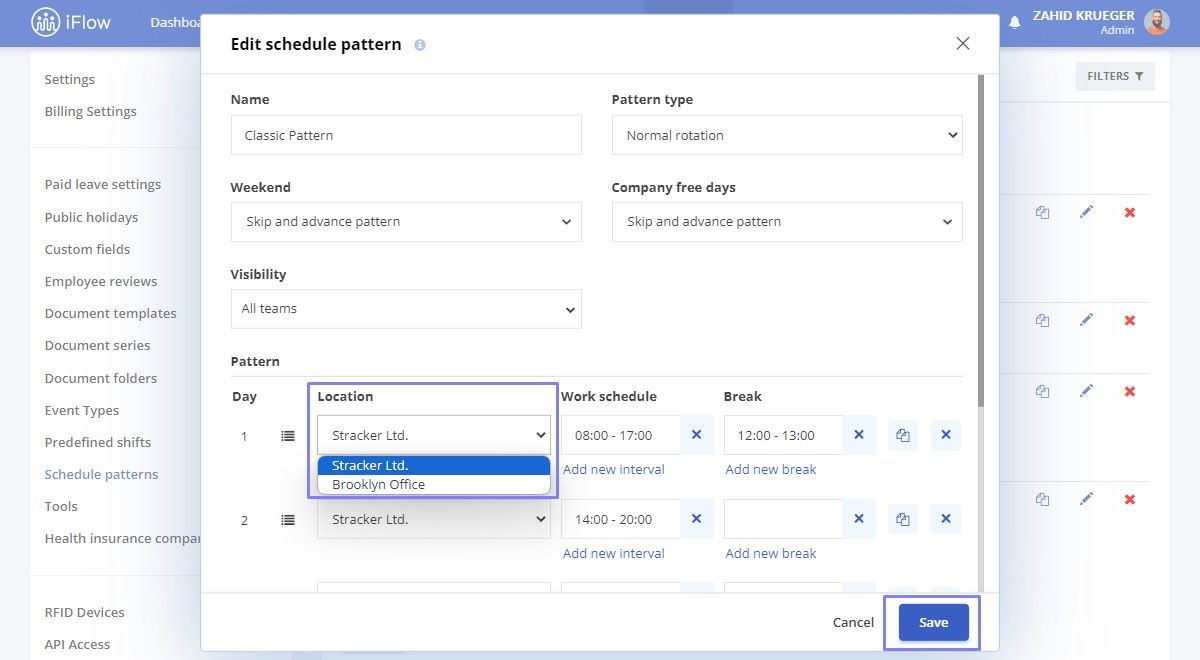
In the box that appears after clicking on the edit pencil icon, you can set the location that will subsequently appear in the Work Schedule next to the employees to whom you have allocated a work schedule with a location.
Additionally, reports that are dependent on scheduling will be able to be filtered by locations for better organization.
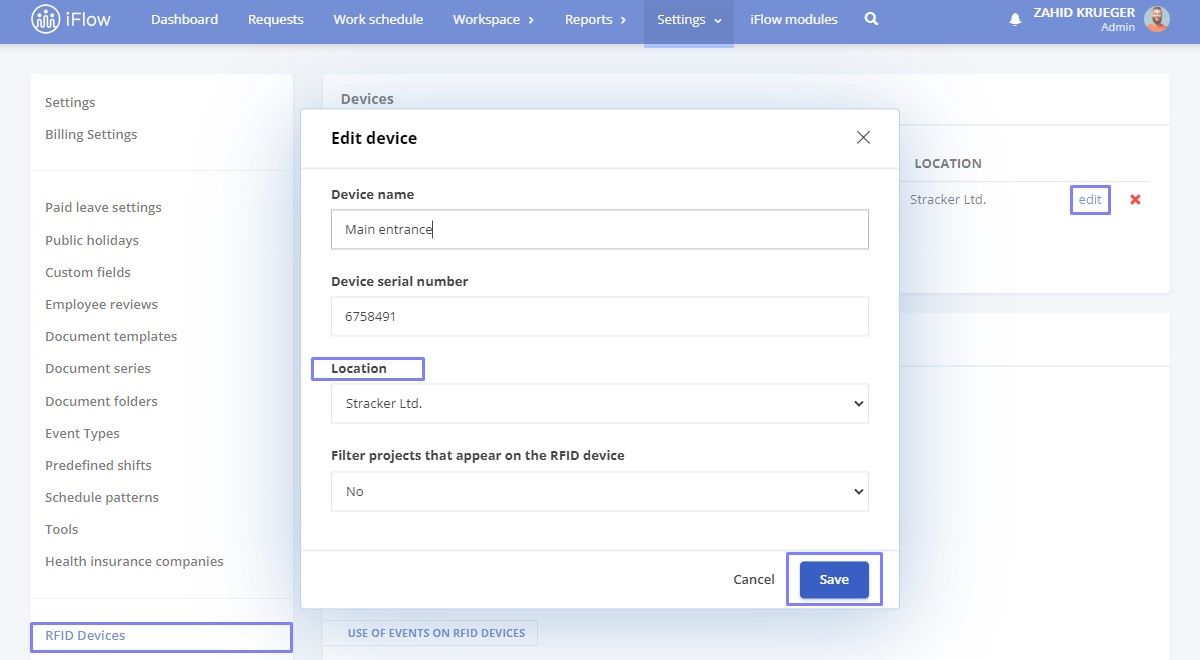
How to set the location for RFID devices
RFID devices have a default location. Follow the steps below to set different locations for devices. If you set a location for a device and delete it, it will automatically be replaced with the default location.
- From the main menu, go to Settings – RFID Devices
- Click on Edit next to the device for which you want to change the location
- Choose another location from the list, then click the Save button
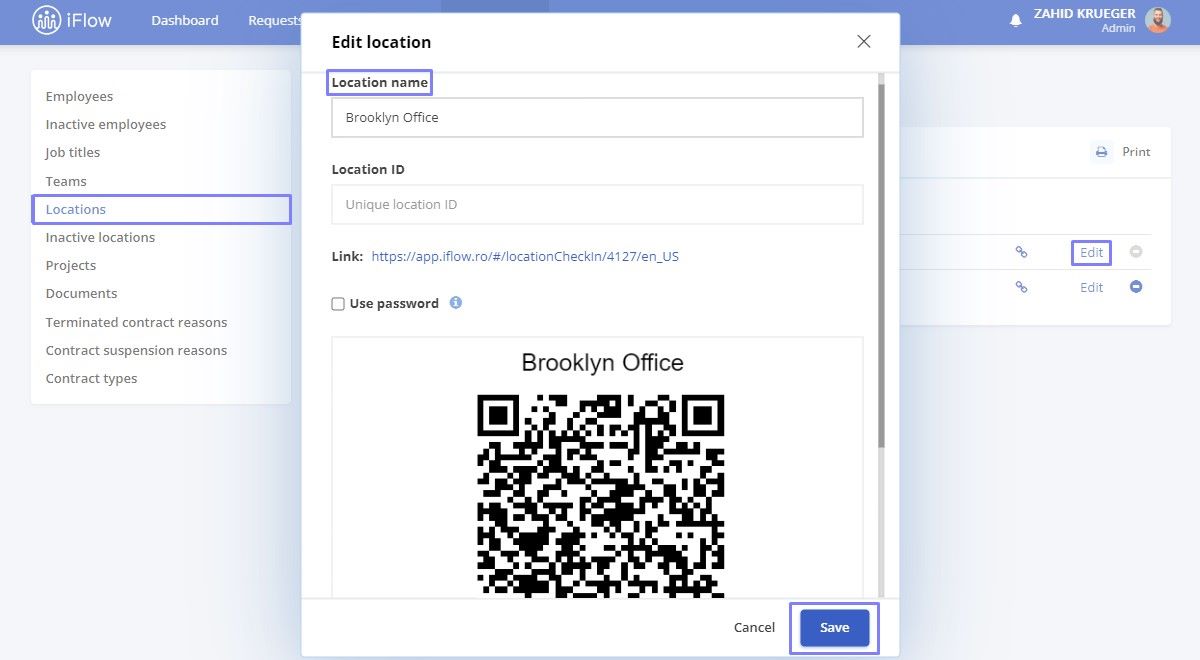
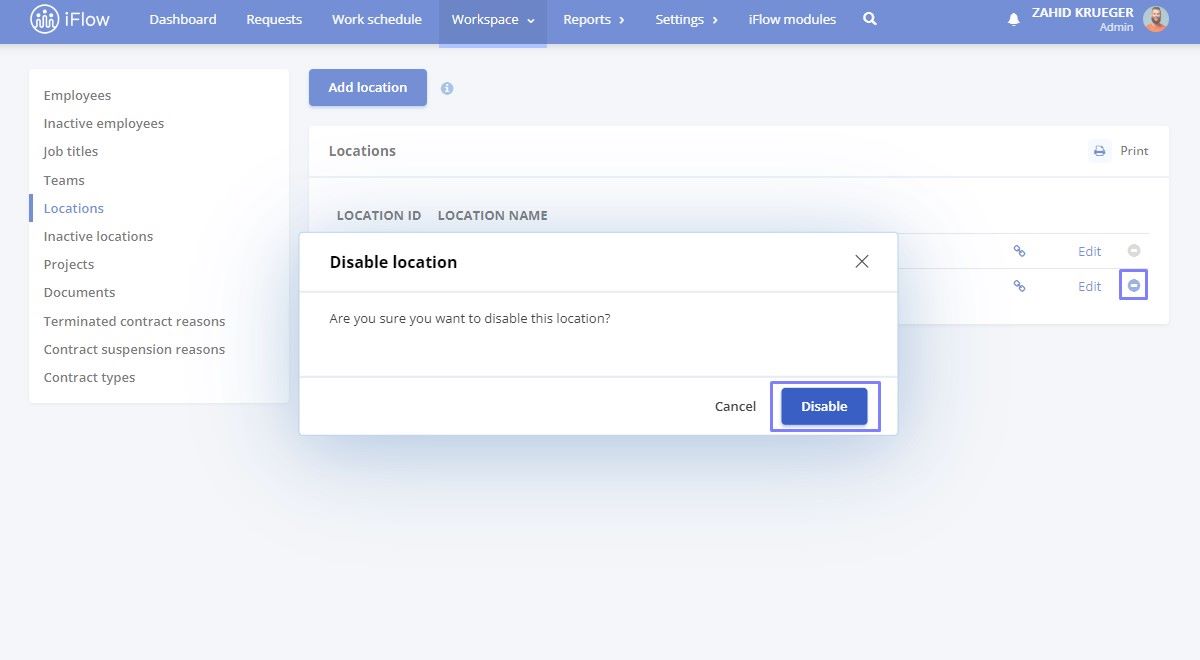
How to edit/delete or disable/enable locations
- From the main menu, go to Workspace – Locations
- Click on the Edit button next to the location
- Modify the name and then click the Save button
- To disable, click on the (–) button next to the location – then click Disable
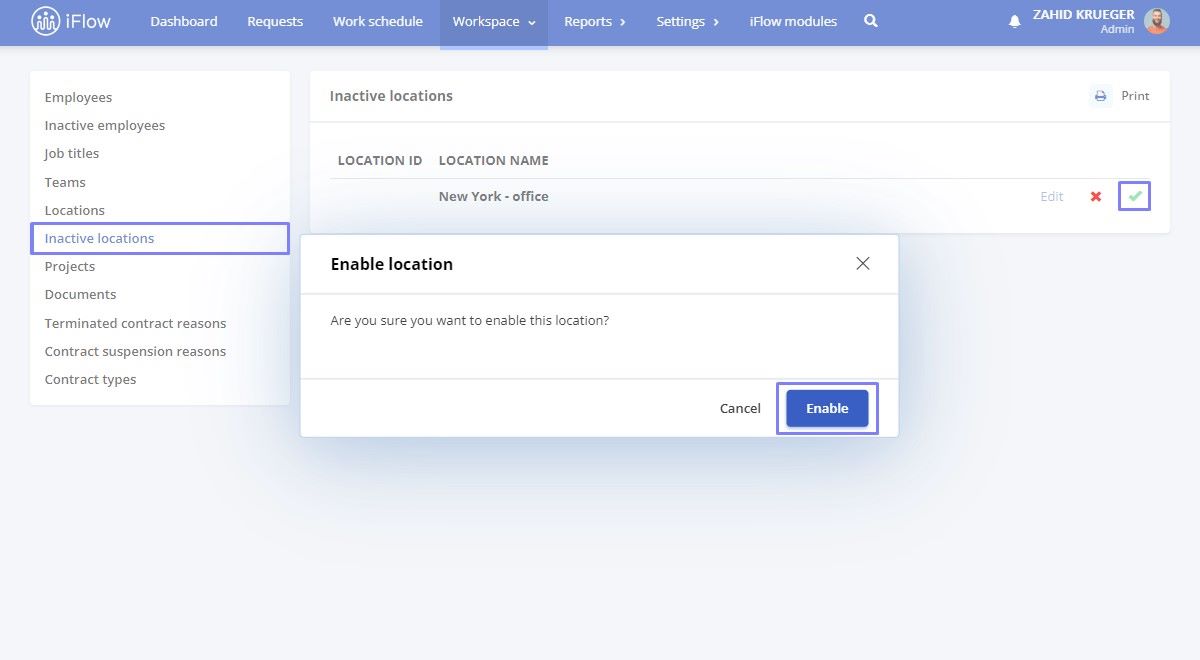
- To delete or activate locations, click on Inactive locations from the left menu
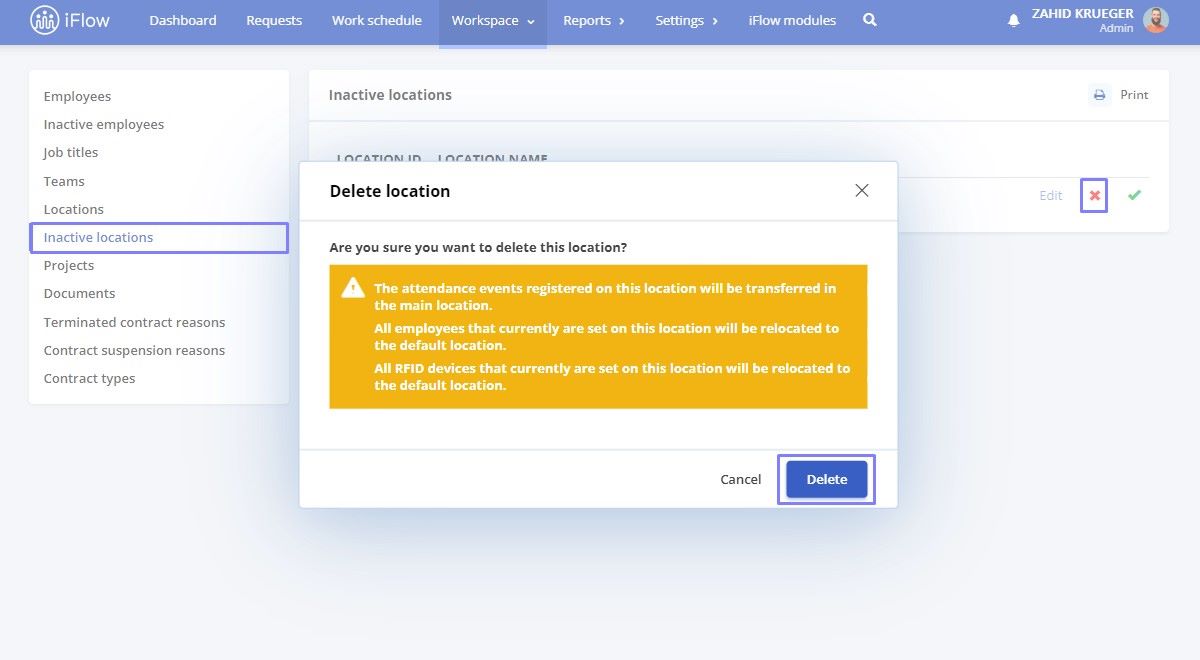
- To delete the location, click on the X button next to the location, then confirm the Deletion
- To enable, click on the green button next to the location, then Enable
Important!
If you delete a location, you need to consider the following warnings:
- Presence events recorded at this location will be transferred to the main location
- All employees who have the current location set will be relocated to the main location
- All RFID devices with the current location set will be relocated to the main location
How to import locations
Navigate to the menu: Workspace – Import – Import locations
Uploading the data
- Download the import file from the bottom right to complete it, or copy the locations in the required format.
- Choose the data import method: Upload a file or Paste from Excel
Defining the fields
In this step, you will choose what each column represents:
- Location name
- Activated – the column that defines whether the location is active or inactive – can be marked as active using True or 1, and inactive using False or 0
- Skip – the selected column will be ignored and will not be imported into the system
Choose the desired option for each column in the file from the section:
- The column will be assigned to
- Then click Next
Data review
In this stage, you can perform an additional review before the data is recorded in the application. The comparison will be made based on the location names.
- If a match is found
- If a value does not already exist
- Click Next
Data validation
In the validation step, if duplicates are found, you can choose what happens to each of these records:
- You can modify the Location name to make it unique so it can be imported, or you can skip that field
- Select your options and click Next to proceed
- You will then be informed about the actions that will be performed on your data.
- If you agree, click Next
Completed
When you reach this stage, it means you have completed the import. You can now upload another document by clicking the Try again button, or you can leave this page.
How to activate the geofencing ckeck-in
Geofencing technology uses GPS to create a virtual perimeter around a physical location. If an employee is outside this perimeter, they cannot log their attendance.
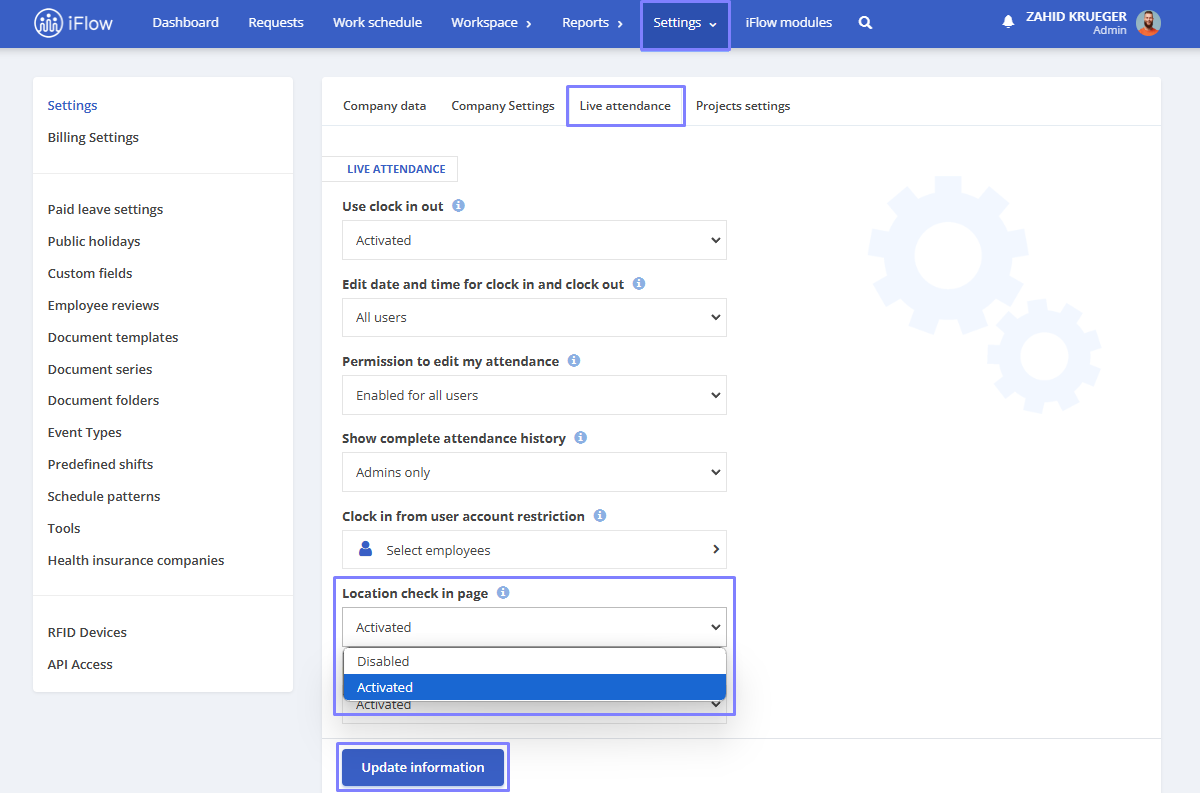
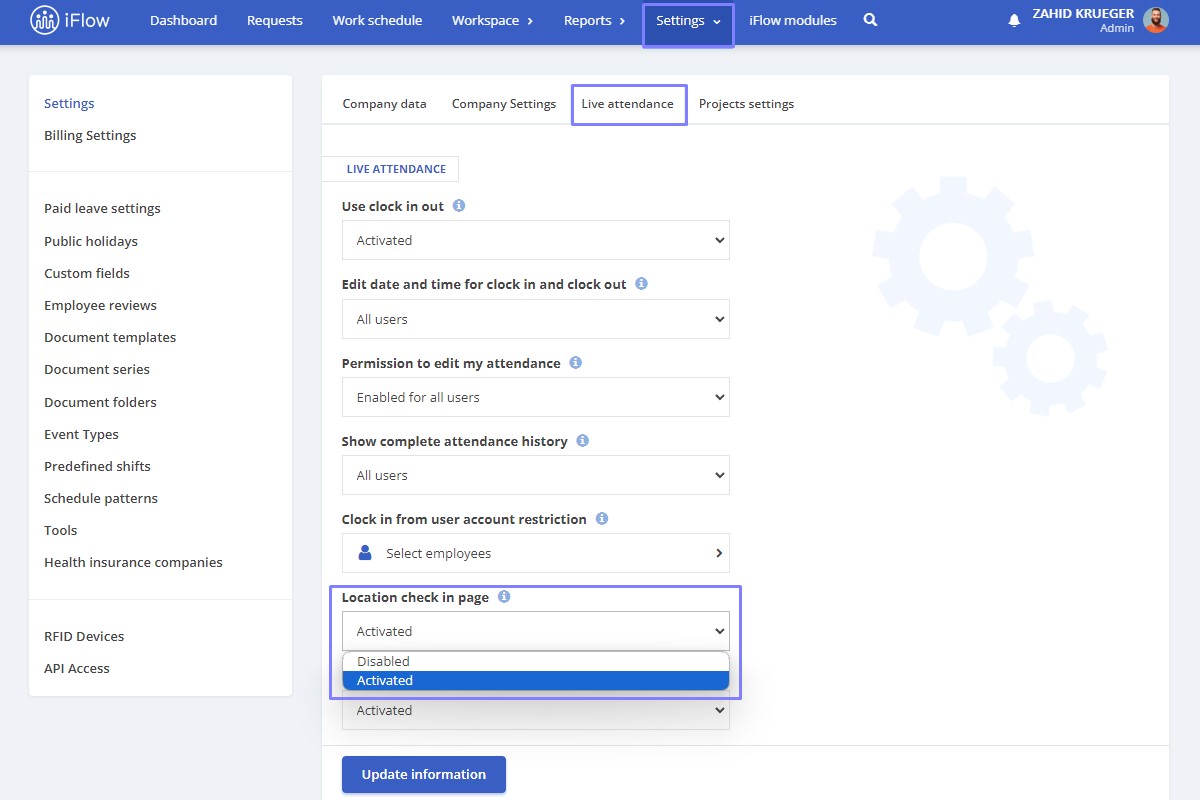
- Go to Settings – Company – Live attendance
- Choose the Activated option in the Location check in page
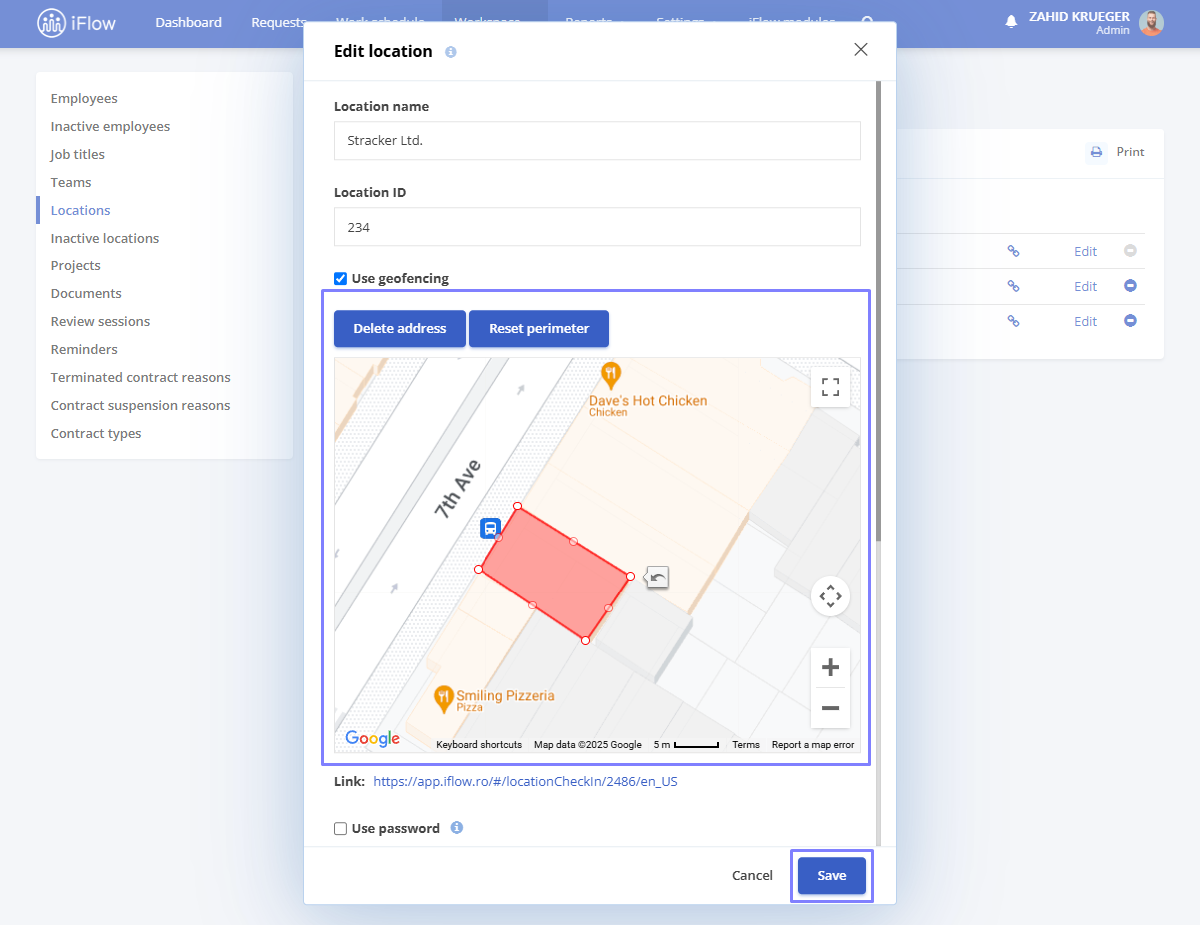
Accessing geofencing settings
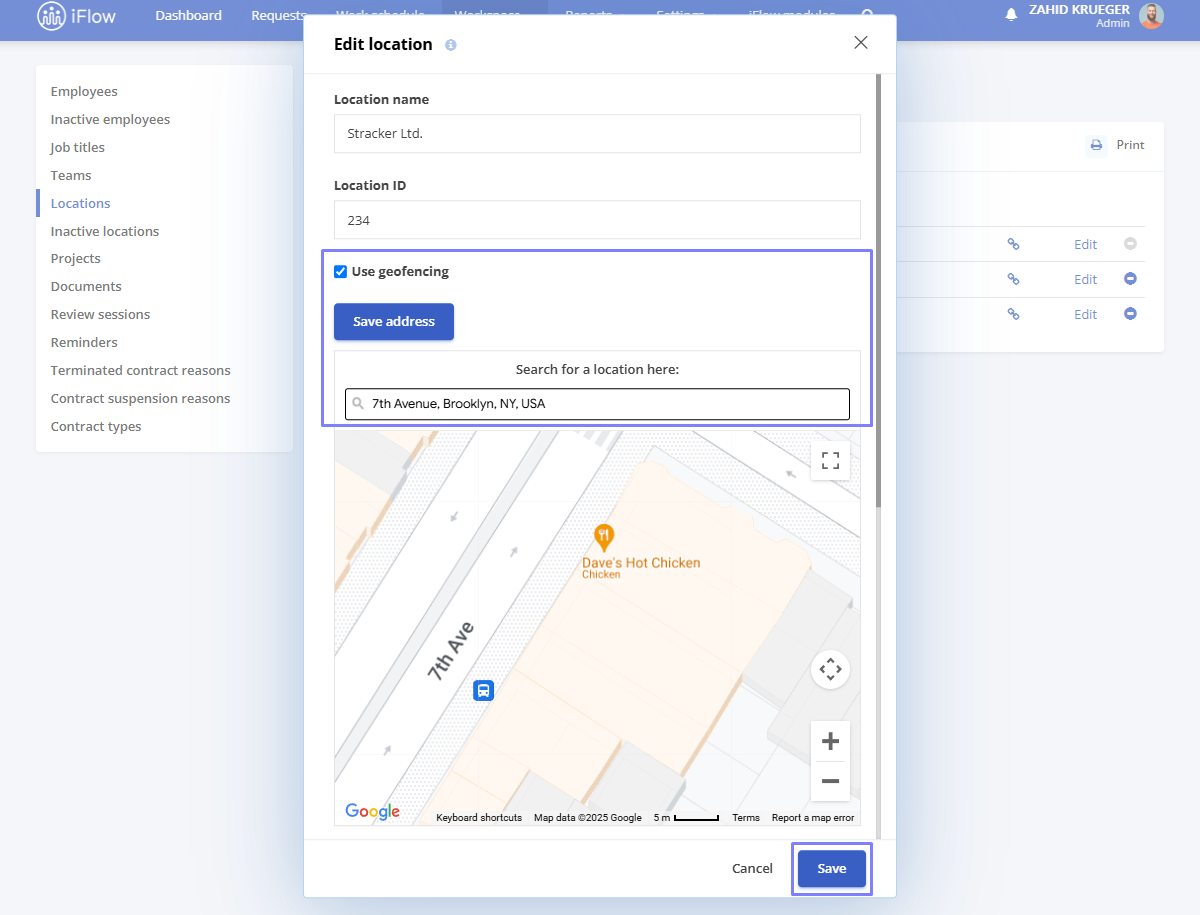
- Navigate to Workspace – Locations
- Click Edit on the required Location
- Check the option Use geofencing
- Enter the desired address
- Click the Save address button
- After saving the address, set the desired geofence perimeter
- Click Save to confirm the settings
- After saving, you have the option to Delete address or Reset perimeter
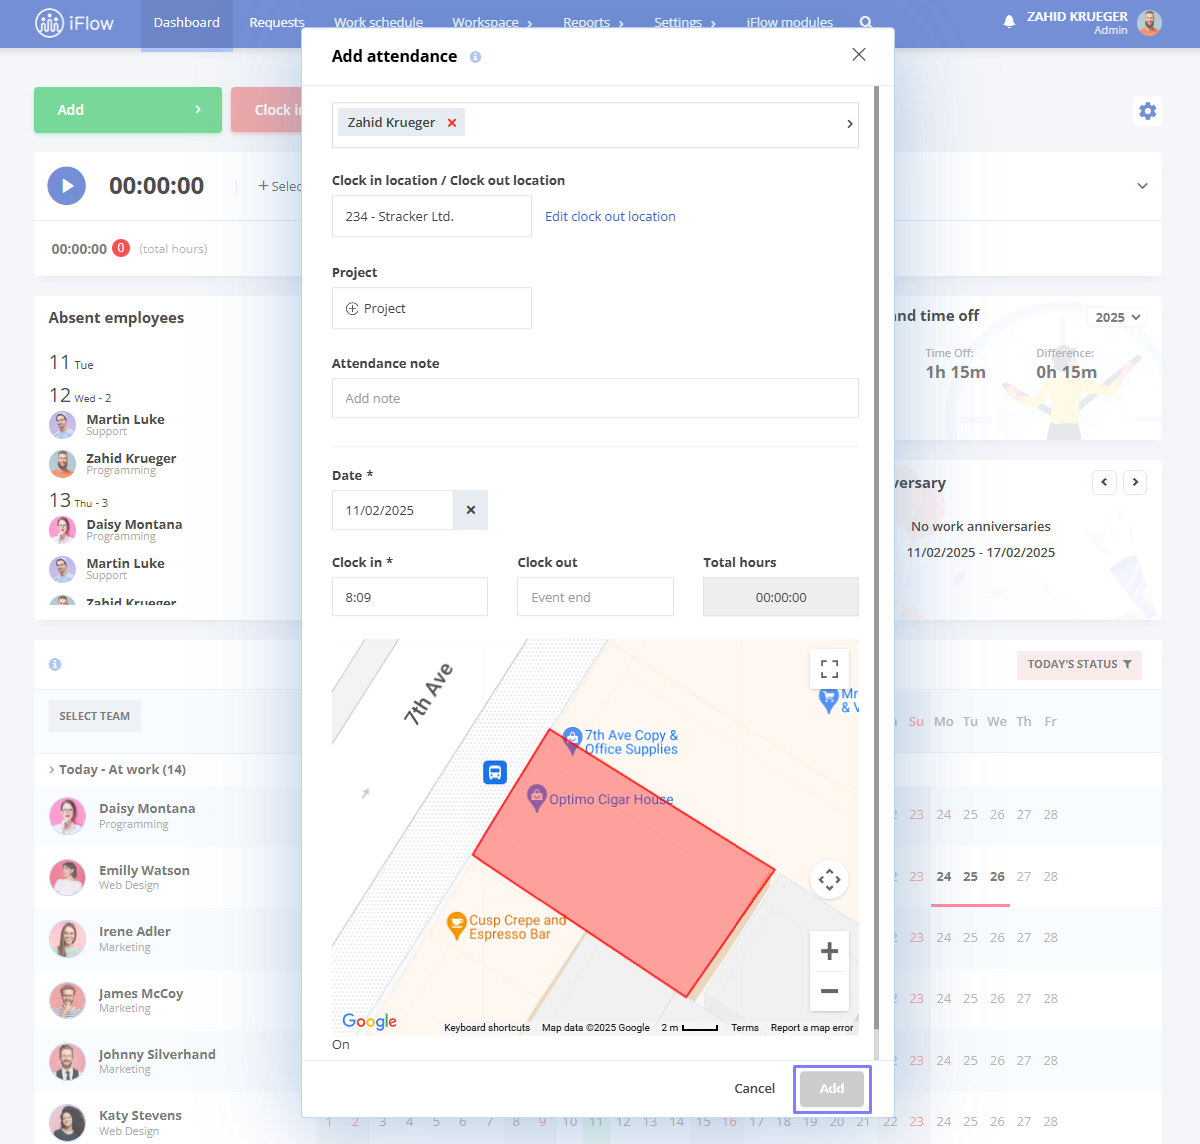
Real-time monitoring
- The employee’s marker updates automatically every 5 seconds
- The perimeter turns green when the employee’s marker enters the designated area
- The Add button remains disabled until the marker is within the perimeter
Important!
This is a business module. Contact the HR iFlow team at [email protected] for activation
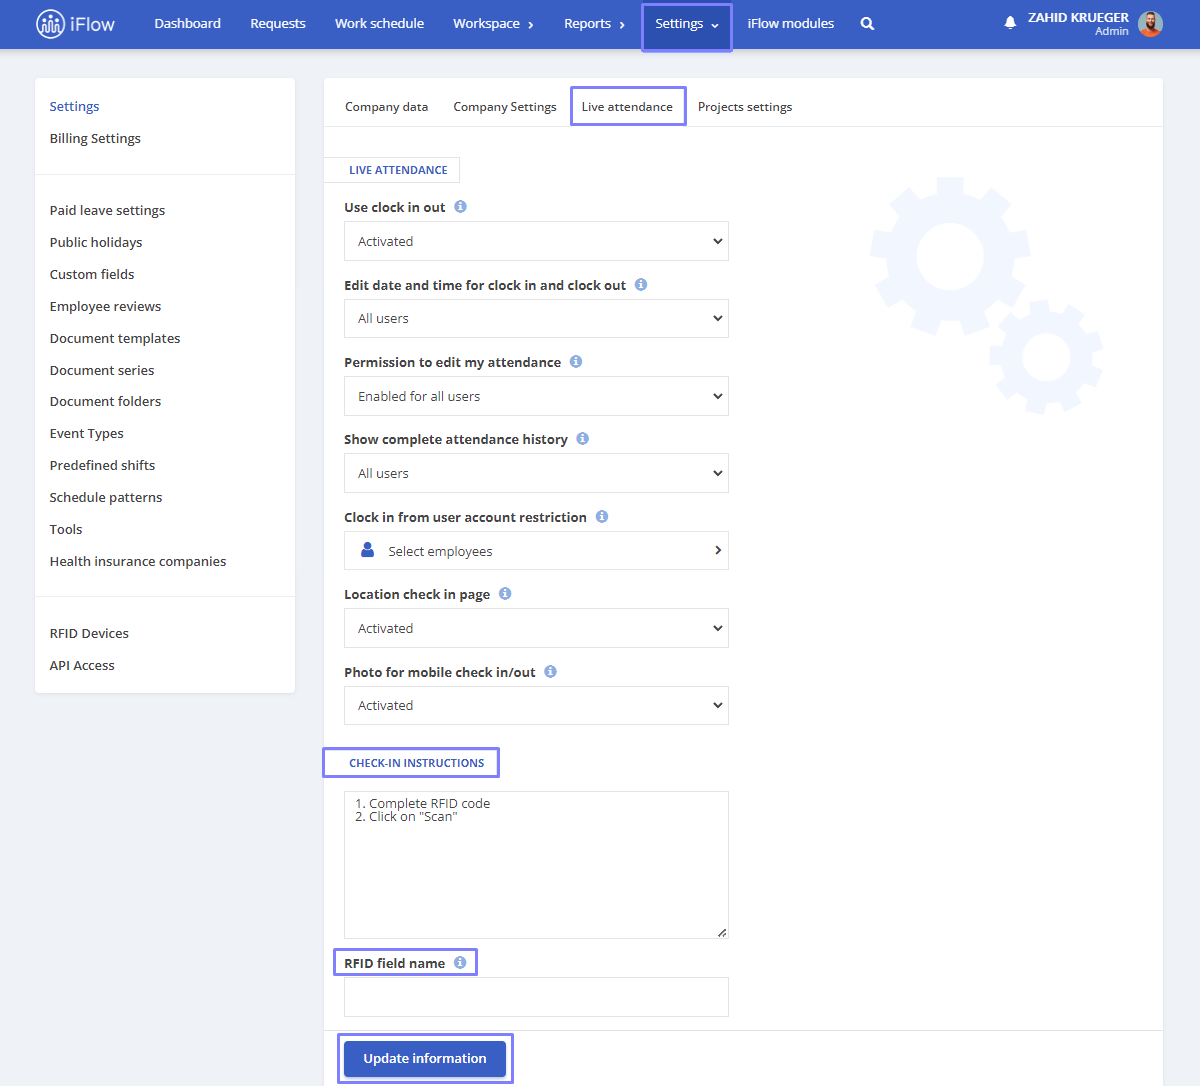
How to activate check-in via link/QR code
- From the main menu, go to Settings – Company
- Click on the Live attendance submenu
- In the Location check in page field, select Activated
- Click on Update information
How to share the check-in link
To share the check-in links, follow the steps below:
- Access the main menu Workspace – Locations
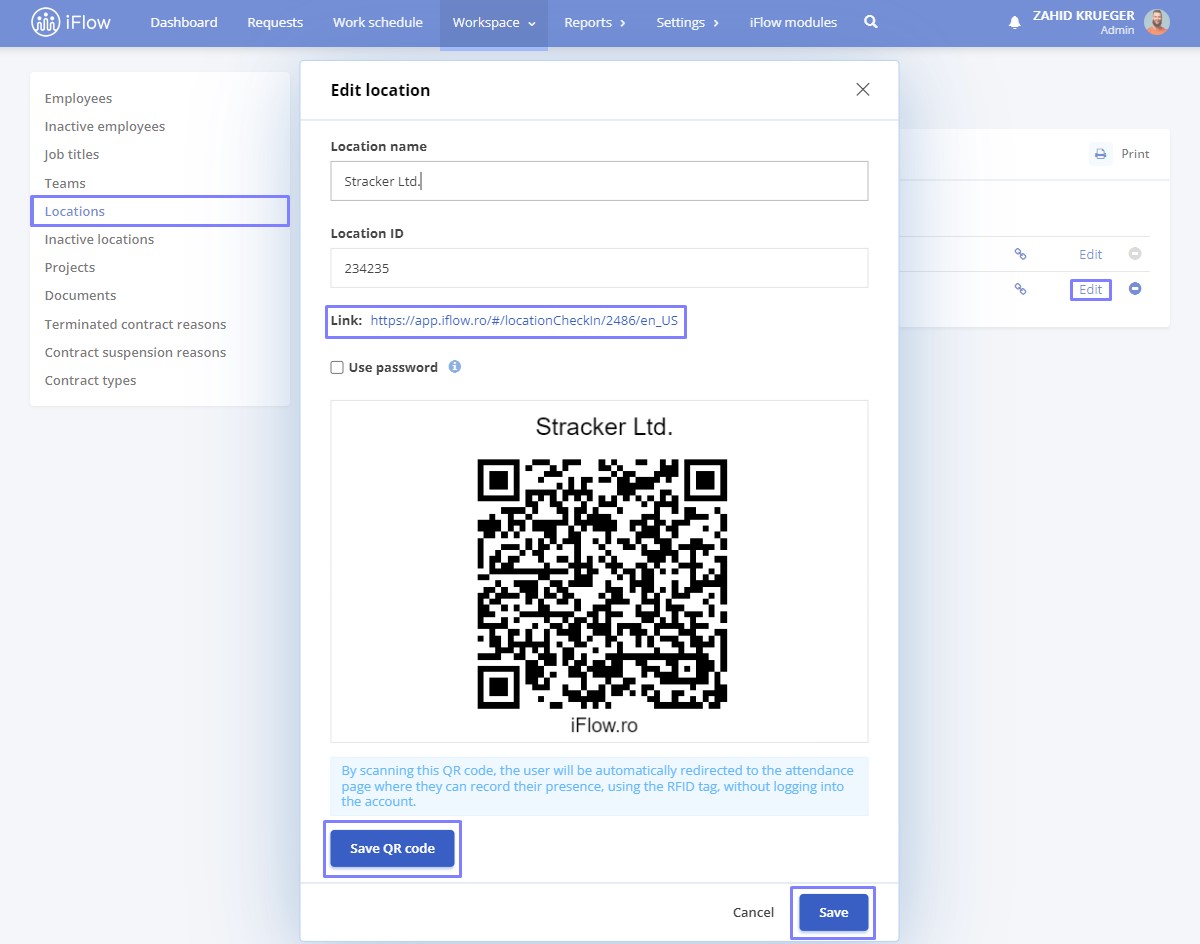
- Click the button designated for copying the link, or click Edit and copy the link from there
- Then send it to the employees
How to share the QR code
To share the QR codes for check-in, follow the steps below:
- Access the main menu Workspace and click on Locations
- Click Edit and Save the QR code
- Then print this code and display it in the location you want
How to set the check-in steps
In HR iFlow, you can write the steps for employees who check in via a link or QR code. They will see your instructions directly on the check-in page.
- From the main menu, go to Settings – Company
- Click on the Live attendance submenu
- Fill in the information in the Check-In Instructions field
- You can even change the RFID Field Name
- Then click on Update Information
How check-in via link and QR code works
Employees access the link you shared, enter the necessary password, input their RFID Series, internal number or check-in code and register their presence.
They can either check in themselves or be checked in by someone else at that location.
Scan the QR code using a mobile phone, enter the password if necessary, then input the RFID Series/Internal Number/Check-In Code and register their presence.
If you want to learn more about all the check-in methods in HR iFlow, click here.


