How to create a team/department
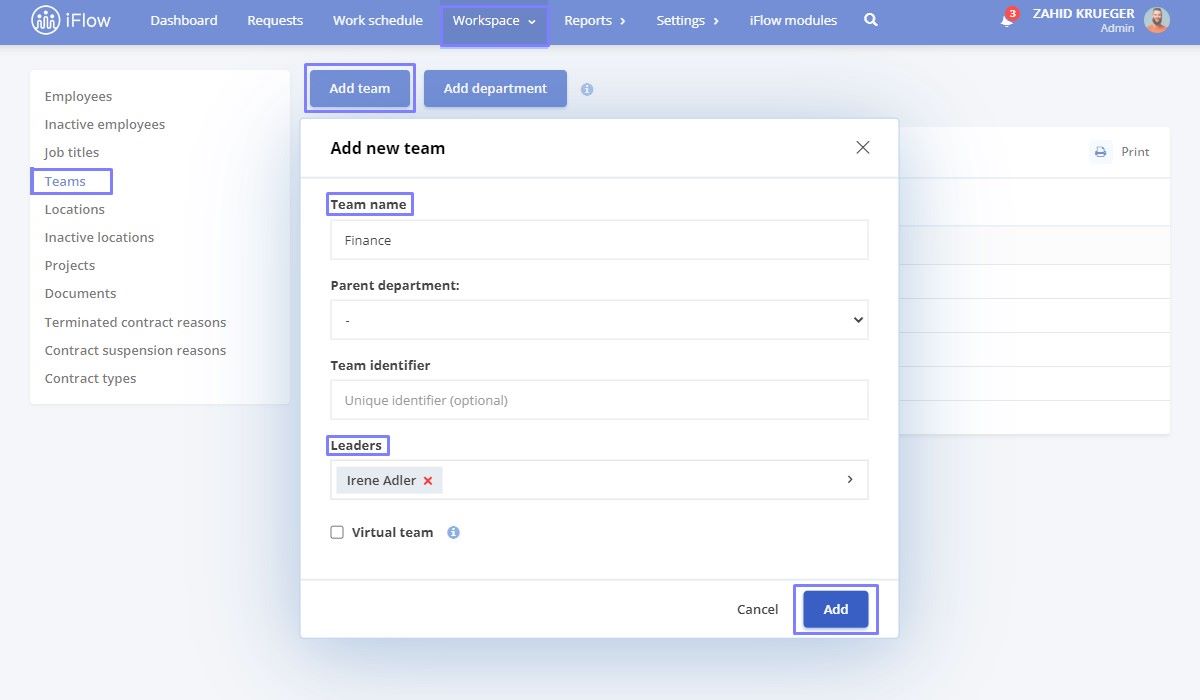
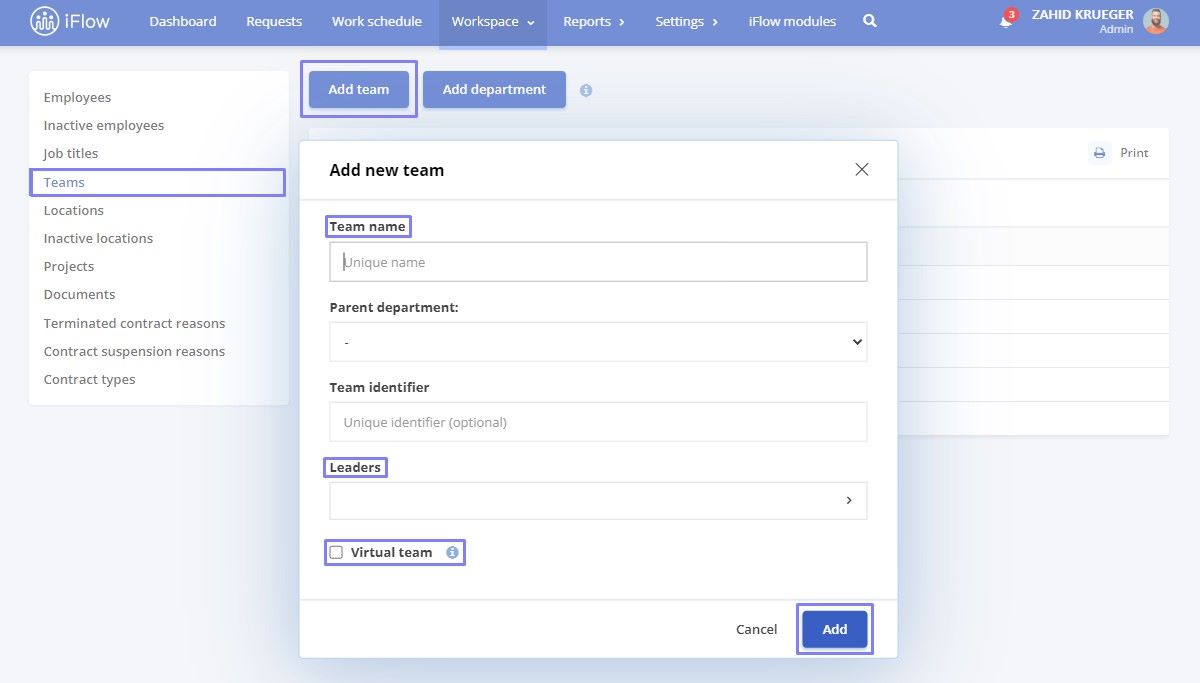
How to create a new team
- From the Workspace menu – Teams section
- Click on the Add team button
- Fill in the Team name
- Fill in the Team identifier (optional)
- Select Leaders (optional)
- To finish, click the Add button
After creating the team(s), the next step is to assign employees. Team members will only see their fellow team members (if the company visibility settings are default), and they won’t be able to view members of other teams.
All reports have a team filtering system, which makes tracking employees easier and simplifies the work schedule setup. Additionally, you can designate team leaders with different permissions to manage a team of employees.
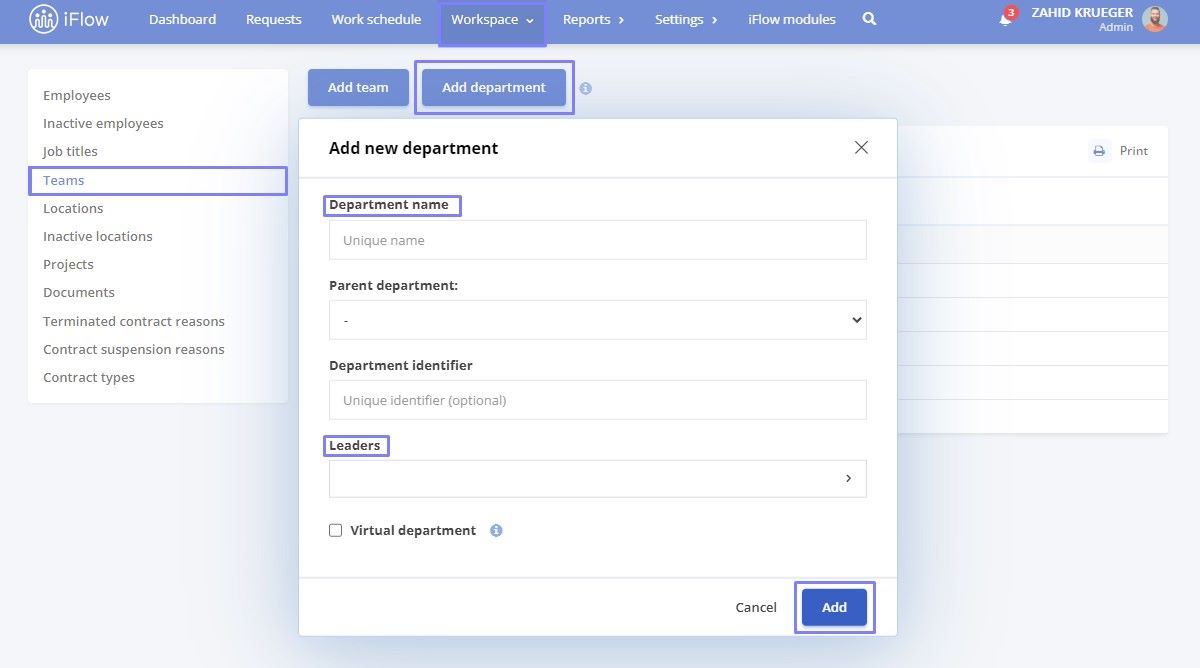
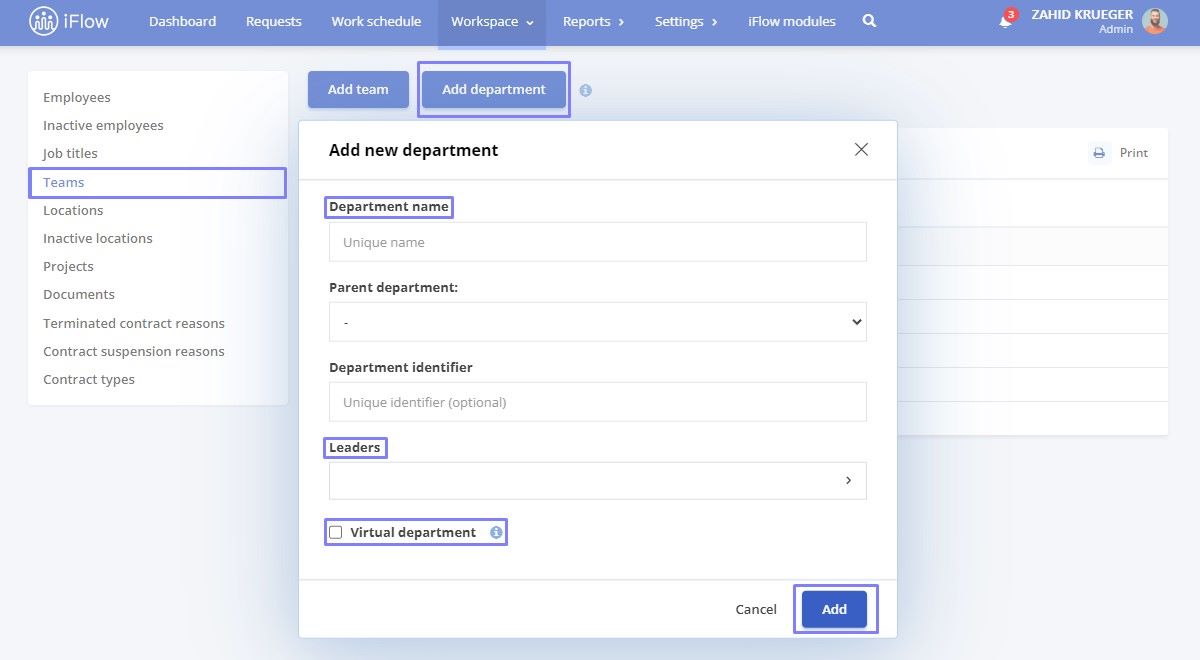
How to create a department
iFlow users can create and structure teams within departments and assign employees to multiple teams. Departments can be created as follows:
- Click on the Workspace – Teams section
- Click on the Add department button
- Fill in the Department name, Parent department, Department identifier, and Leaders
- Click the Add button
Next to each department, you’ll find two buttons. Clicking Edit will modify the department’s identification details, and clicking the X symbol will delete it.
Departments can be accessed by clicking on their name, allowing you to navigate or perform operations directly within them, such as adding/editing teams or departments. Additionally, existing teams can be distributed among departments using the drag and drop function.
How to create virtual teams/departments
Virtual departments and teams are helpful when tracking activities (permissions, notifications) for specific teams/departments without appearing in the Users’ Teams column in the Reports, Dashboard, and Work schedule sections.
How to create a virtual team
- From the Workspace menu – Teams section
- Click on the Add team button
- Enter the Team name
- Fill in the Team identifier (optional)
- Select the Team leader (optional)
- Check the box next to Virtual team
- Click the Add button
How to create a virtual department
- From the Workspace menu – Teams section
- Click on the Add department button
- Enter the Department name
- Fill in the Department identifier (optional)
- Select the Leaders (optional)
- Check the box next to the Virtual department
- Click the Save button
How to edit a team and assign a leader
How to edit an existing team
- From the Workspace menu – Teams section
- Click on the Edit button next to the team you want to modify
- Update the details as needed
- Click the Save button
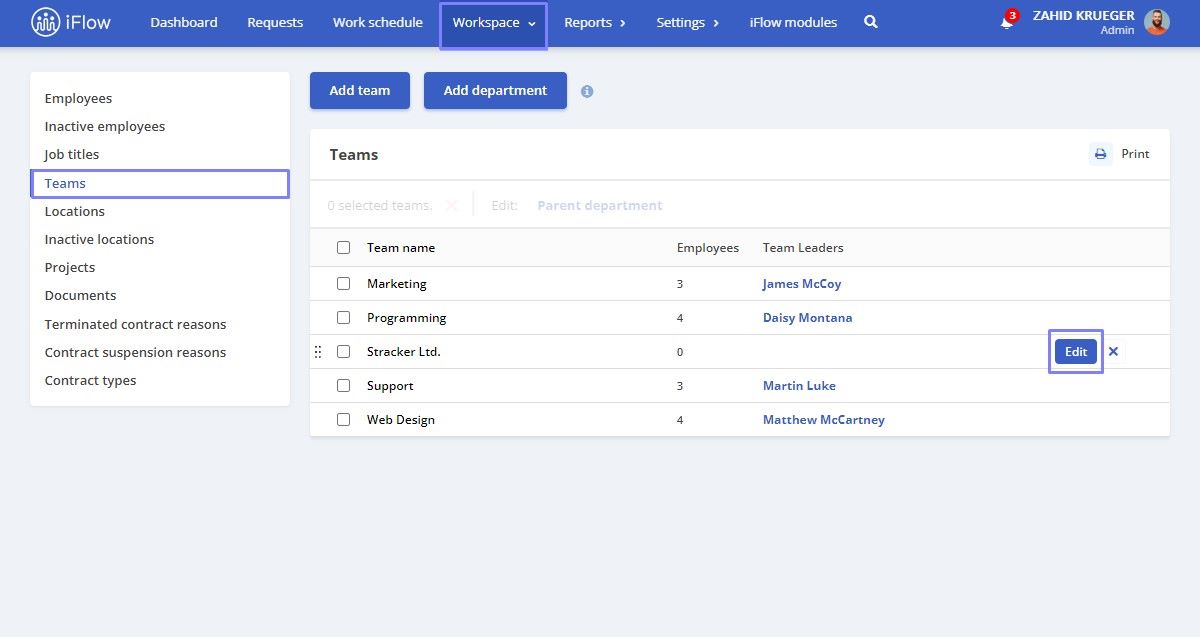
How to delete an existing team
- From the Workspace menu – Teams section
- Click on the X button next to the team you want to delete
- To confirm, click the Delete button
Assigning a team leader is not mandatory for existing teams but is essential for managing employees effectively.

How to assign a team leader
- From the Workspace menu – Teams section
- Click on the Edit button next to the team to which you want to assign one or more leaders
- Click on the Leaders
- Select the employee(s) who will be the team leader(s) (you can assign multiple leaders to a team)
- To finish, click the Save button

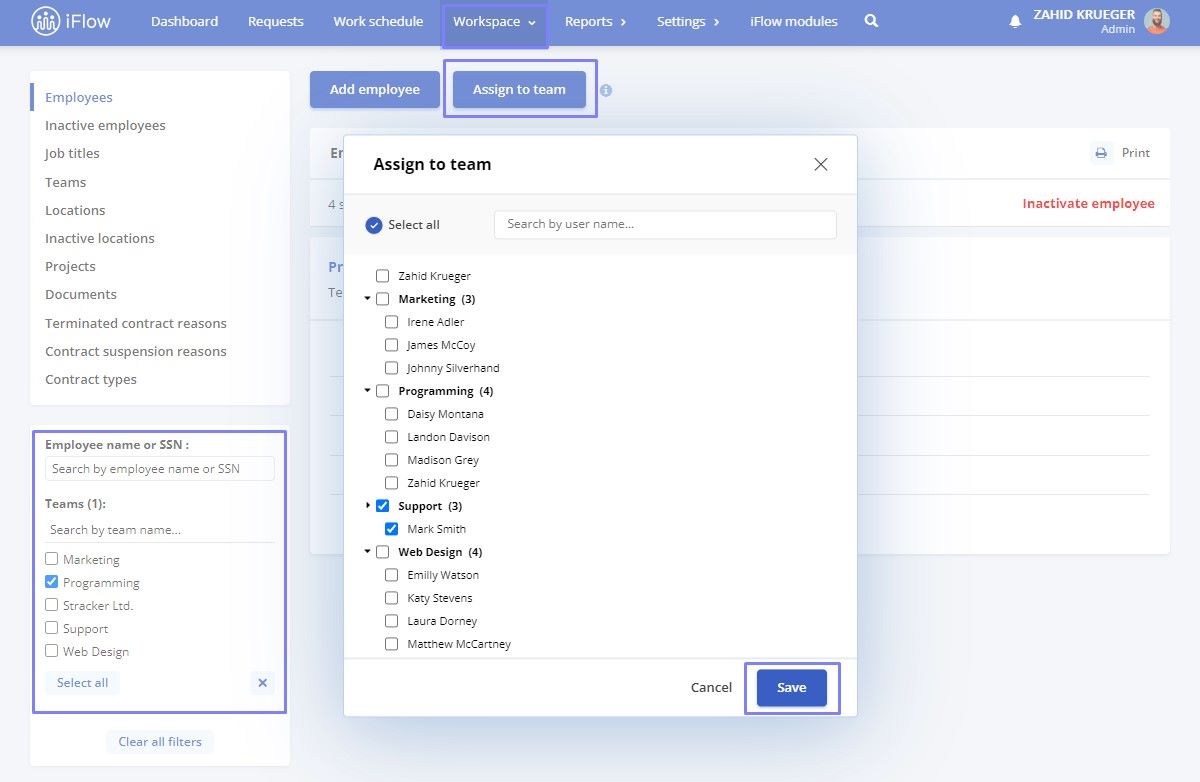
How to assign employees to a team
- From the Workspace menu – Employees section
- Select the Team from the filter on the left side
- Click on the Assign to team button
- Check the box next to the team and the employee you want to assign to the team
- Click the Save button
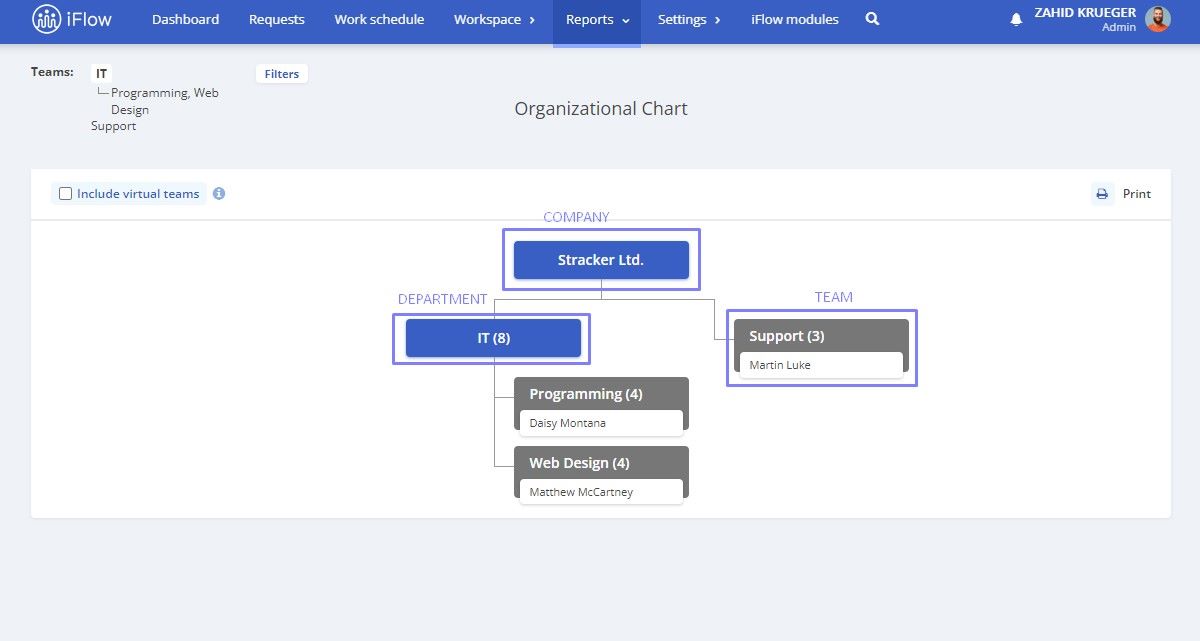
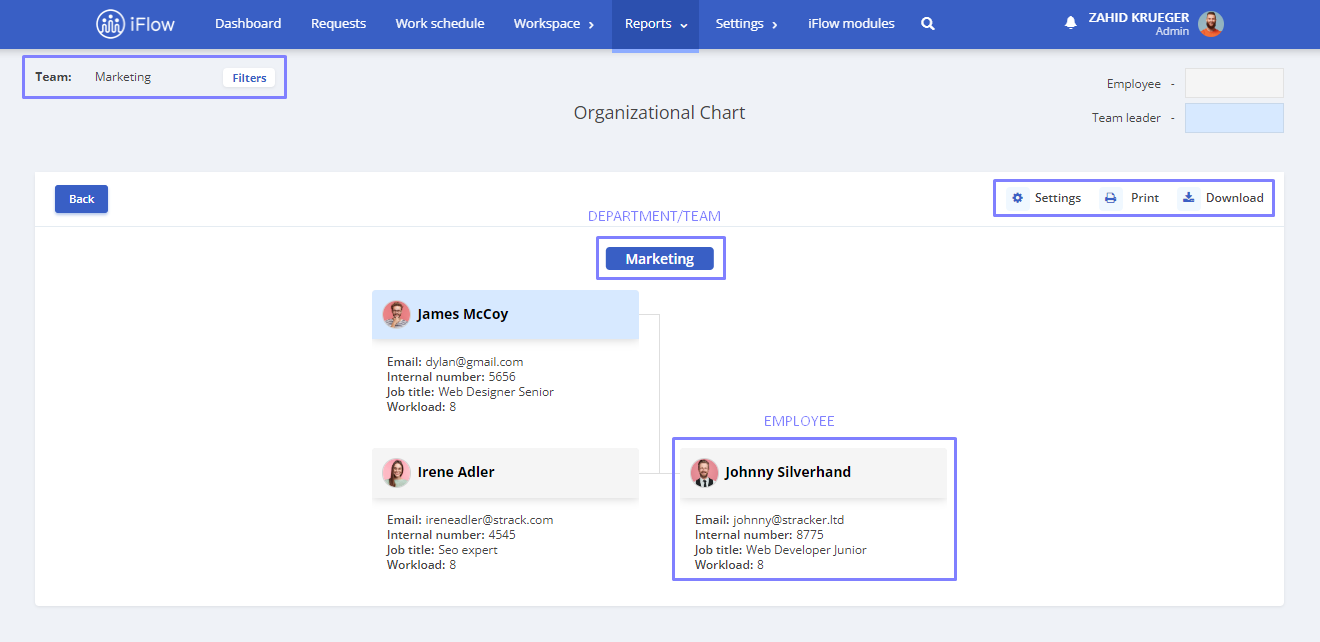
Organizational Chart
The Organizational Chart report in the application is generated based on the teams and departments created, highlighting individuals who are leaders or administrators.
To access the company’s organizational chart, click on Reports – Organizational Chart. Here, you can view the company’s organizational chart structured by parent departments, departments, and teams. Click here to see how you can create teams/departments.
The team organizational chart can be accessed by clicking on the team name within the department organizational chart. Additionally, by clicking on a department name, you will be redirected to the organizational chart for the selected department or team.
You can choose which information to display under the employee’s name by using the Settings button and checking the boxes next to the desired information. You can filter the organizational chart by teams and print or download it using the Print and Download buttons.
An employee’s profile can also be accessed by clicking on their name in the main organizational chart.