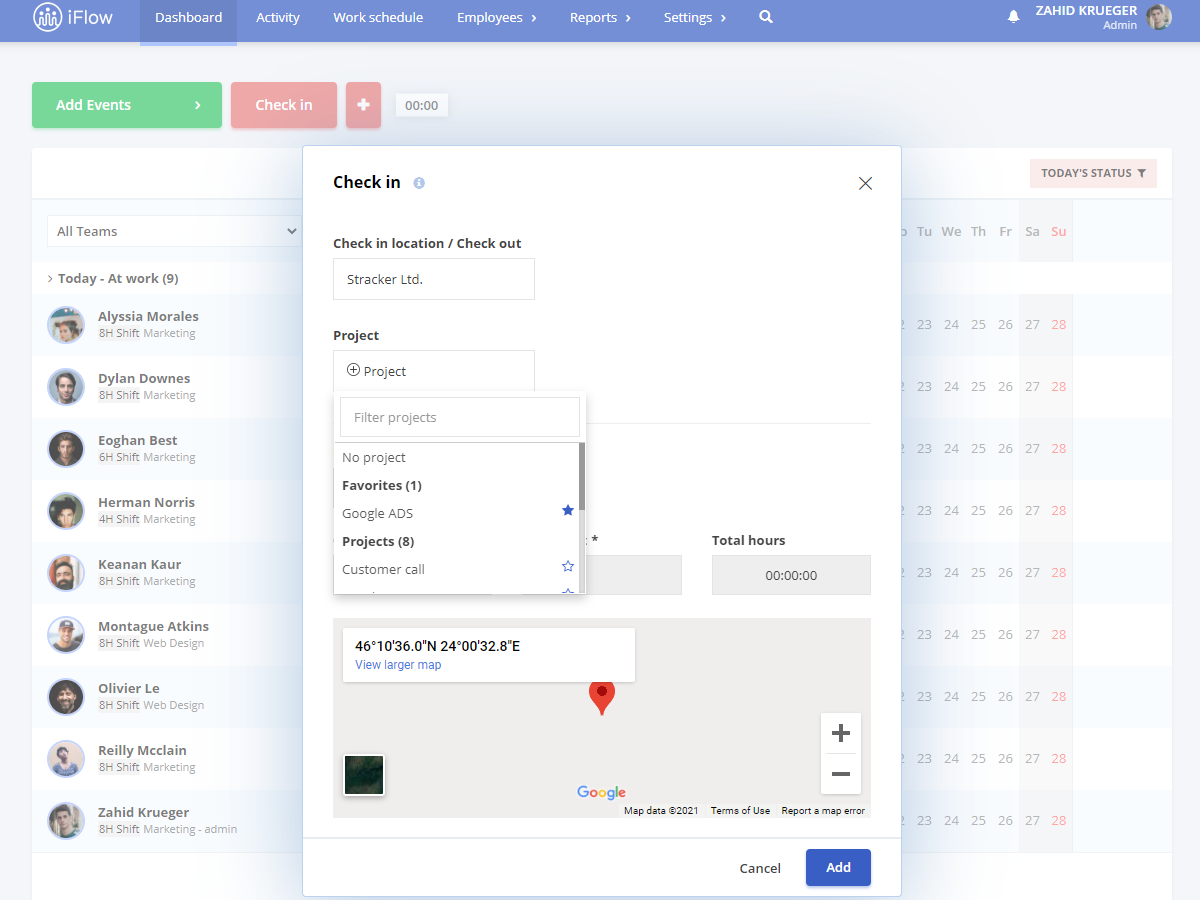
In this article, you will find out how to use project tracking and live attendance. Your employees can record their working time on each project. This can help you further when making decisions, such as project distribution.
There are 3 simple steps you have to follow. You find them listed below Before you start, make sure you have activated the project module. In the main menu “Settings” – “Company” – “Company Settings” – “Projects” – choose “Activated”, then save the settings.
1. Create projects
Projects can be created when you start tracking time, by the employee himself. But if more employees will work on the same projects, we recommend that the administrator creates the projects from the menu “Employees” – “Projects”. Afterward, the employees will use them to track their time, by selecting them from a list.
Creating projects by admin avoids situations where employees create the same project but with small differences in the name, making reports inaccurate.

2. Track projects
Tracking the time they spend on a project is available for team members, team leaders, and admins. The latter 2 can track the working time for several employees at the same time.
When adding attendance, in addition to the location where the work is done, you will also select the project from the list. They can also be marked with a star, which helps you when there is a long list of projects, those marked with a star will fall into the category “Favorites” and will be displayed at the top of the list each time.
Depending on your company’s live attendance settings, you can add attendances retroactively.

3. Generate reports
When you use live attendance with project tracking, there are 2 reports you can filter by the project:
If you want to find out who works on a particular project, then we recommend the “Real attendance” report. In this report, you can filter on projects, employees, location, teams, or time frame.
Thus, if you want to find out which employees are working on a specific project, you select “All teams” and in the “Projects” filter you select the project in question. The report will provide you with a list of all records to which the filters apply. You can print or download the results.
If you want to see the total hours worked by employees on a specific project, you can do this from the “Timesheet” report by using the Projects filter. The report will be generated based on your selection and will automatically calculate the total number of hours the employee has made for the project in question. You can download this report or print it.
If you have any questions about iFlow, you can consult our user’s guide, or contact us via Chat in the application or at [email protected]


