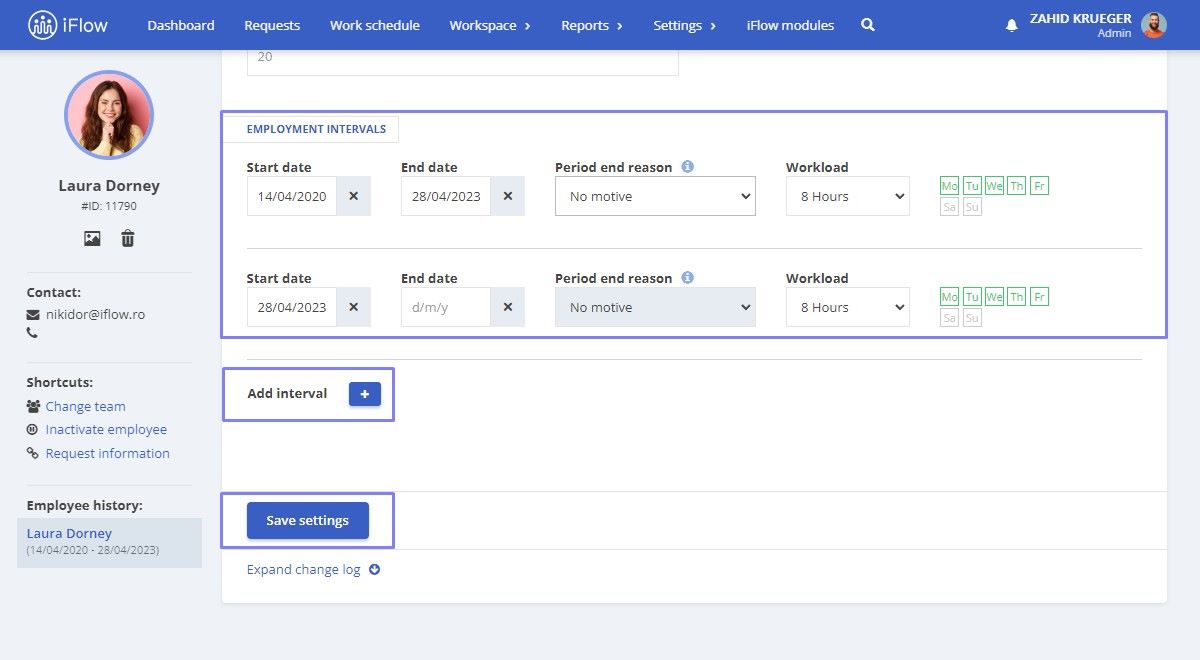
How to set employment intervals
These intervals can be filled from the employee’s profile as follows:
- Access the Employee’s profile
- Click on the Settings button – Contracts, then scroll down
- Fill in the Start and End date for fixed-term contracts, and for indefinite contracts, fill in only the Start date
You can add multiple employment intervals for a user by pressing the Add Interval button.
When entering an end date, you can also select a reason.
If there is a history of employment intervals, it will be displayed at the bottom of the Employment Intervals section.
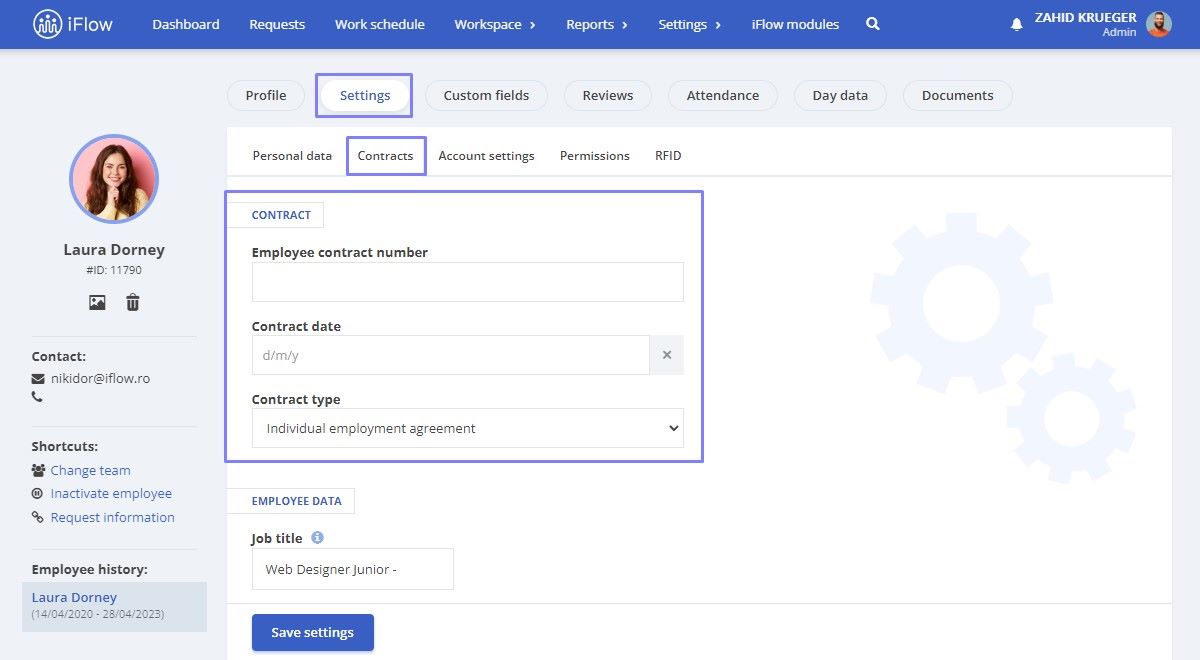
How to modify contract details
- Go to the Employee’s profile
- From the main menu, click on Settings – Contracts
- In the section Contracts, you will find the following information:
- Employee contract number
- Contract date
- Contract type
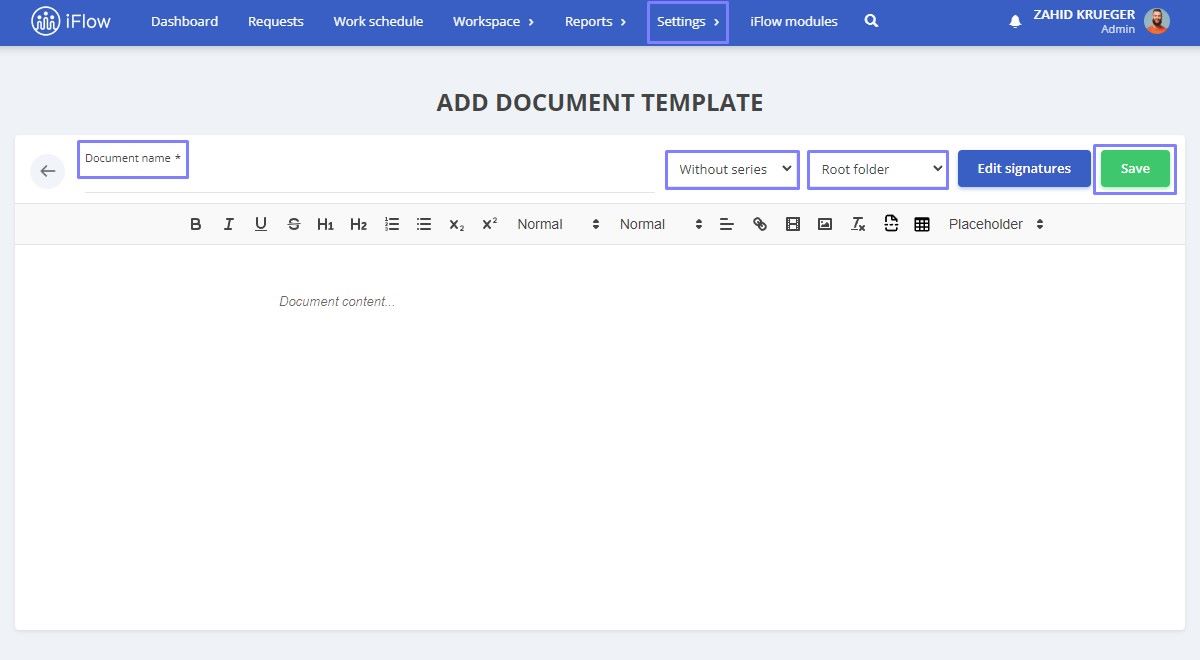
How to add the document related to the Employment Contract
Contracts can be generated using the iFlow Documents module. You can create custom document templates that will auto-populate based on the employee’s data for whom it is generated.
From the main menu, click on Settings – Documents – Document Templates – Add Template. Enter a Document Name, and choose the series type and folder. Use copy-paste to add the necessary content for the employment contract and click Save.
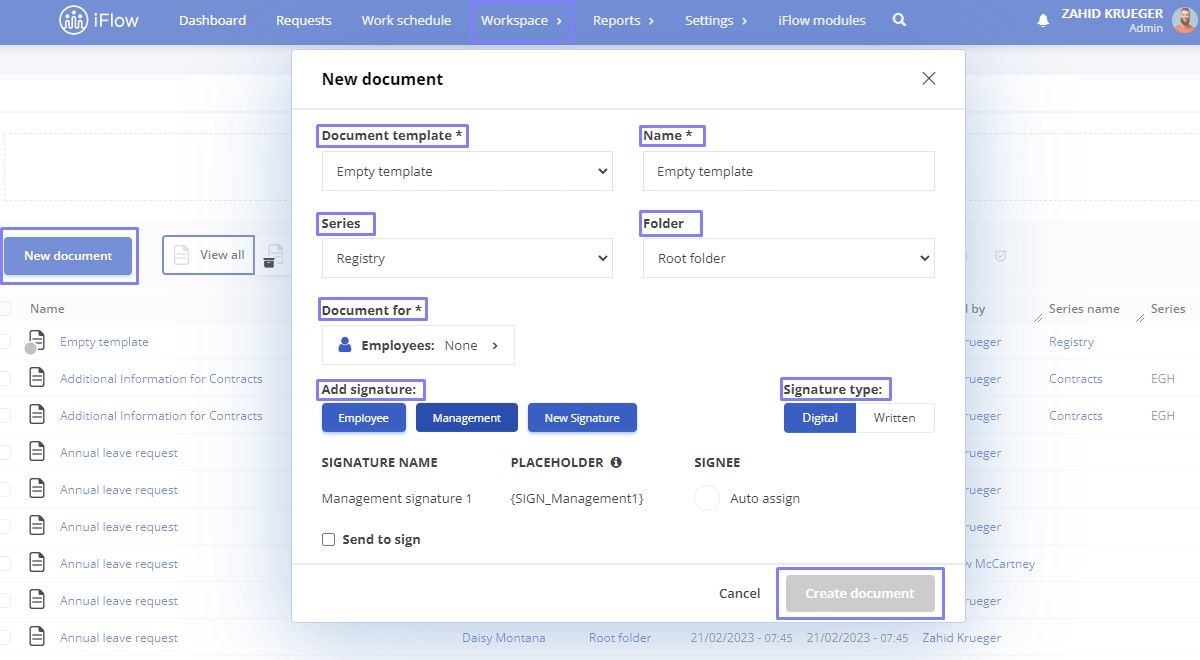
How to generate a new contract for employees
To add a contract for an employee, click on Workspace – Documents – click on the New Document button – choose:
- Document Template
- Name
- Series
- Folder
- Document for
- Add Signature
- Signature Type
- Click on the Create Document button
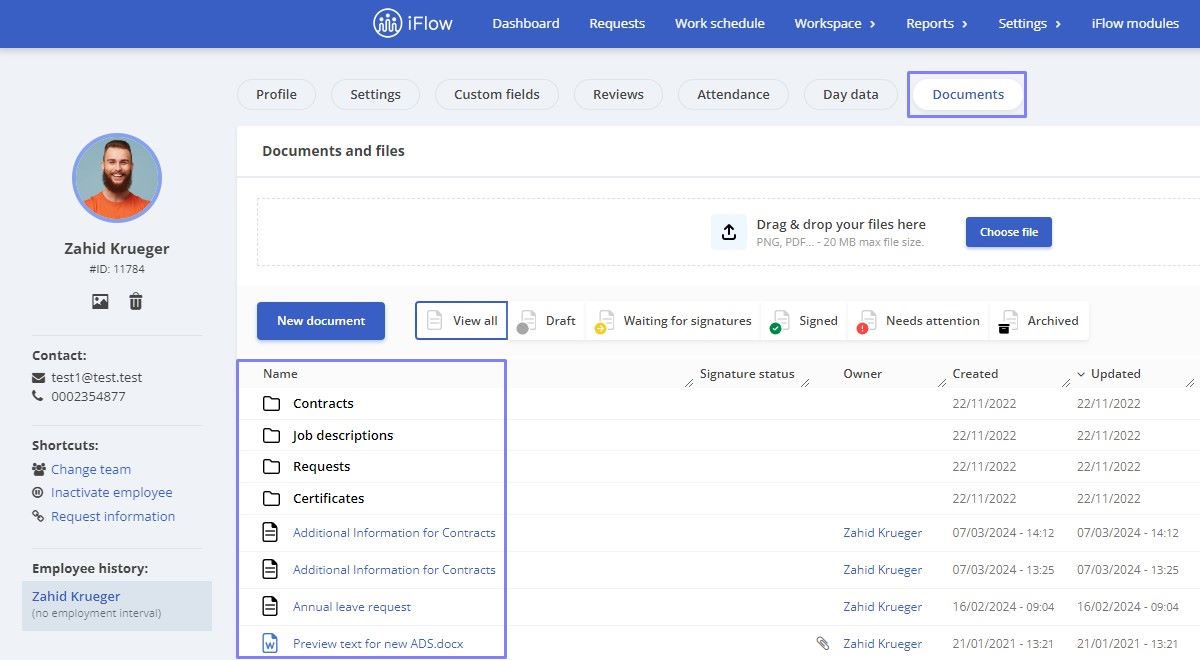
These documents are added to the Employee’s profile under Documents.
Types of Contracts
In the employee’s profile, under Settings – Contracts, you have the option to choose the type of contract under which they are employed.
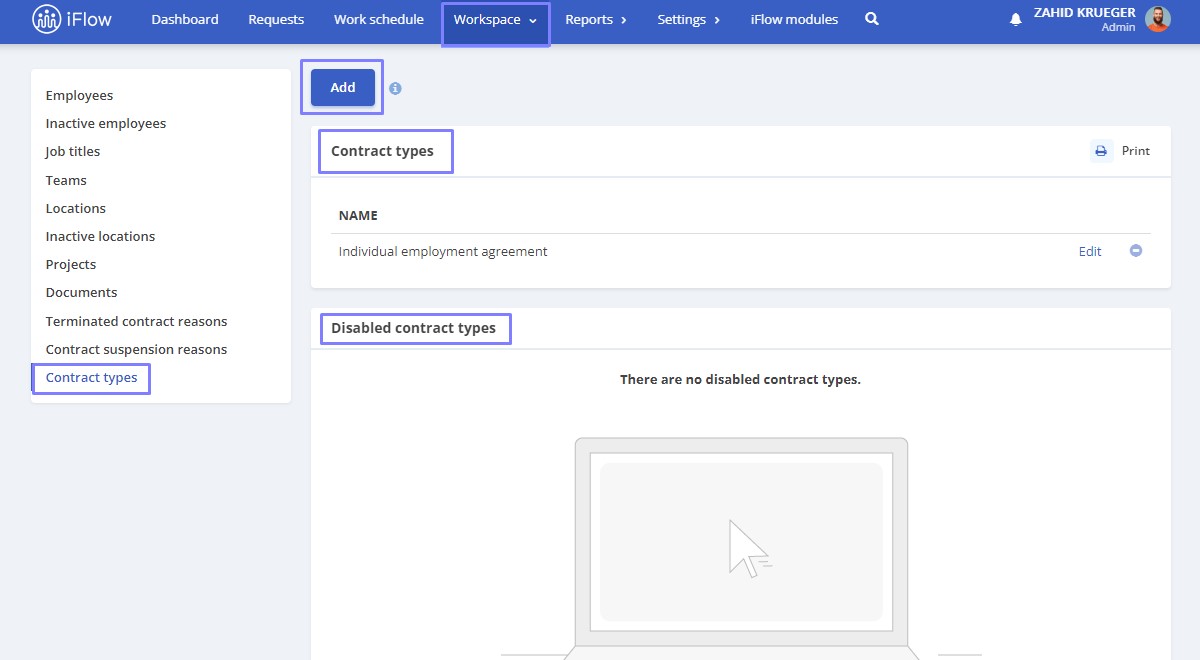
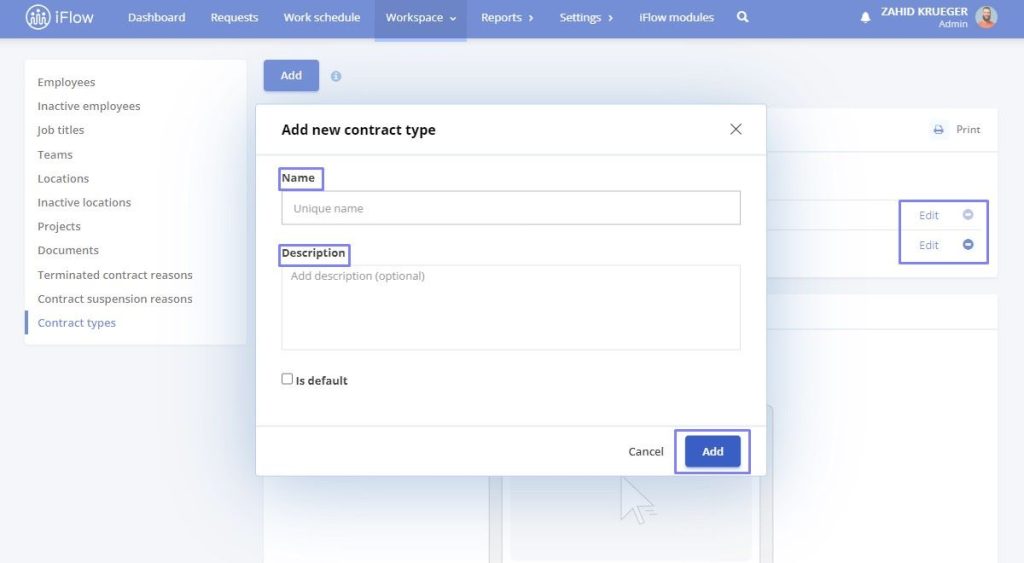
If you do not find the necessary option in the predefined list, you can easily add a new type of contract:
- From the Workspace menu – Contract Types – Add
Additionally, these can be edited or deactivated using the buttons next to the contract type.
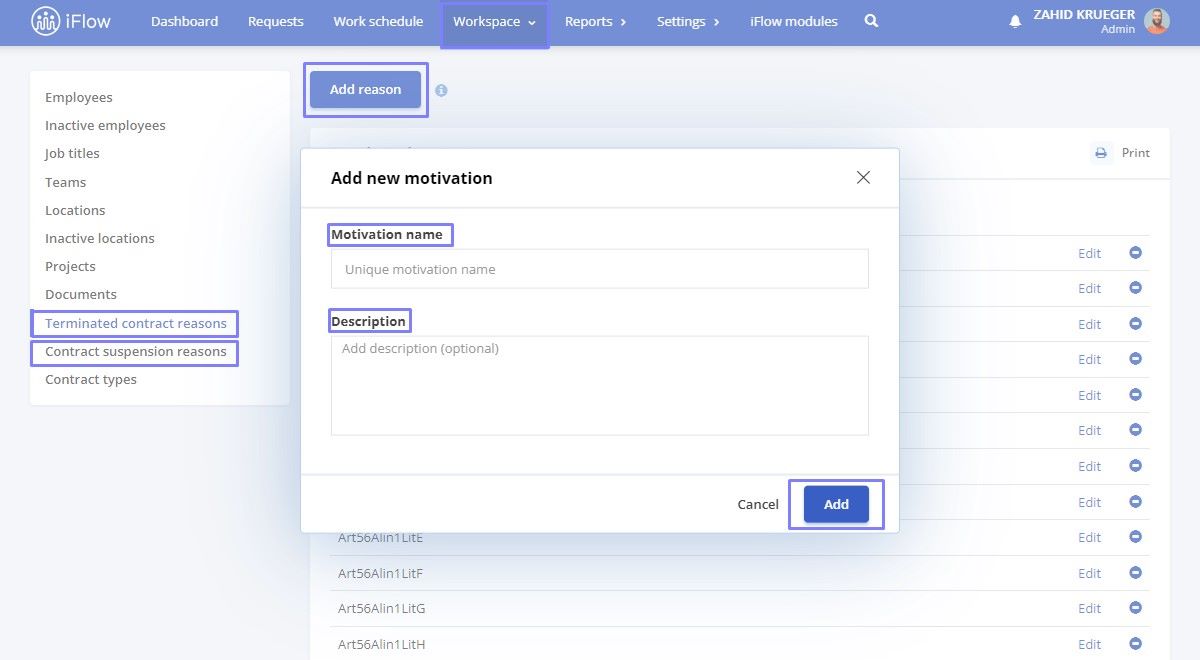
Contract suspension reasons
- From the main menu, go to Workspace – Contract suspension reasons
- Click on the Add Reason button
- Enter the Motivation name and Description
- Click on the Add button
Terminated contract reasons
- From the main menu, go to Workspace– Terminated contract reasons
- Click on the Add Reason button
- Enter the Motivation name and Description
- Click on the Add button