The Dashboard allows you to quickly view and access information, optimizing your workflow and the efficiency of daily activities.
You can view the Day’s Overview from the Dashboard or add events, attendance, and widgets such as food coupons, available paid leave, absent employees, etc. Each of these functionalities is detailed below.
Events
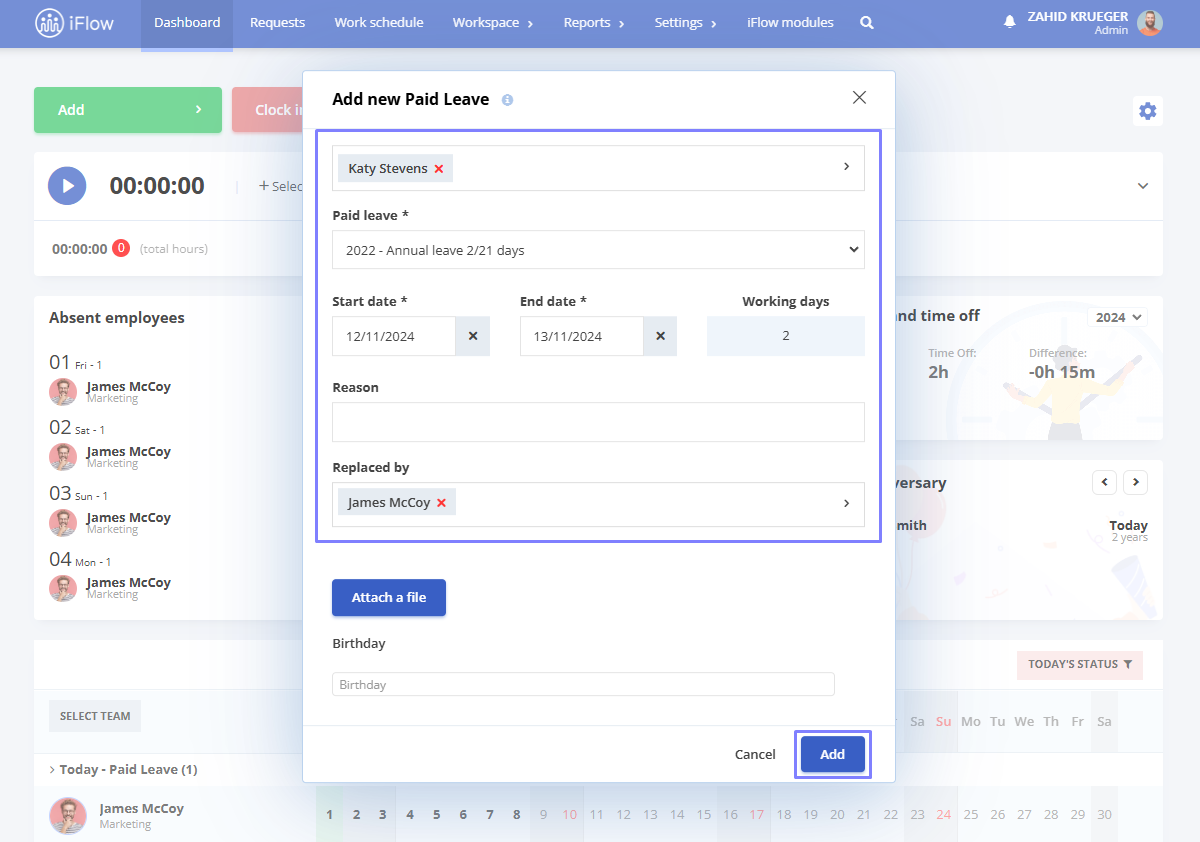
How to add events
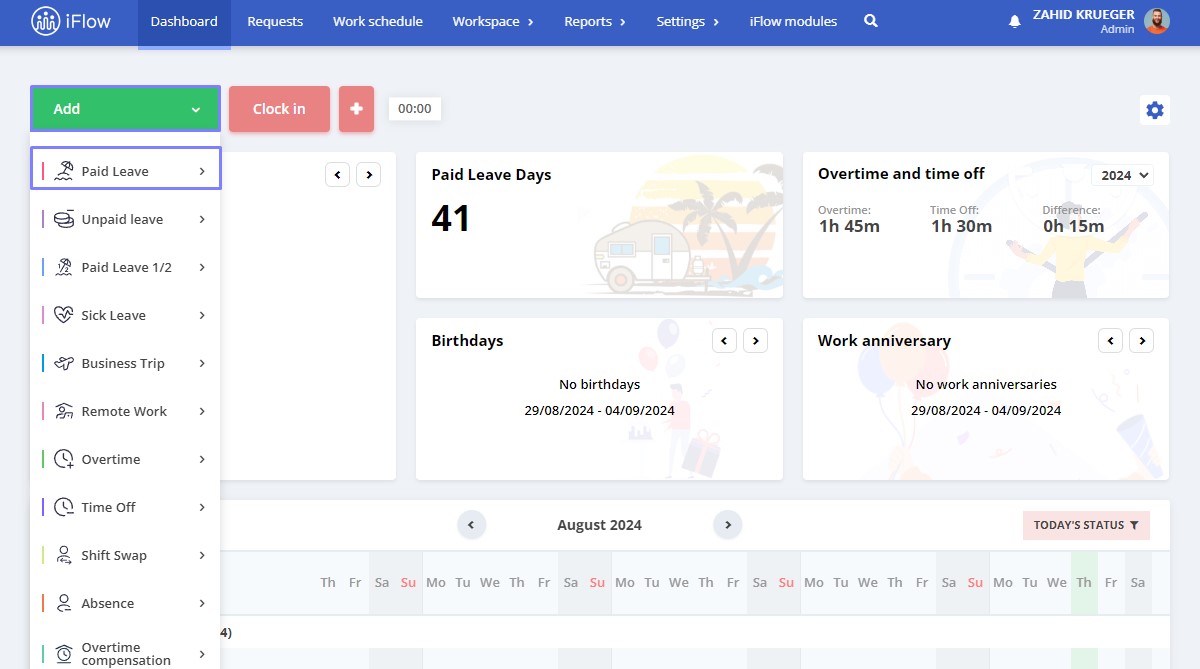
- Click on the Add button
- Select the type of event you want to add
- Select the employees to whom you want to assign the event
- Enter the event’s Start/End date, Start/End time
- Specify the Reason for the event request (this may be optional or mandatory, depending on your settings)
- If necessary, choose a substitute for the employee during the selected event period
- Click Add to add the event
How to approve/reject an event
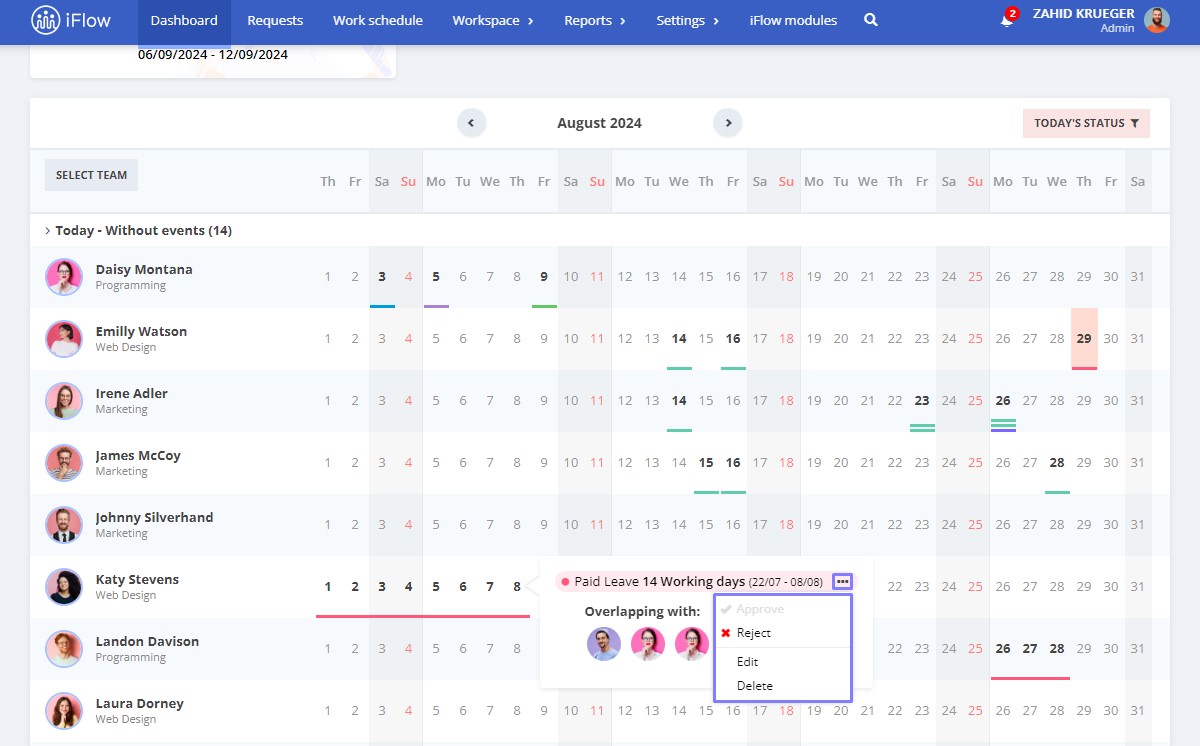
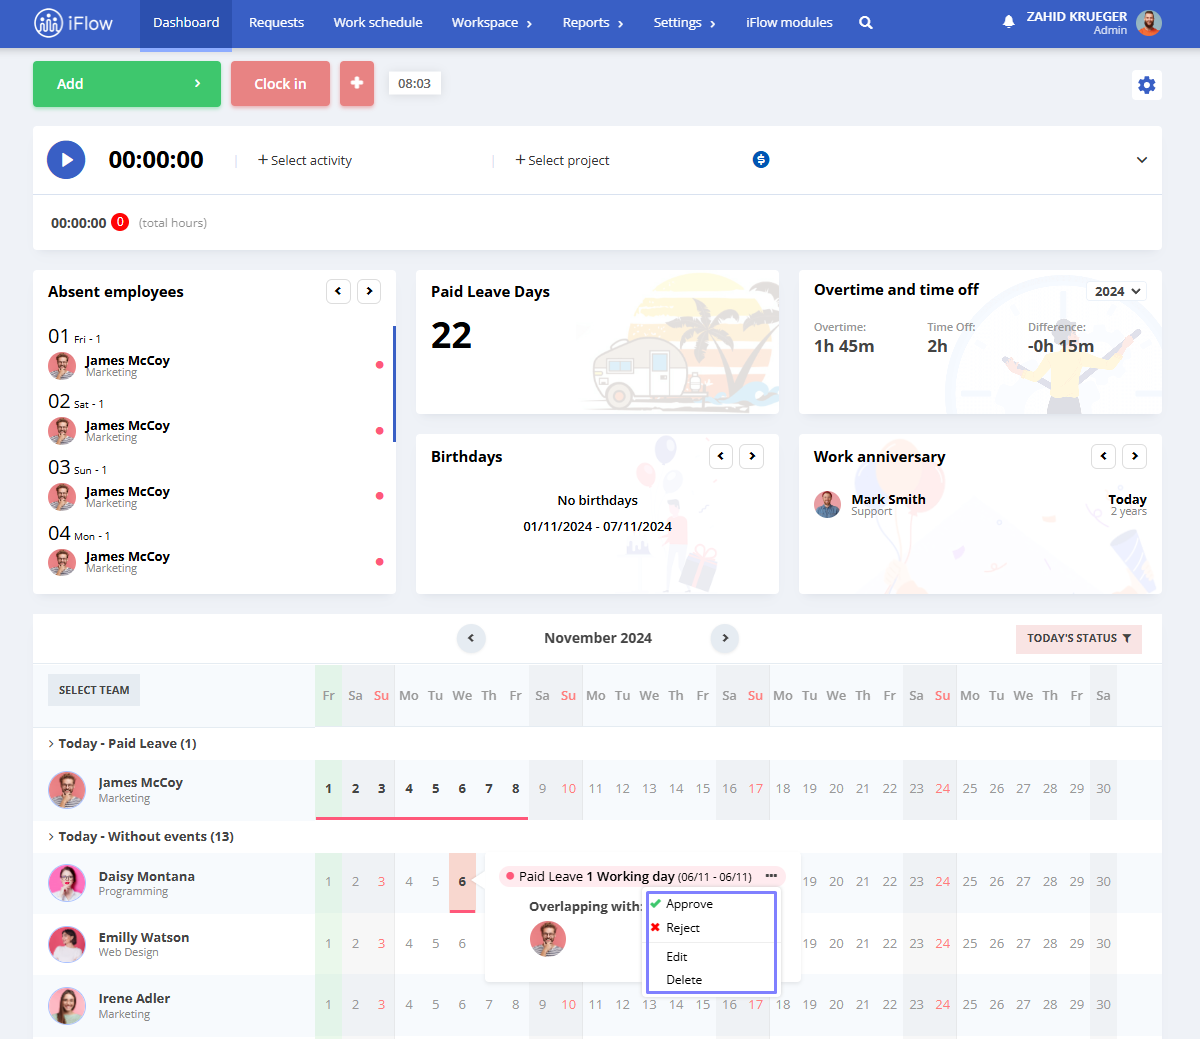
To approve an event from the dashboard, hover over the event you wish to approve and then click on the three dots:
- Click Approve if you want to approve the event
- Click Reject if you want to reject the event
- Click Edit if you want to edit the event
- Click Delete if you want the event to be deleted
For more information about events in iFlow, we invite you to consult the dedicated guide.
Attendance
How to add attendance
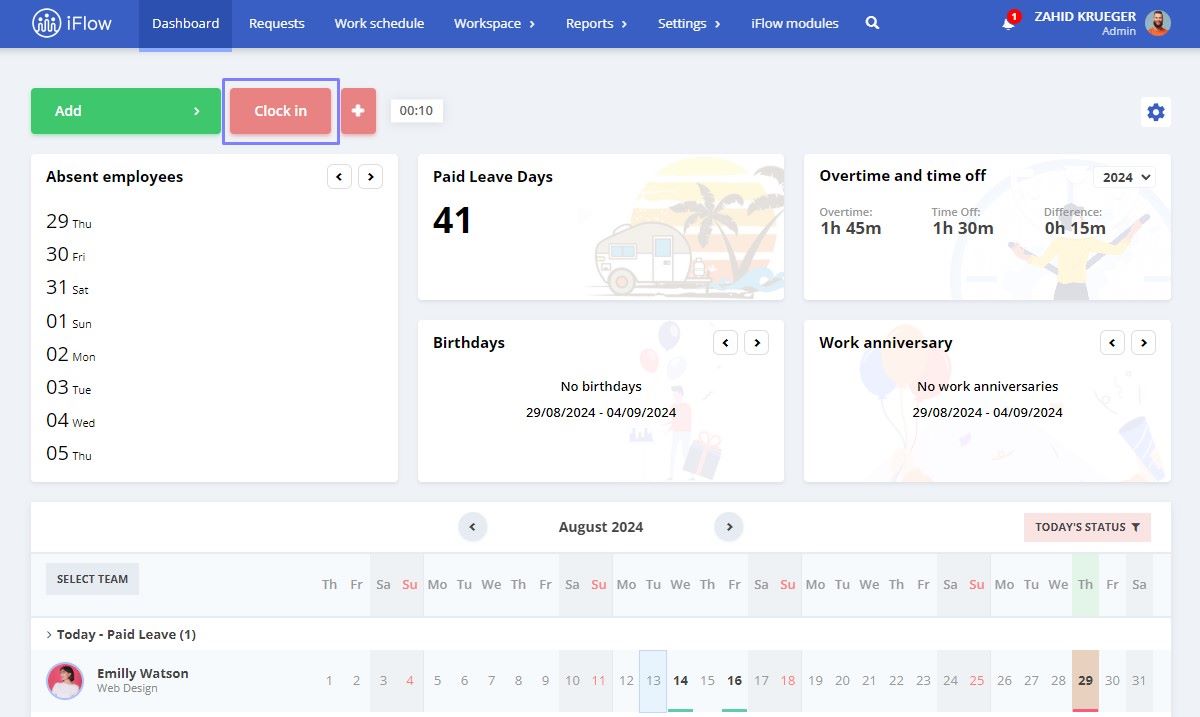
- Click on the Clock in button
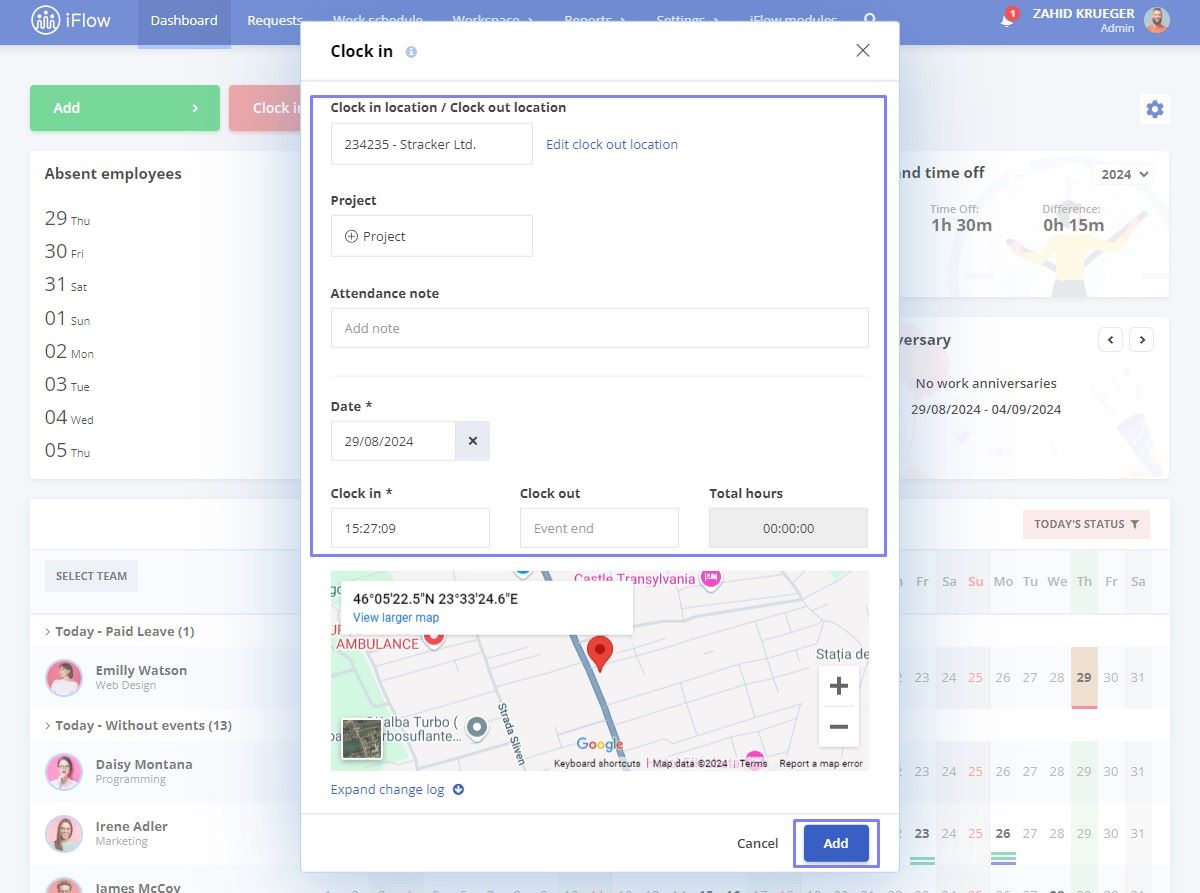
- Select the Clock in location where the activity is taking place
- Choose the Project for which attendance needs to be recorded
- Add an Attendance note to the attendance to include additional details
- Select the Date and then, necessarily, the Clock in
- On the right side, under Total hours, will be displayed the number of hours recorded from the entry time to the exit time
- Click on the Add button
- Afterwards, this button will change to Clock out
How to close attendance
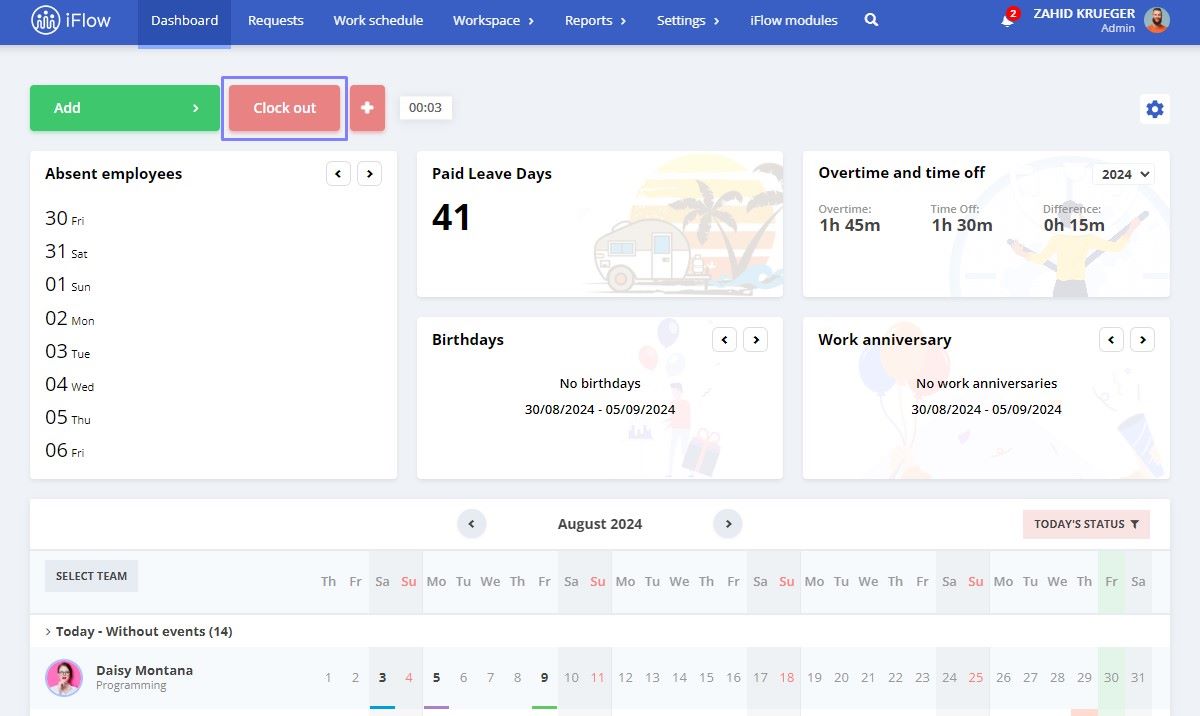
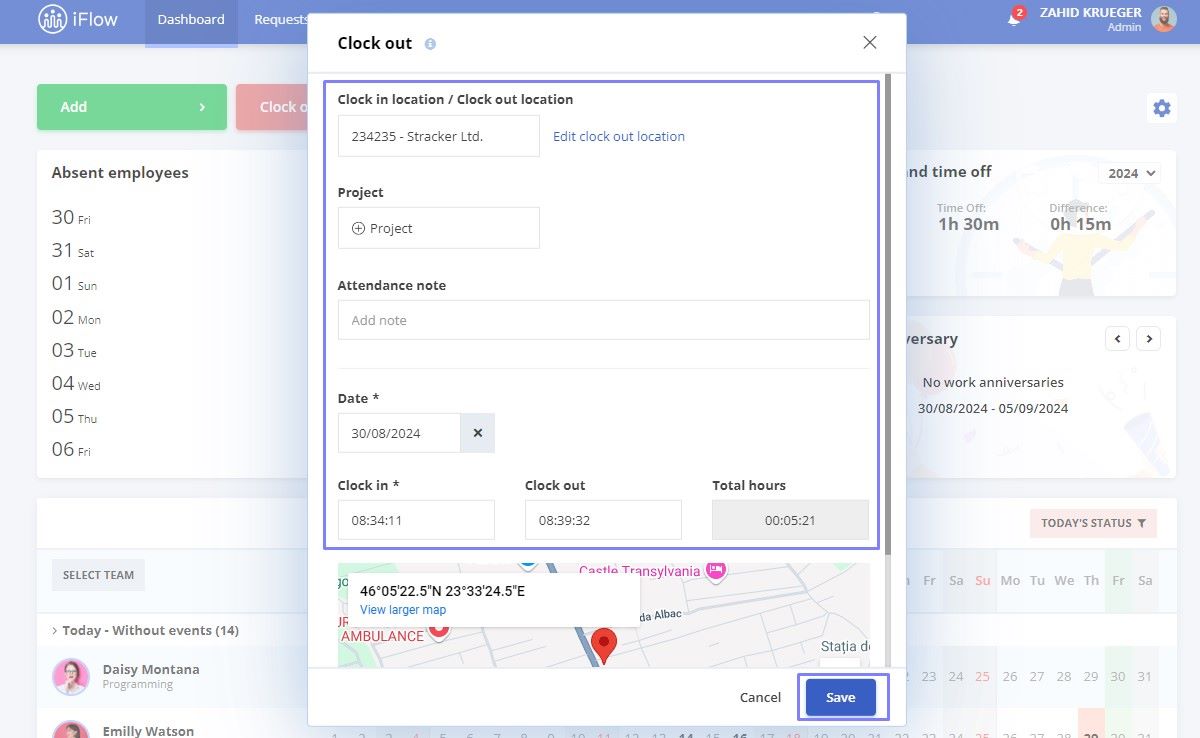
- Click on the Check out button
- Select the Location where the activity ends
- Click the Save button
How to add attendance for multiple employees
This feature is available only for Admins and Team Leaders. To add attendance for employees:
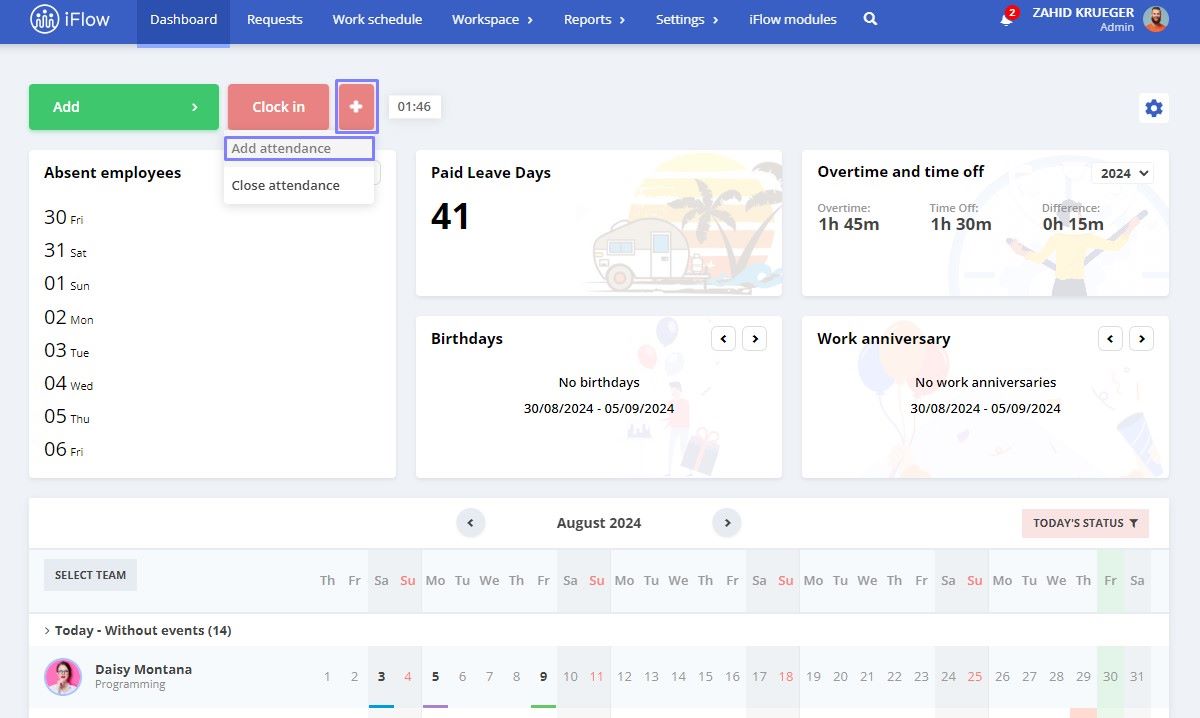
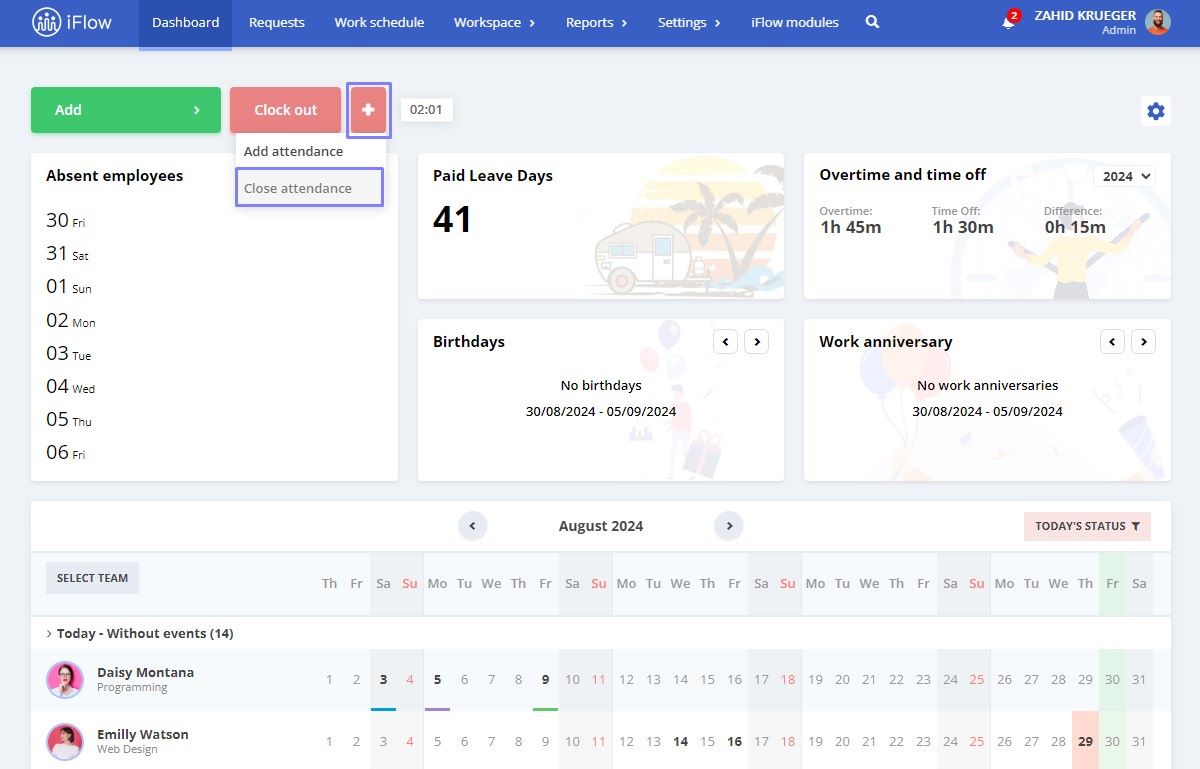
- Click on the + button
- Select Add attendance
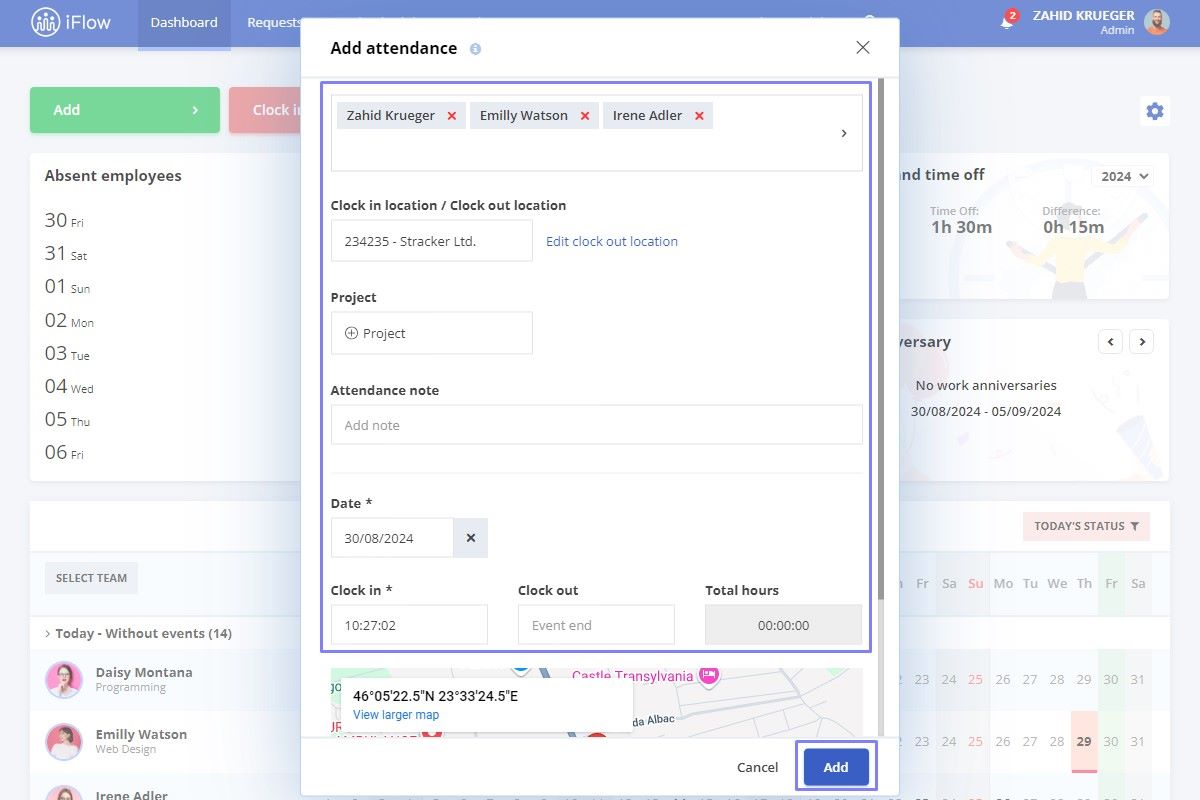
- Choose the employee or employees for whom you want to add attendance
- Select the Check in location/Check out location where the activity takes place
- Choose the Project for which the attendance needs to be recorded
- Select the Date and then the Clock in time (mandatory), followed by the Clock out time
- On the right side, under Total hours, the number of hours from check in to check out will be displayed
- Click the Add button
How to close attendance for multiple employees
This feature is available only for Admins and Team Leaders. To close attendance for employees:
- Click on the + button
- Select Close attendance
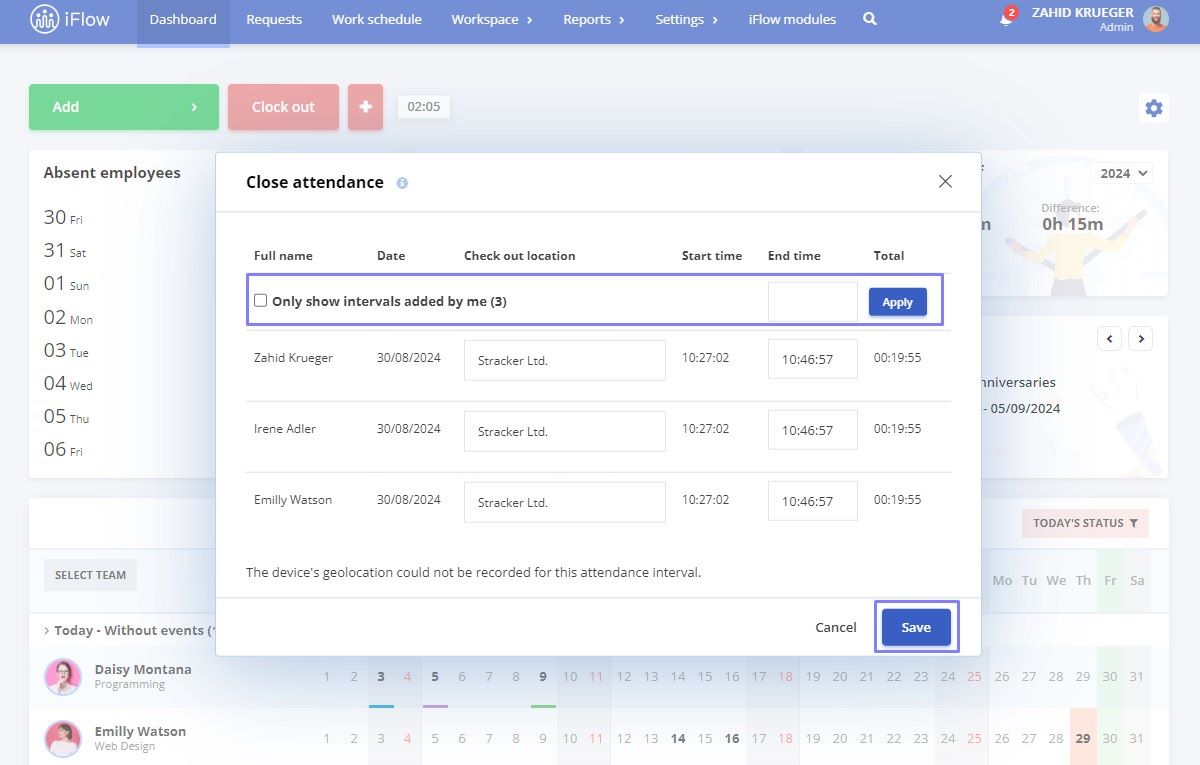
- If you want to see only the attendance recorded by you, check the option Only show intervals added by me
- Set the End Time and then click the Apply button
- Click the Save button
How to enable/disable the add attendance button
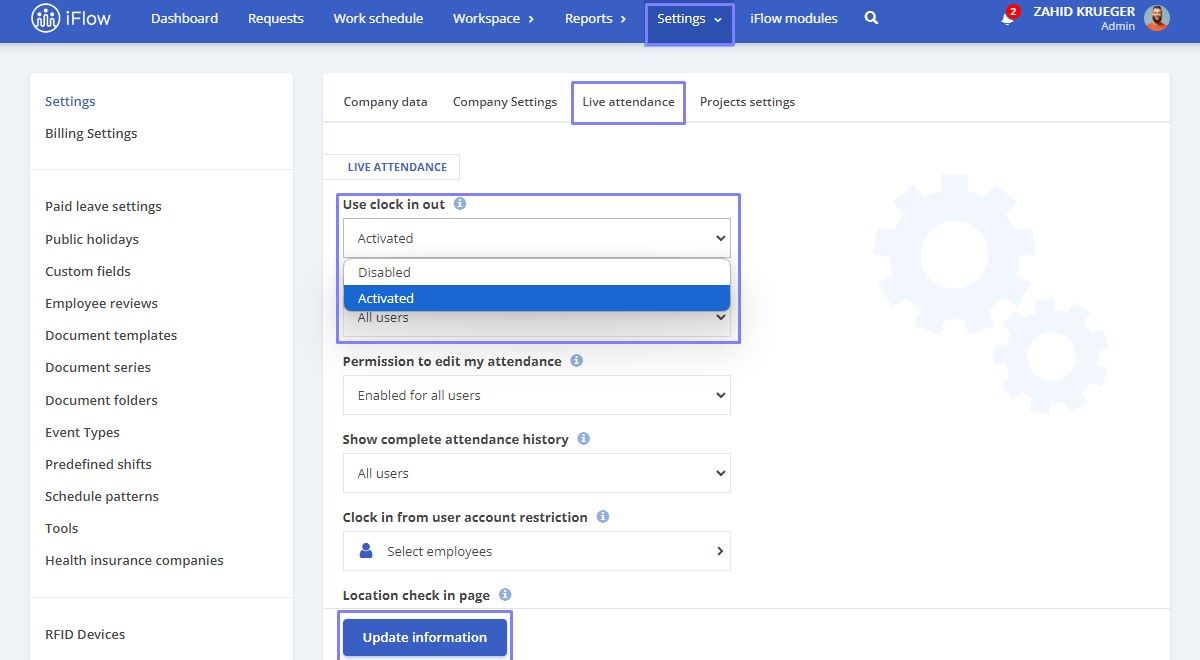
To enable or disable the Add attendance button, go from the Dahboard – Settings – Company – Live attendance – Use clock in out – Activated or Disabled.
How to set visibility
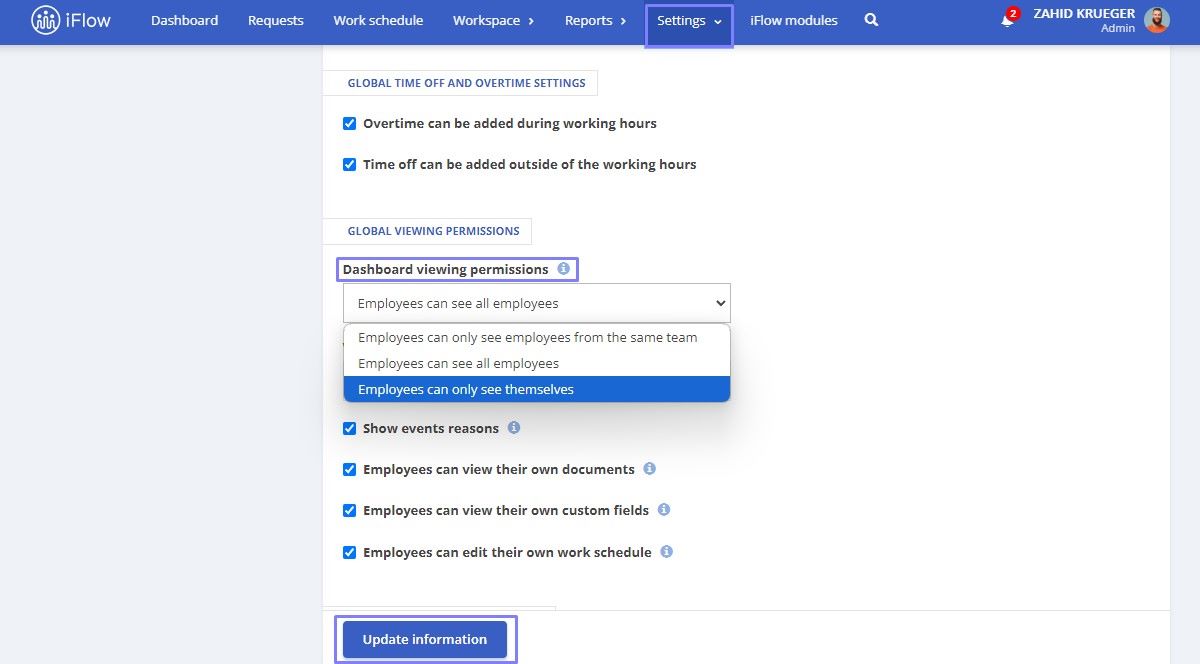
Set visibility accessing from main menu Settings – Company – Company Settings – Global viewing permission– Dashboard viewing permissions. Here, you have three options:
- Employees can only see employees from the same team
- Employees can view all employees
- Employees can only see themselves
Widgets
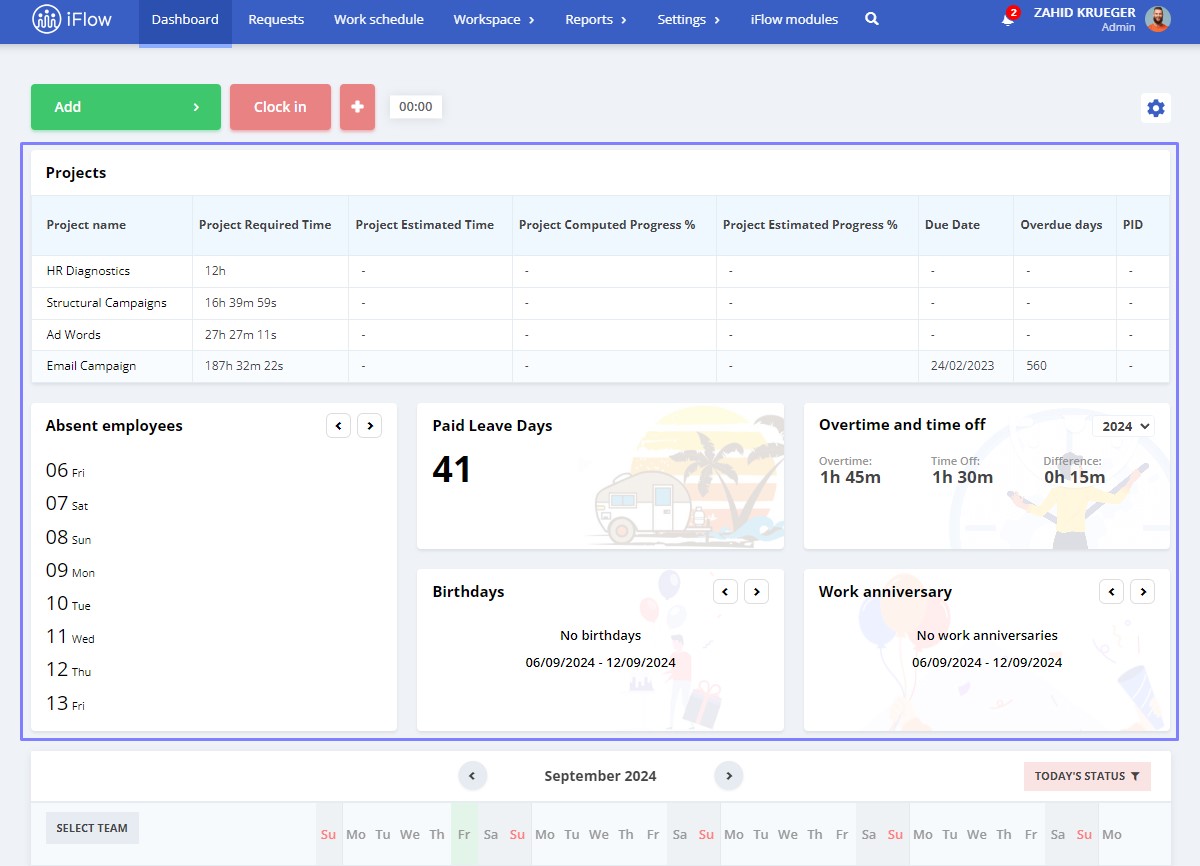
You can customize your Dashboard with widgets according to your preferences or needs. On the right side of the Dashboard, click the Settings icon to view three user categories:
- Administrator
- Leader
- Employee
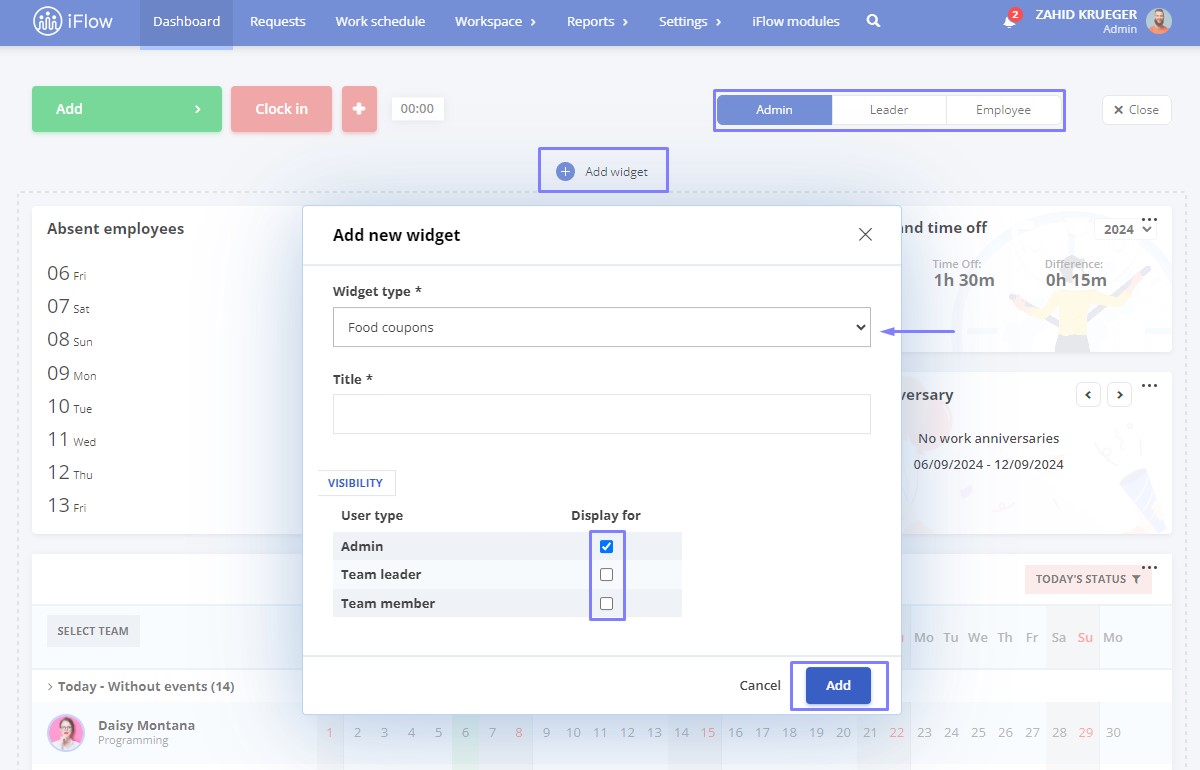
Selecting one of these categories lets you see which widgets are available for each. Different widgets can be set depending on the user category. Click on Add widget. In the popup, select the Widget type, Title, and Visibility.
The types of widgets you can choose from are:
- Dashboard classic – The main dashboard with employees and events
- Absent employees – A daily list of absent employees
- Employees birthday – Birthdays with their corresponding dates
- Available paid leave – The number of available leave days
- Food coupons – The number and value of meal tickets
- My projects – Company projects and essential details
- Last events – A log of recent events (leave, absences, etc.)
- Overtime and time off – Record of overtime and absences, as well as their differences
- Employees work anniversary – The date an employee started working
- Custom message – Add any text, image, video, or link, and modify sizes, colours, and other settings
How to add a custom widget
- On the Dashboard, click the Settings icon on the right side
- Click on Add widget
- In the popup, select Custom message as the Widget type
- Enter a Title
- Choose which User type should see this widget in the Visibility section
- If you do not want background, check the Hide background option
- Click the Add button
How to add information to a custom widget
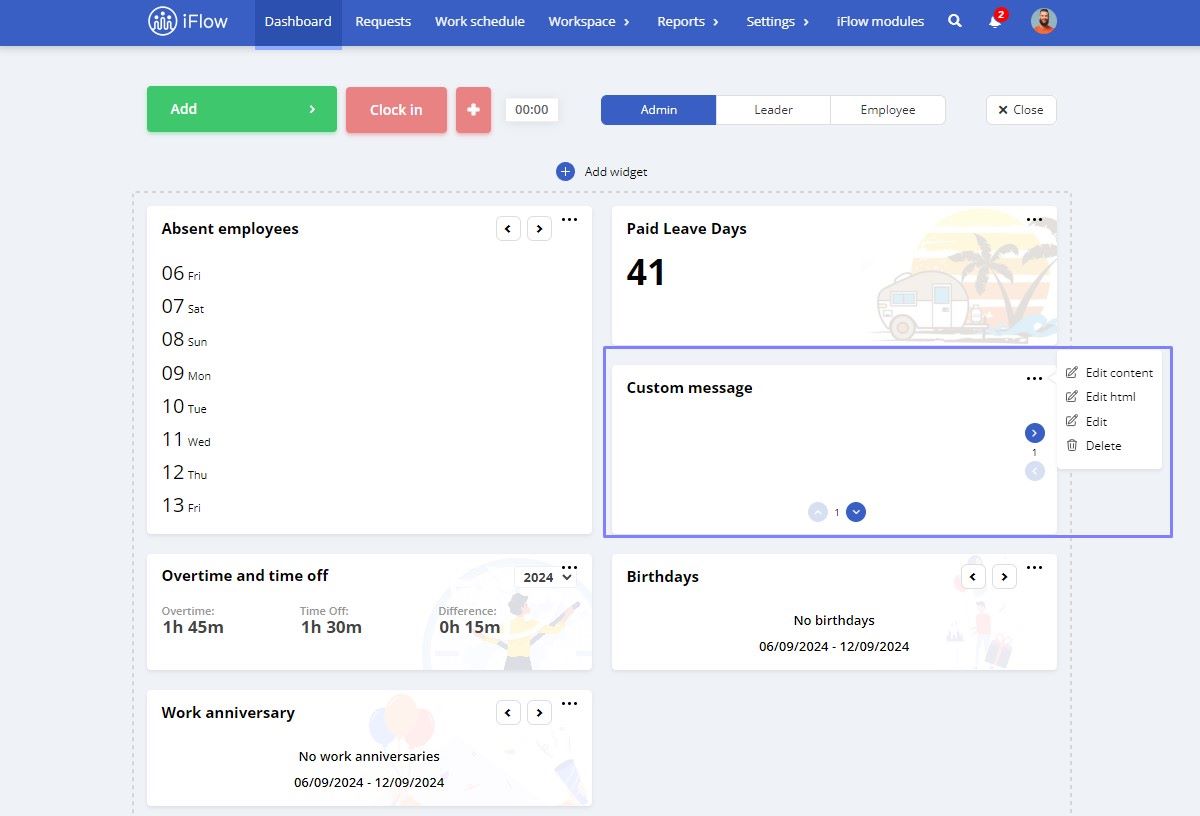
- Click the Widget icon from the Dashboard
- Click the three dots on the right side of the widget
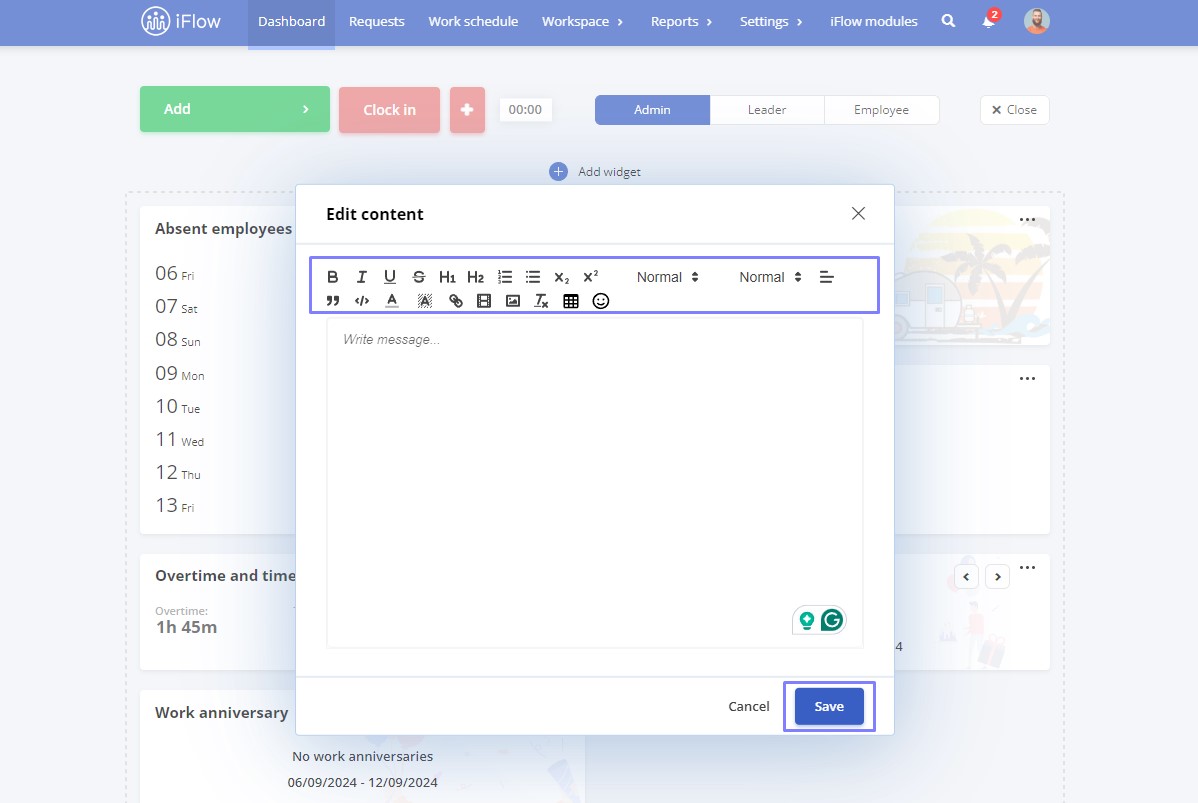
- Choose from the options Edit content, Edit HTML, Edit or Delete
- In the Edit content section, you can add text, images, links, videos, tables, and emojis
- In the Edit HTML section, you can customize the text by adding HTML code
Administrators have access to widget settings to configure them for all user categories.
To edit or delete an existing widget:
- Click Settings on the Dashboard, then on the Widget icon
- Click the three dots on the right side of the widget
- Choose Edit or Delete
- Then click on Close button to finish the action
Filters
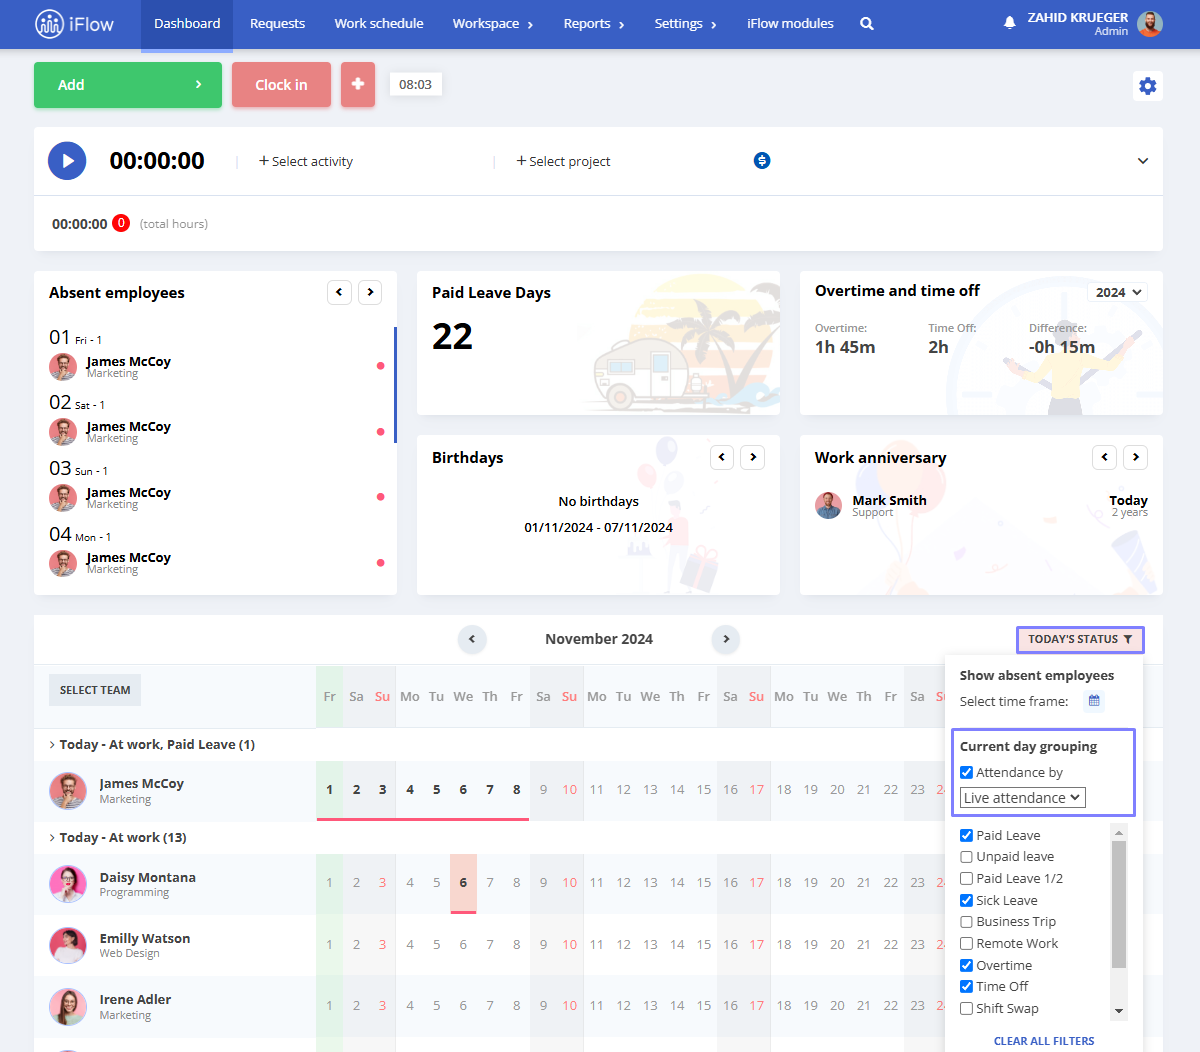
You can filter employees on the Dashboard based on your needs. To do this, click on the Today’s status button.
With this button, you can display:
- Absent employees for a specific period
- Attendance based on Work schedule or Live ettendance
- Employees with a specific type of event: Paid leave, Sick leave, Business trip, Overtime, etc
To clear all filters, click on the Clear all filters button.
One Button Application
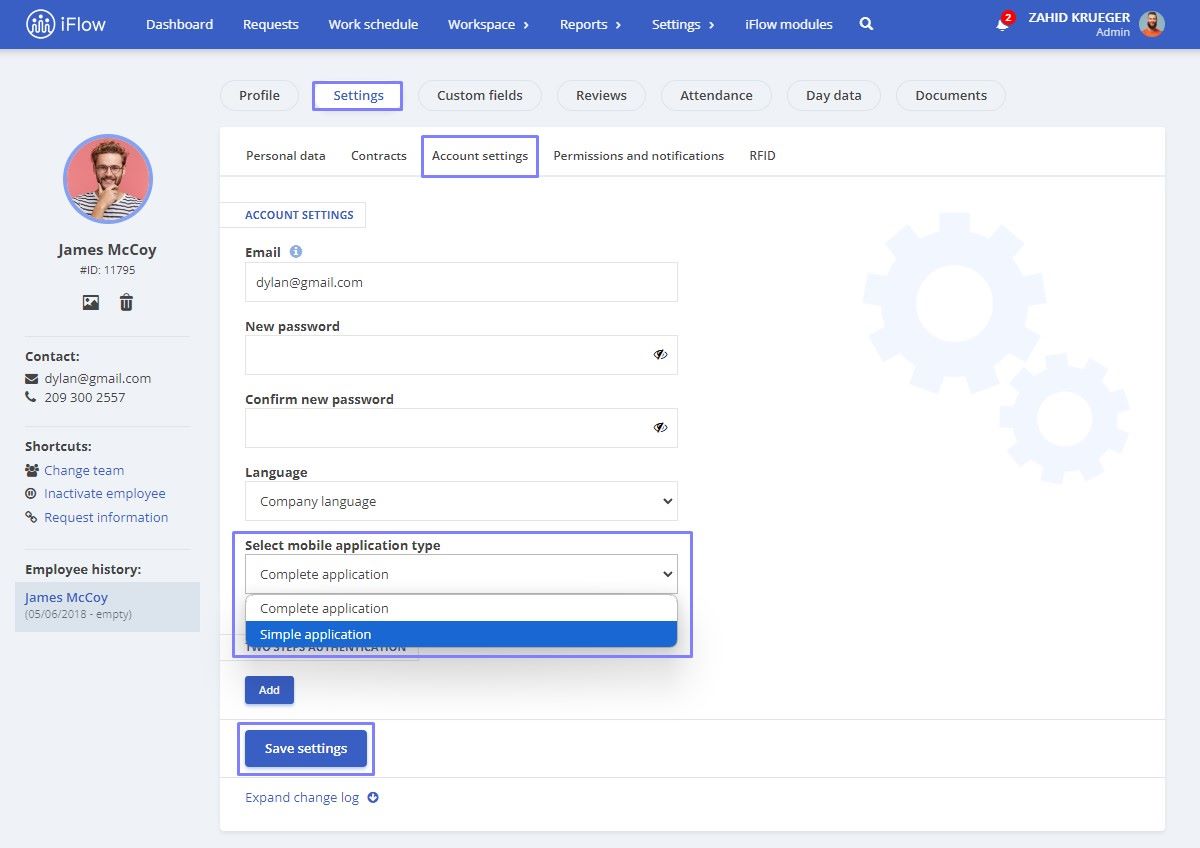
This option must be activated separately for each employee by following these steps:
- Go to the Employee profile
- Access the submenu Settings – Account settings
- In the field labelled Select mobile application type, choose the Simple application option
- And then click on Save settings
How to display a specific team on the Dashboard
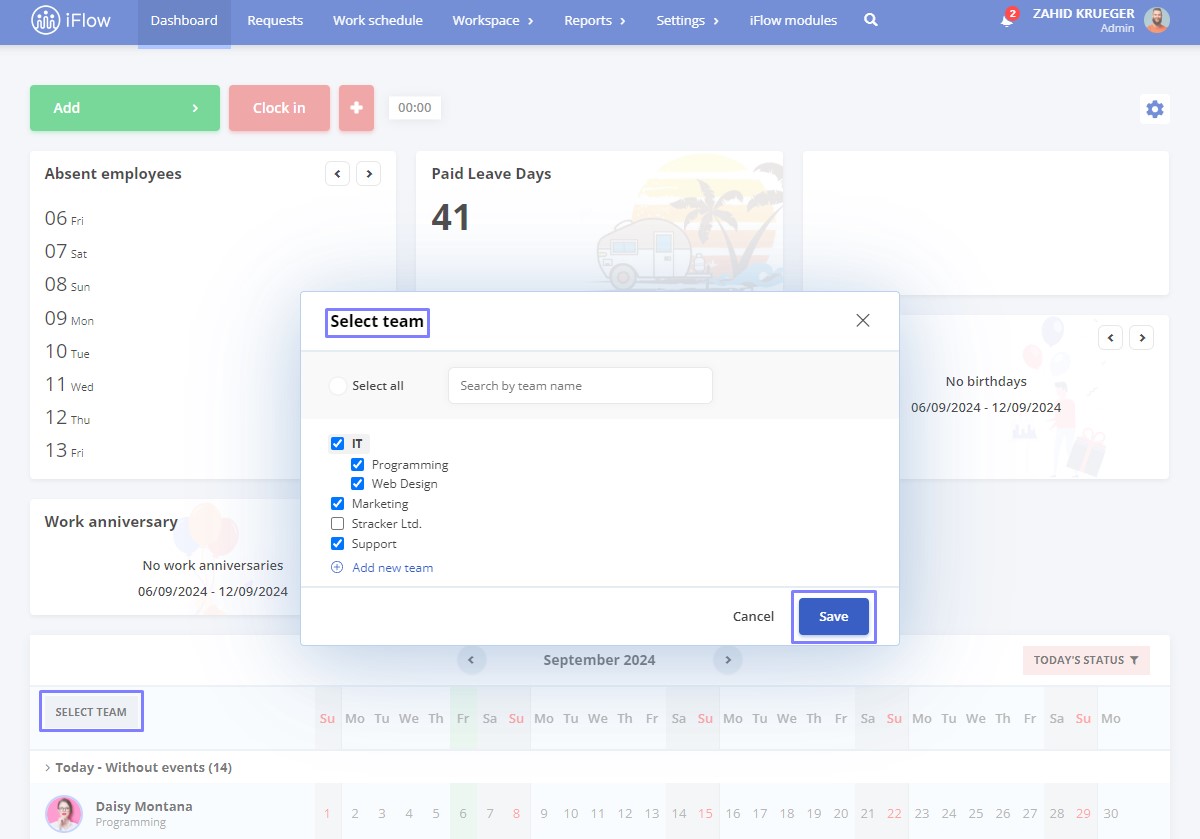
You can display specific teams on the Dashboard, depending on your needs. To do this, click the Select team button on the left and check the box for the team you want to display.
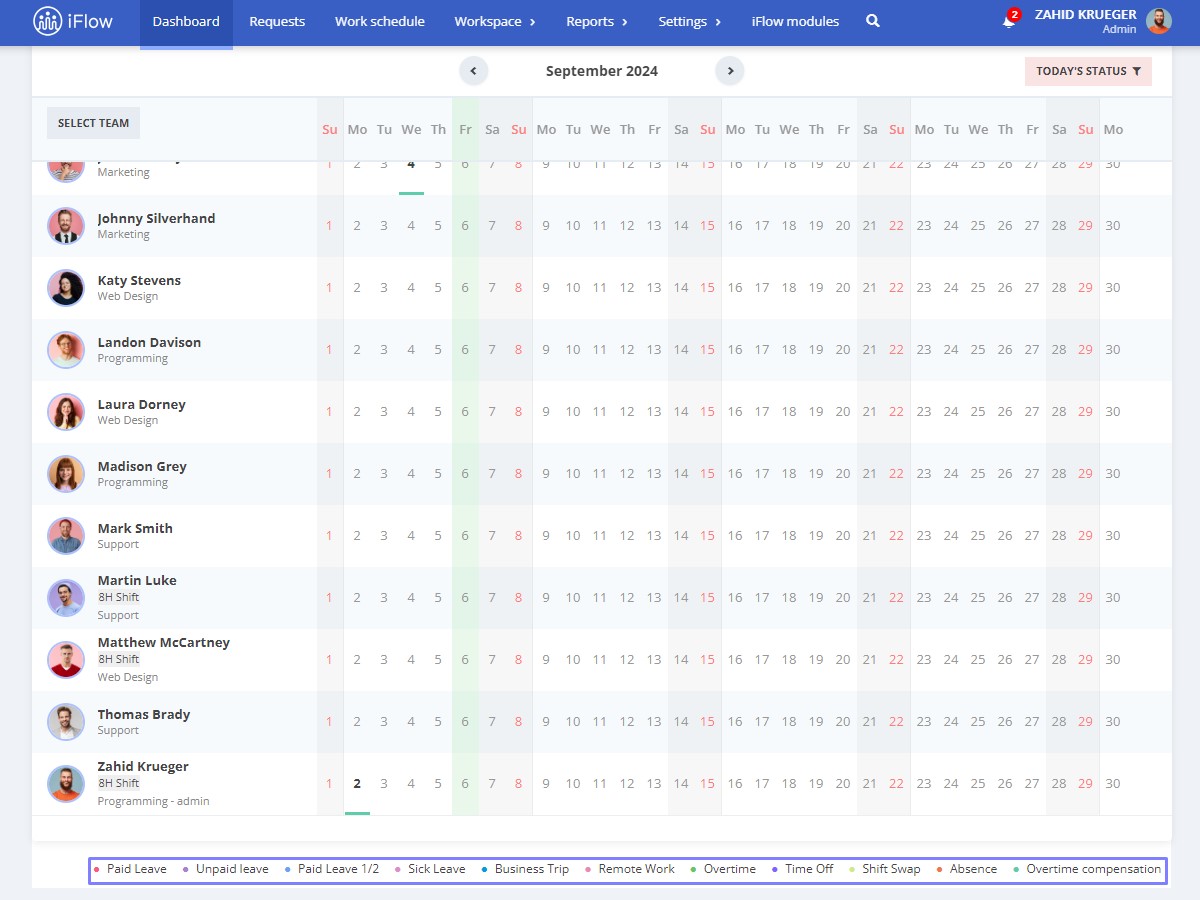
Where to view the event legend
Each employee’s event for the current month is displayed on the Dashboard. At the bottom of the page, you will find the event legend. Additionally, by hovering over an event on the calendar, you can view details such as the event type, total number of days, date range, and request reason. From this view, you can also Delete, Edit, Reject, or Approve events by clicking on the three horizontal dots.
