
Most types of paid leave or special leave days are created by default in the application. In addition, each company can control these aspects:
- Can create new types of paid leave
- Can choose the automatic allocation of these days or they can allocate them manually
- May set an annual limit for them
- May change the number of days available for each type of paid leave
- May disable existing types
Find the steps below for each action mentioned above.
How do I create new types of paid leave?
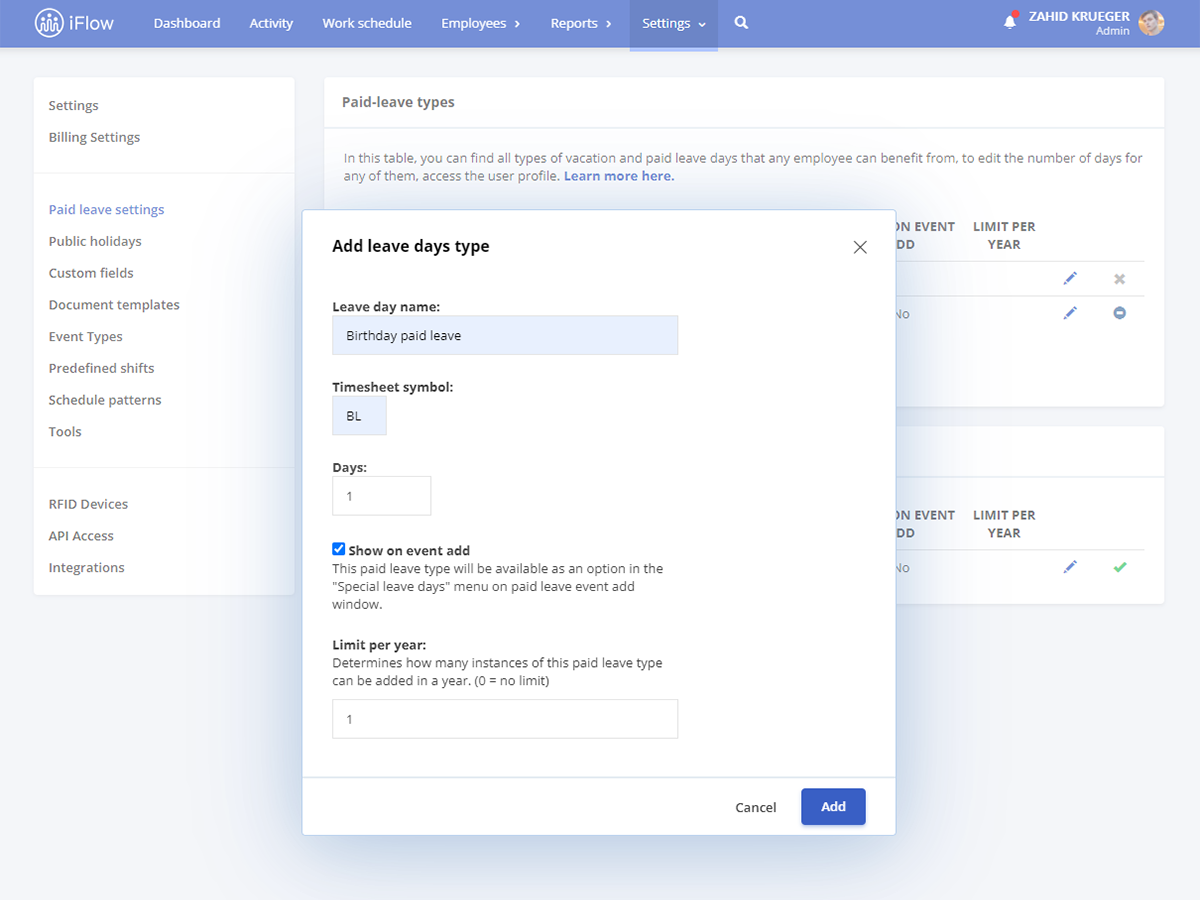
If you need a new type of paid leave that is not in the predefined list, you can create it by following the steps below.
- From the main menu “Settings” – “Paid leave“
- Click on the “Add” button
- Fill in the name of the paid leave
- Choose the symbol for the timesheet
- Fill in the total number of days available
- Check the “Show on event add” box (explanations for this setting below)
- Set limit per year (explanations for this setting below)
- Click on “Add“
Automatic allocation of paid holidays / special leave days
The automatic allocation of these days is done by checking the box “Show on event add”. This means that employees can add the event directly from the paid leave add-on window by selecting the “Special leave days” type.
Manual allocation of paid leave / special event leave
- From the General panel
- Click on the name of the employee to whom you want to add a type of paid leave
- In the “Paid leave days” section, click on the “Add” button
- Choose the type of paid leave (either one of the predefined ones or one of the ones you created)
- You can change the explanatory note
- Allocate the number of days available for this type
- Choose the year (often used for rest days related to a year other than the current one)
- To complete the action, click on the “Add” button
Annual limit activation
To activate the annual limit just follow the steps below. This is activated for each desired paid leave, separately.
- From the main menu “Settings” – “Paid leave“
- Click on the “Edit” button next to the paid leave
- Fill in the limit figures (1 = once a year)
- Then click on “Save“
Change the number of available days
- From the main menu “Settings” – “Paid leave“
- Click on the “Edit” button next to the paid leave
- Make your changes, then click “Save“
Deactivation of paid leave
- From the main menu “Settings” – “Paid leave“
- Click on the “Disable” button next to the paid leave
- Click on “Disable“
Keywords: paid leave, paid leave types, add paid leave, create paid leave, add leaves, leave

