
In iFlow the “Work schedule” panel has multiple roles and you can perform different actions. This is the list of the actions you can perform:
- Set the work schedule
- Plan the work schedule for a long period of time
- View and add events
- Edit, approve/reject events
In this panel, you can find all the information in the same place, so it makes it easier to plan the work schedule along with the paid leaves.
How do I set the work schedule?
The work schedule can be set in 2 ways: directly from the work schedule panel or by allocating predefined shifts. Click here to find out how to create predefined shifts.
Setting the schedule directly in the “Work schedule” panel
- “Work schedule” in the main menu
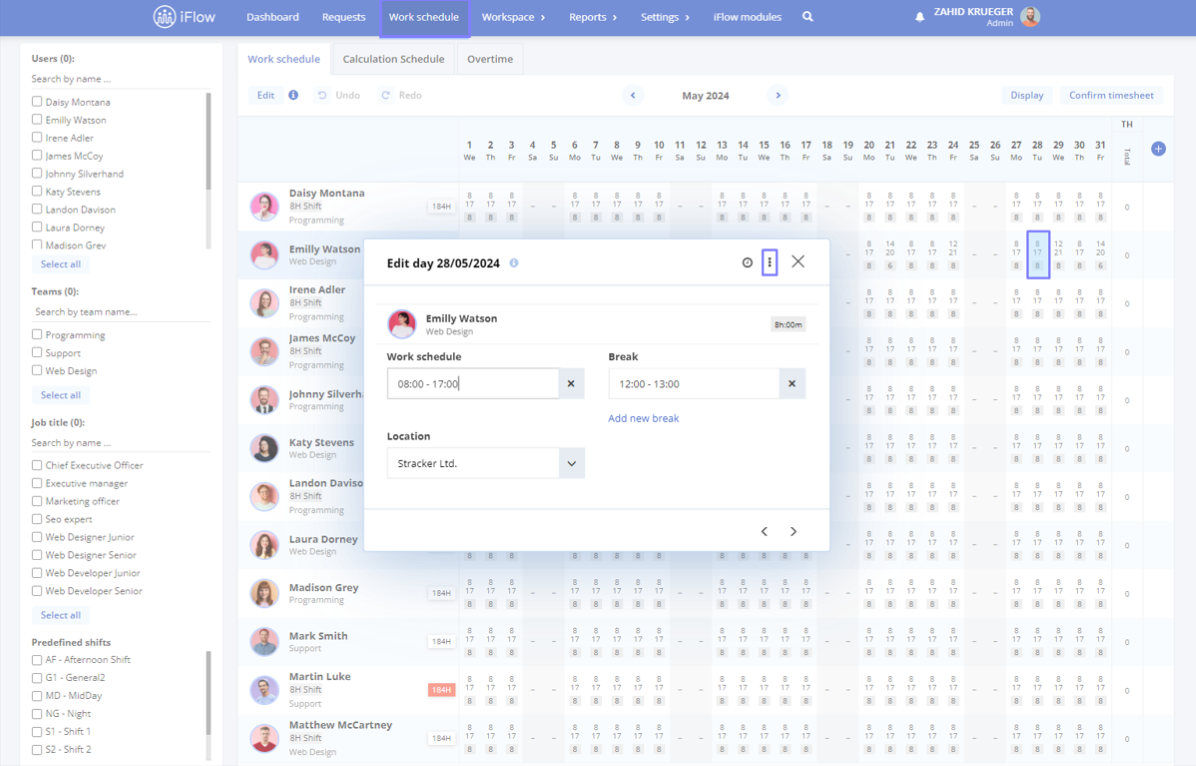
- Double-click on a box
- Set the work schedule and break interval
After setting the work schedule for one employee, you can use “Copy/paste” or Ctrl + C and Ctrl + V to allocate it to all the employees.
All the changes are saved automatically.
Setting the schedule with predefined shifts
To use this feature you need to have predefined shifts created.
- “Work schedule” in the main menu
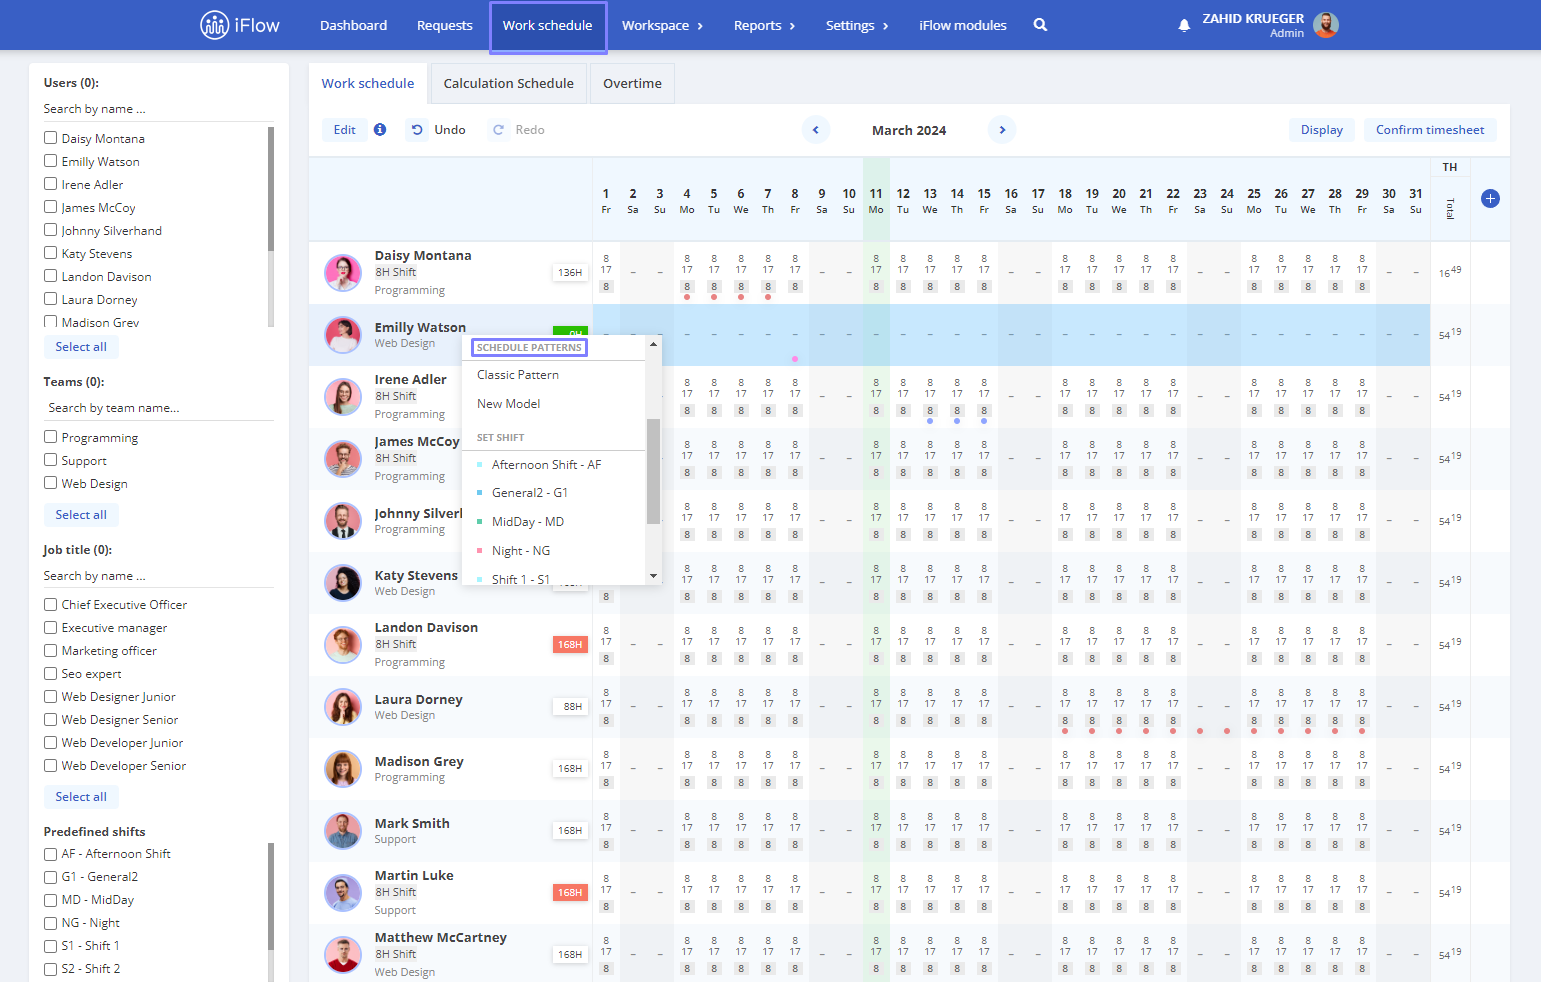
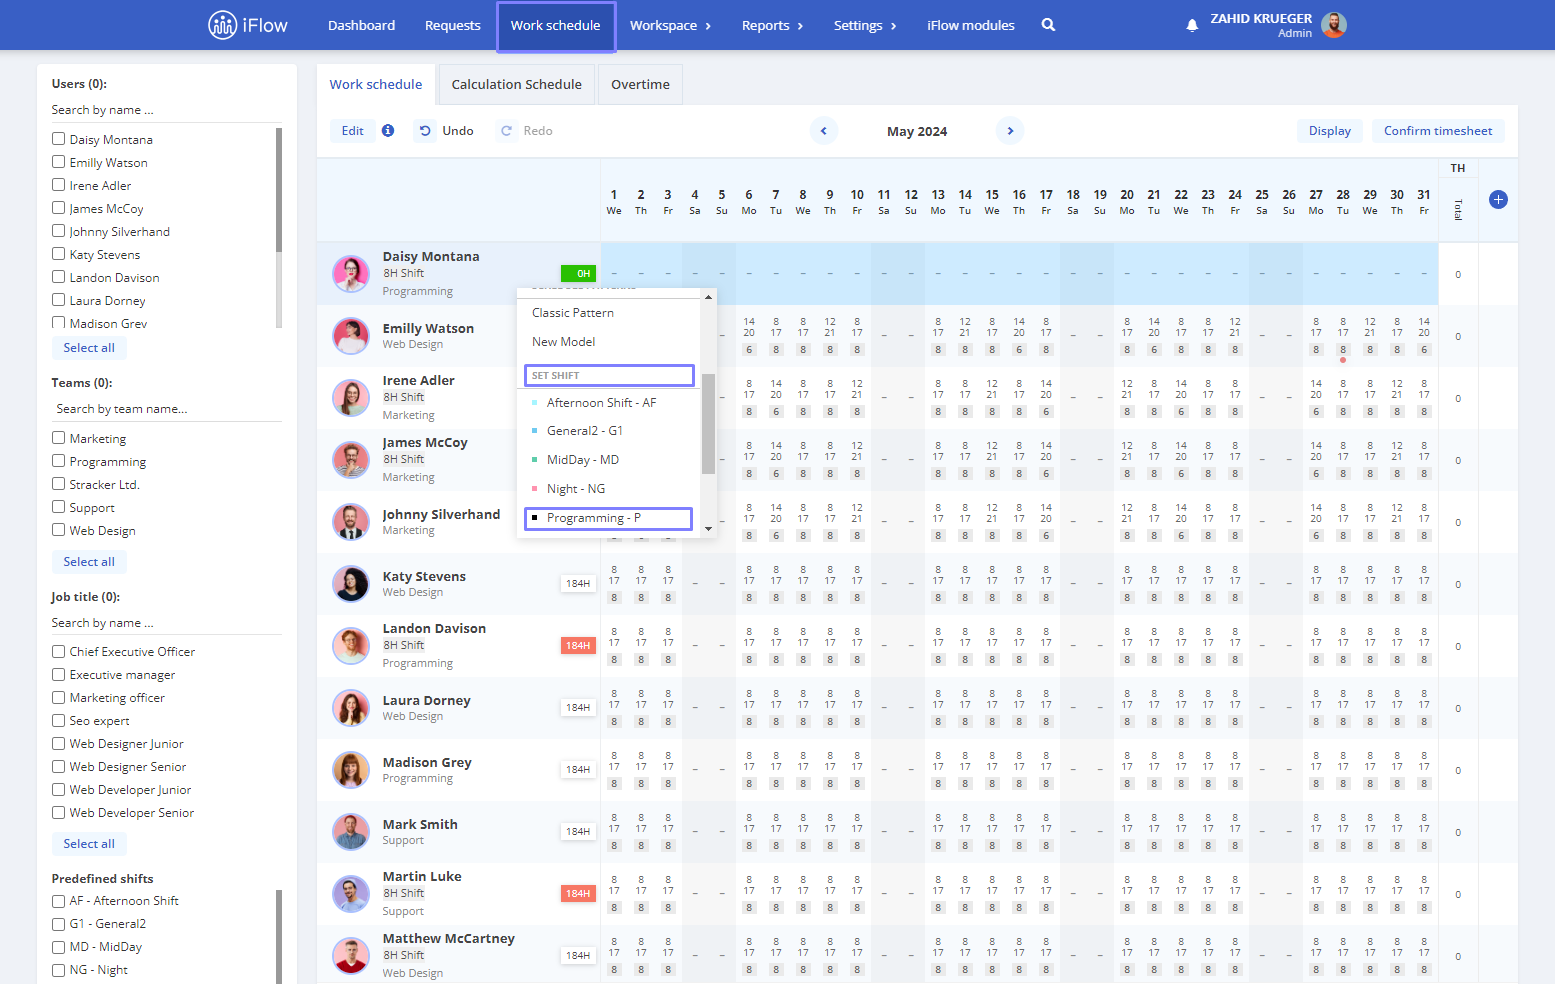
- Right-click on a cell and select the shift
This way you allocated a predefined shift to an employee. You can copy and paste it to other employees.
How do I plan the work schedule for a long period of time?
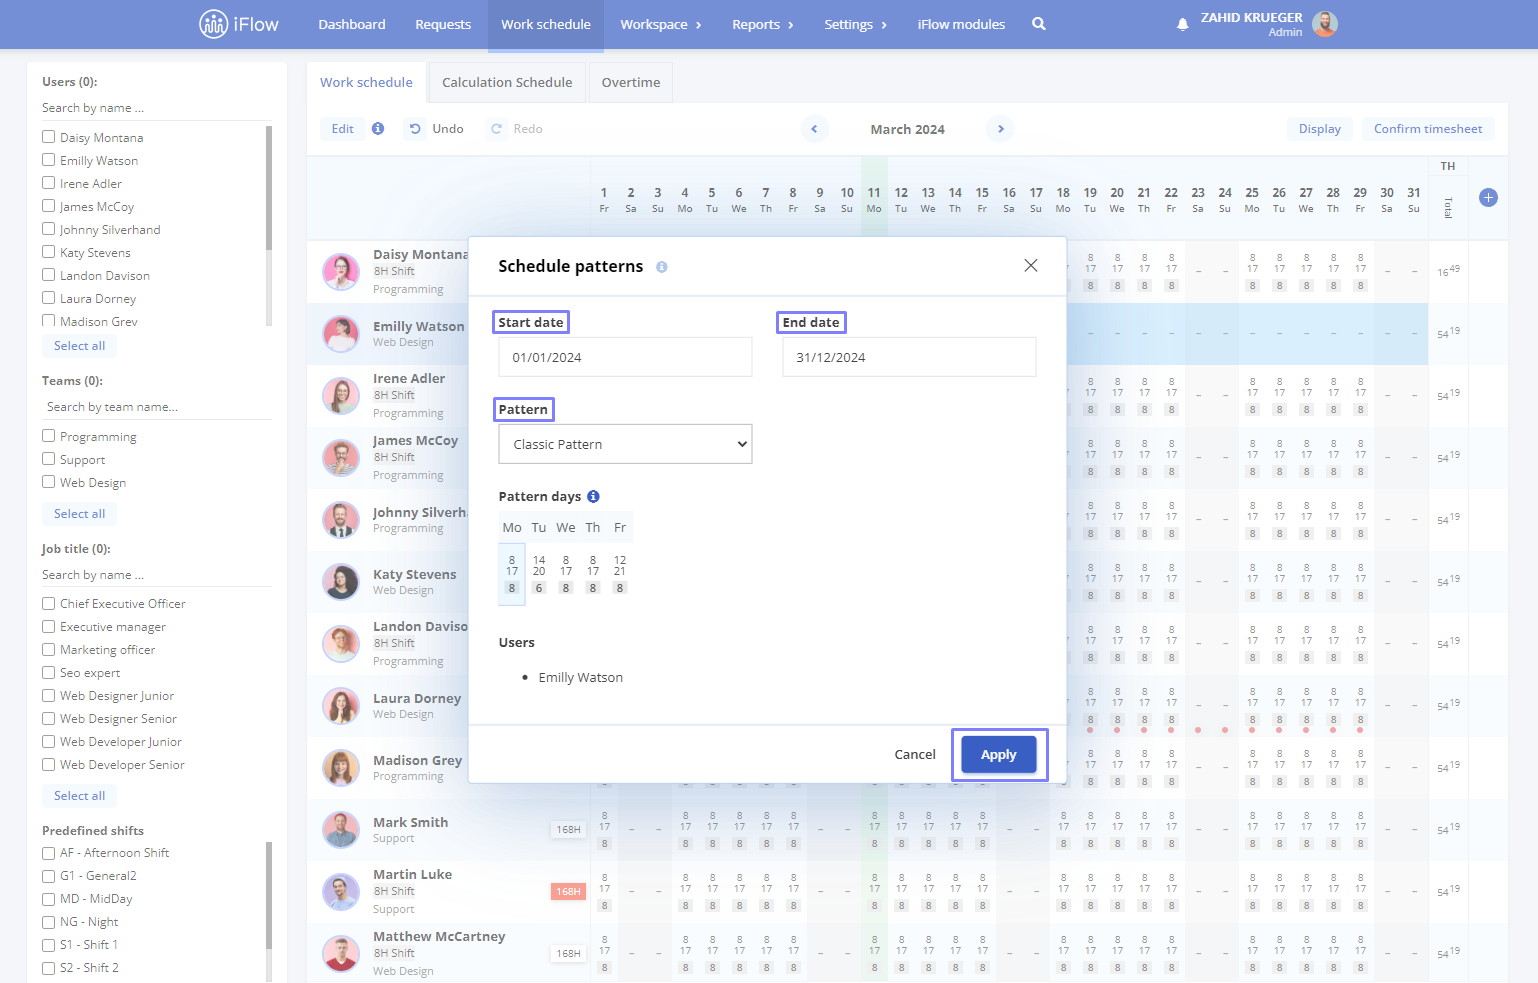
In iFlow it’s easy to plan the work schedule for a long period of time. If your employees have different work schedules, we recommend creating predefined shifts.
For example, if your employees all have the same work schedule, you can select the whole panel, click “Edit” and set the schedule for everyone.
After doing this all you need to do is select the free days and/or weekends from the top bar and press “Delete”.
After you deleted the schedule on these days, the planning is correct. You can do this for every month and in just a few minutes you can plan the work schedule for the whole year.
If your employees work on shift, you can set it for one employee and then copy it for the rest of them. Copy the schedule for a week and paste it for every week during the next months.
How do I view and add events in the work schedule panel?
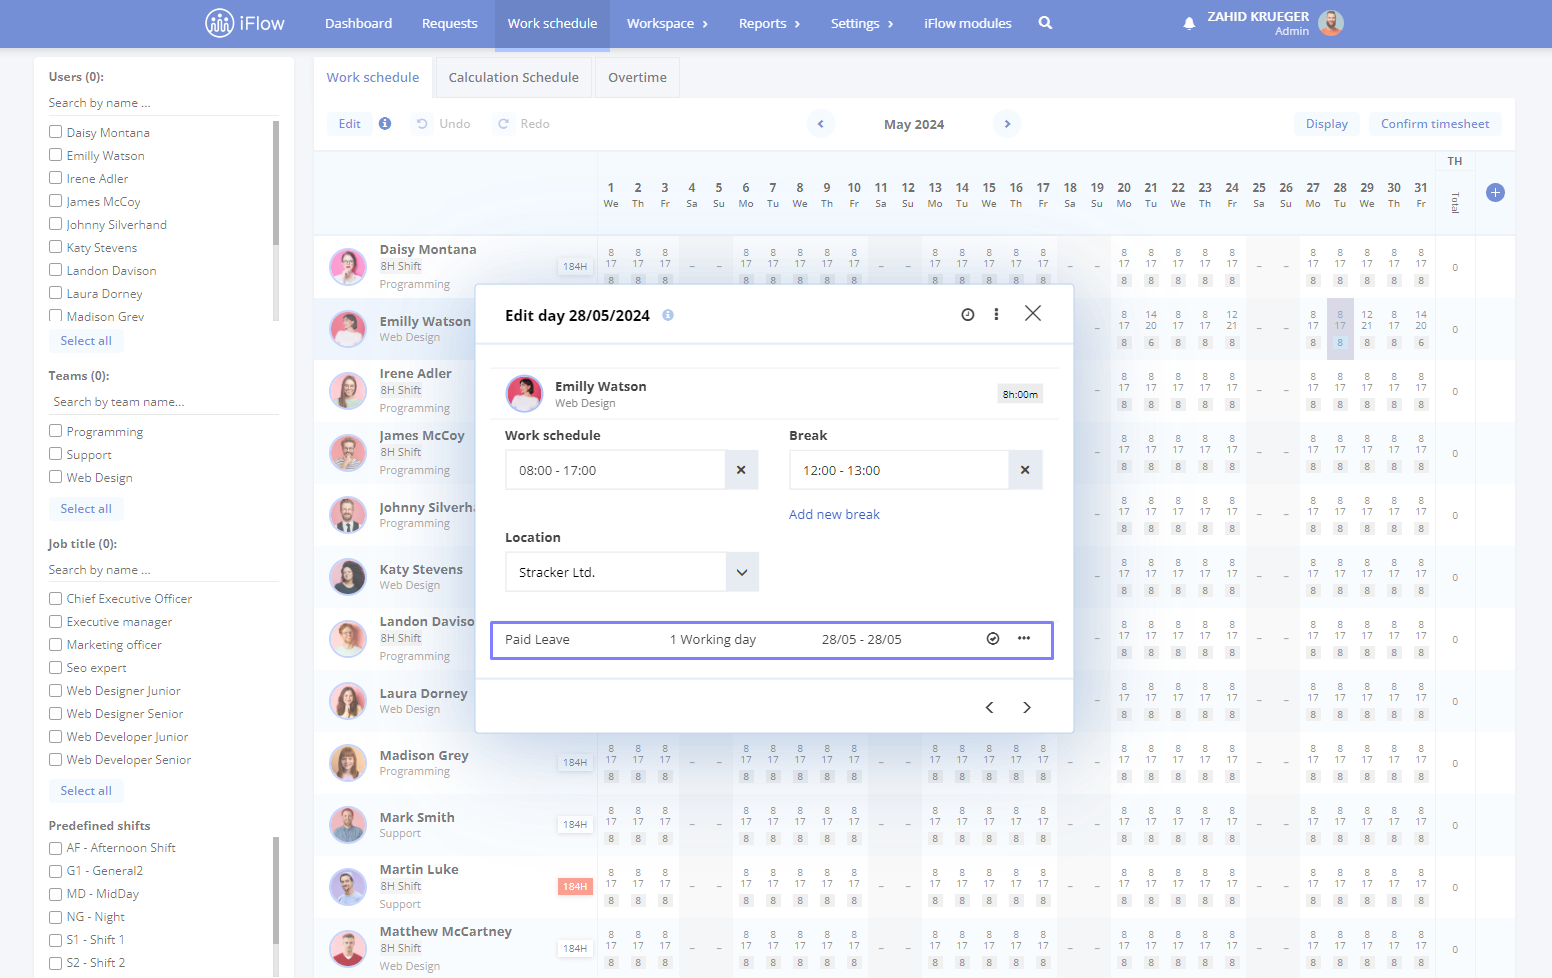
If you already have events added, in the work schedule panel you will notice them alongside the work schedule. They are represented by colored circles (you can see them in the images below).
To add an event directly from the work schedule you need to:
- Double click on the cell of the day you want to add an event
- Click on the symbol from top left, 3 points
- Choose the event that you wish to add
- After you set the time/date interval, click on “Add”
This is how you add events in the work schedule.
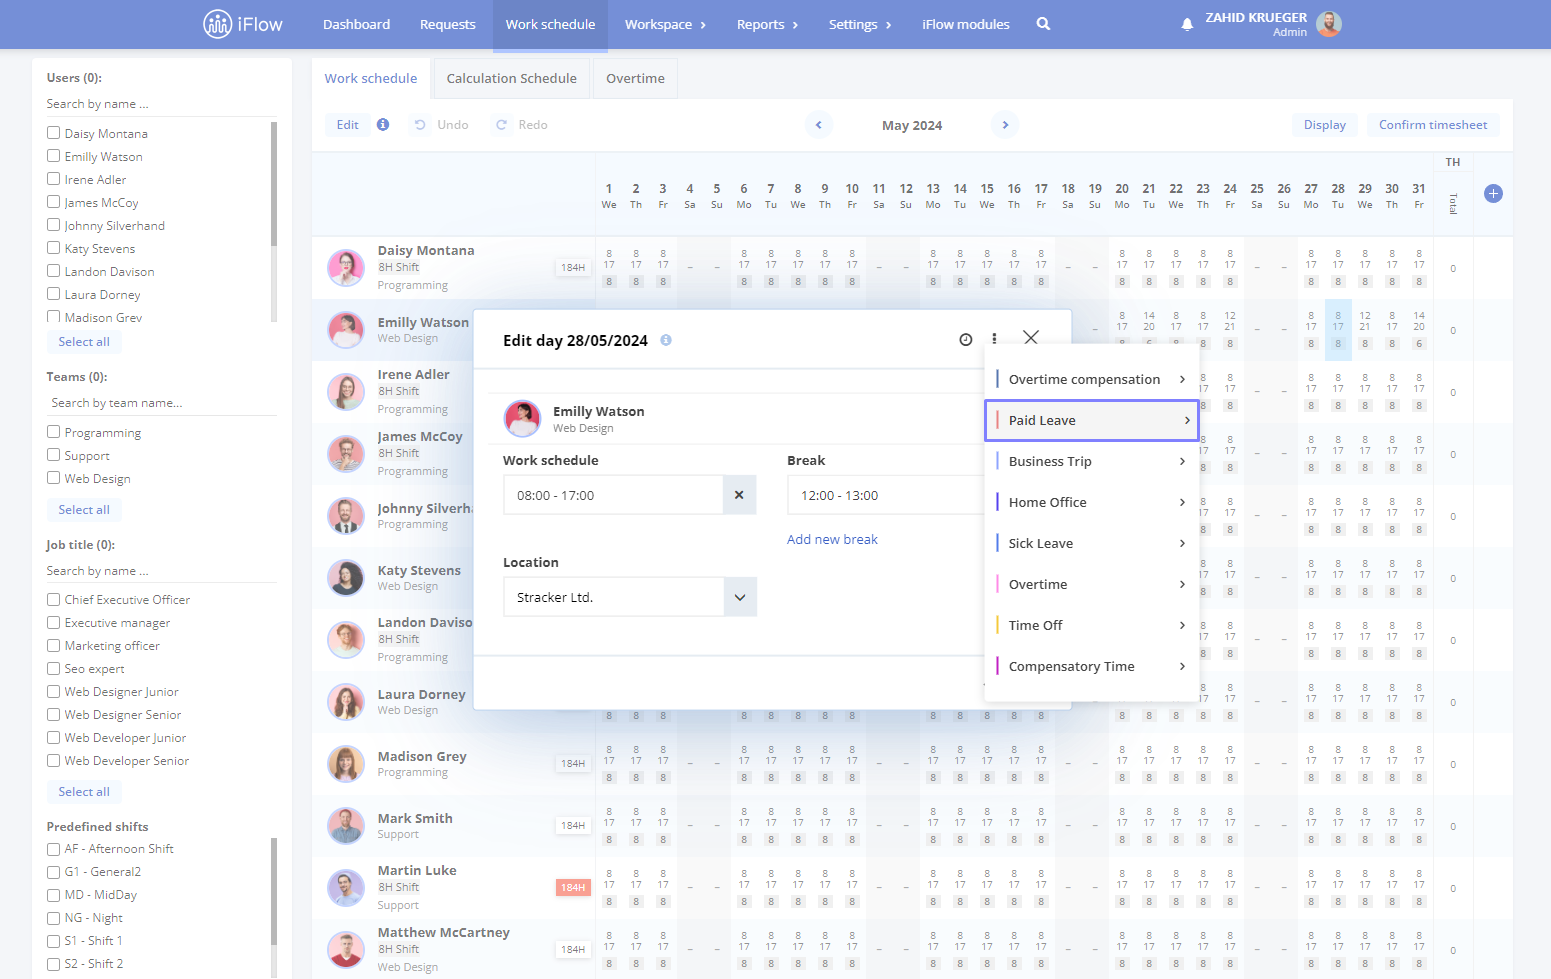
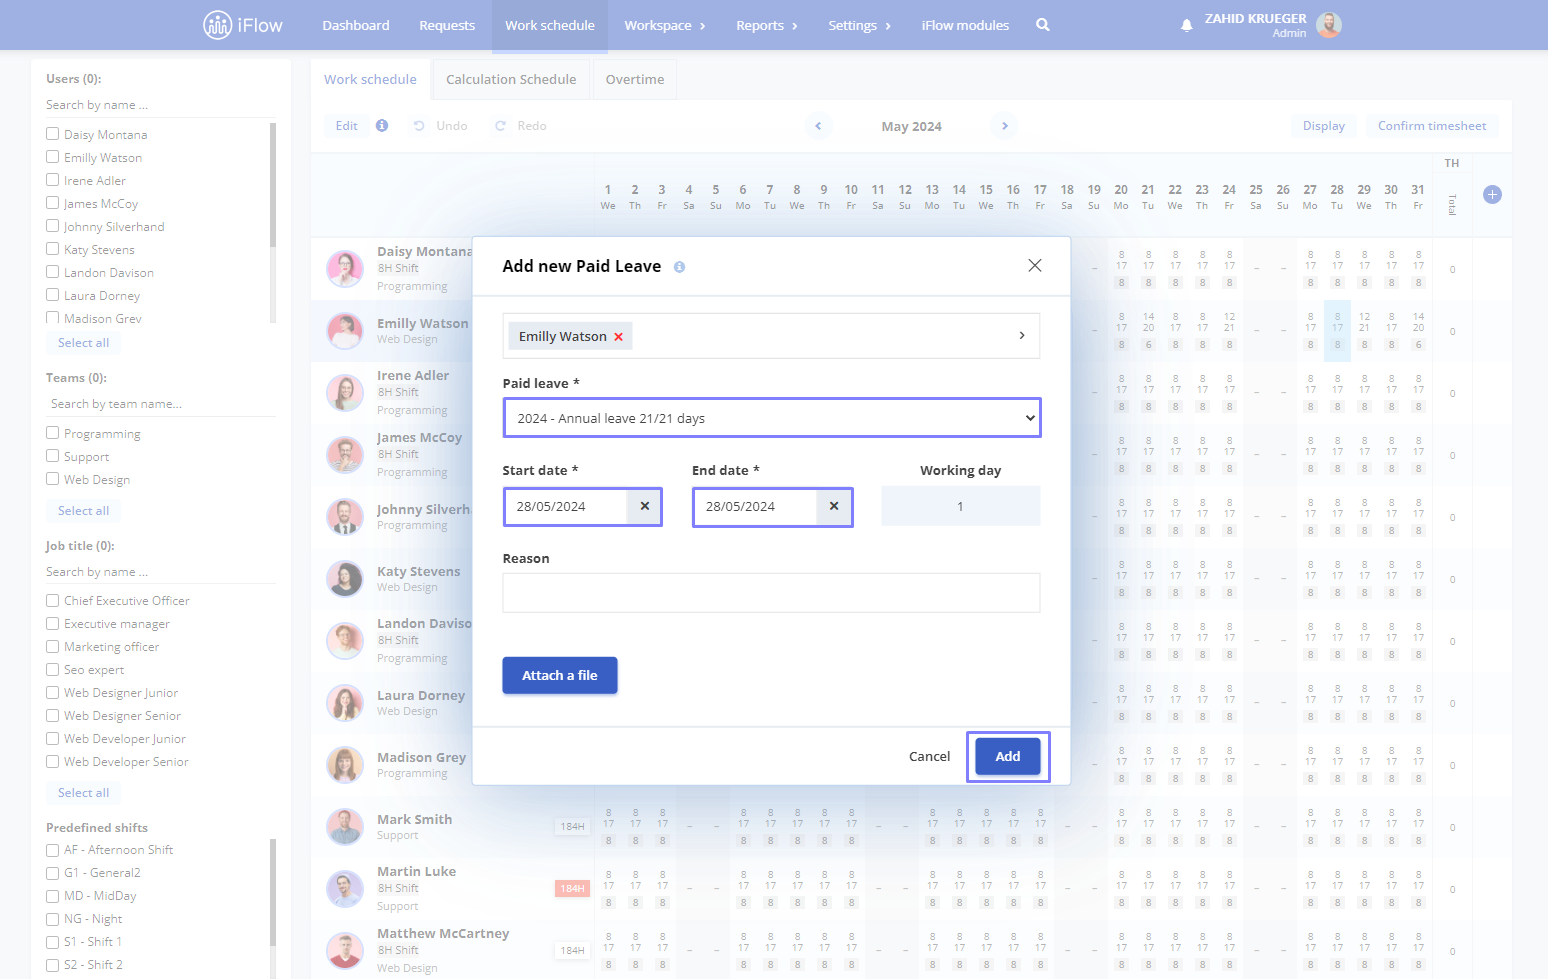
Note! For the time interval type of events: Business trips, Time-off, and overtime you can select multiple employees to add the event at the same time.
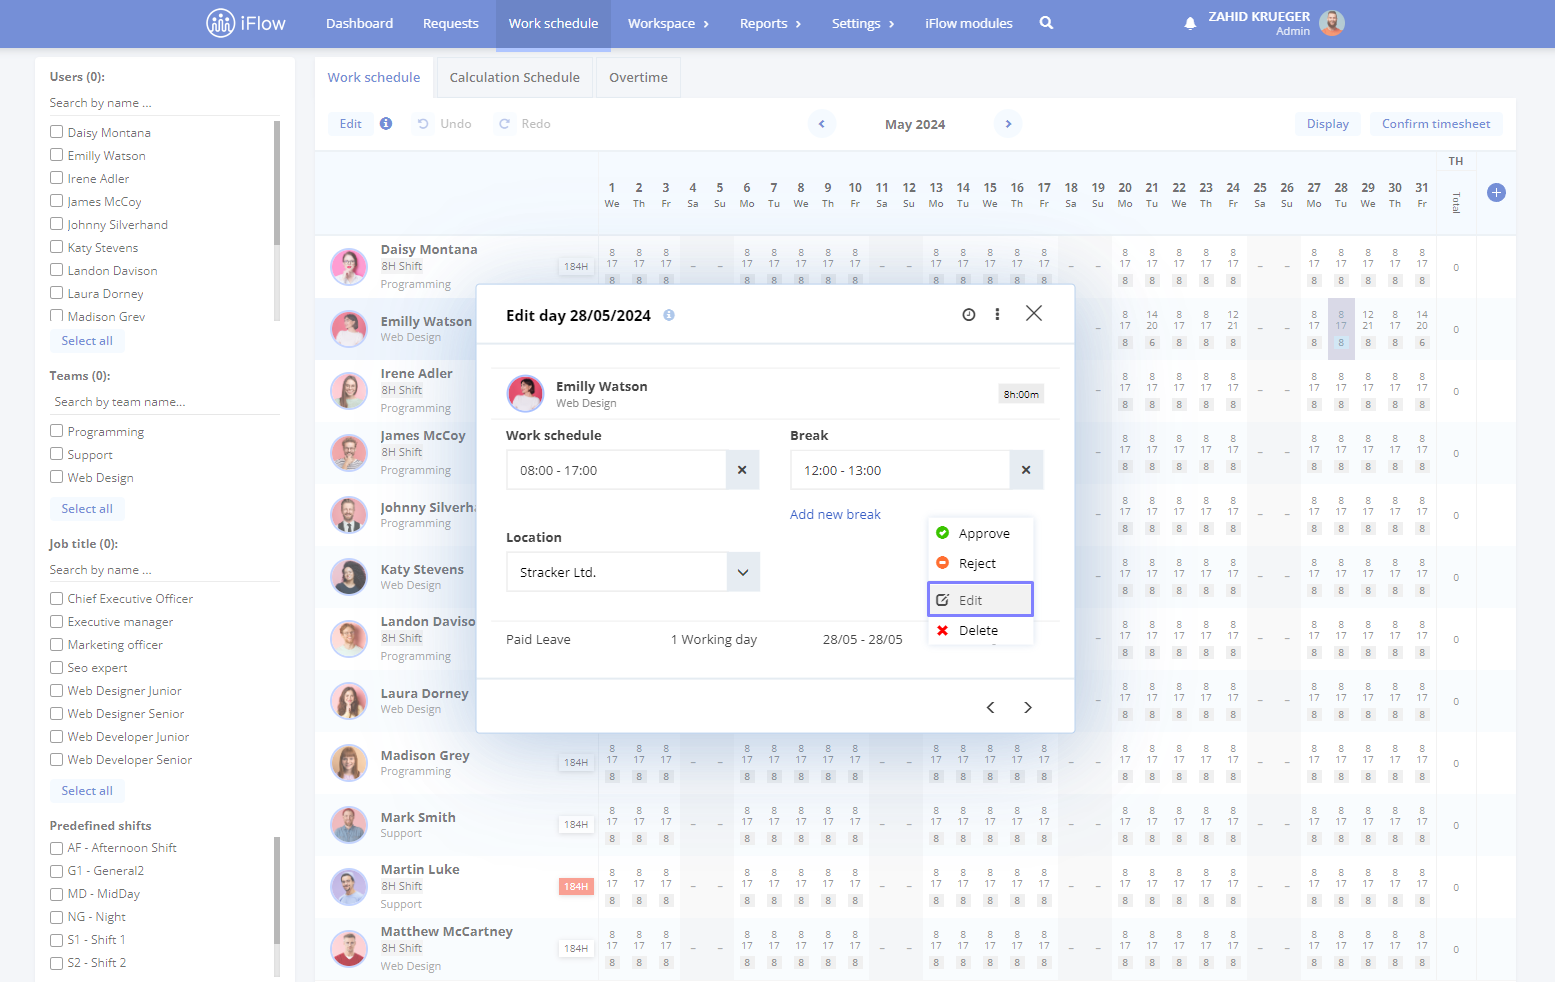
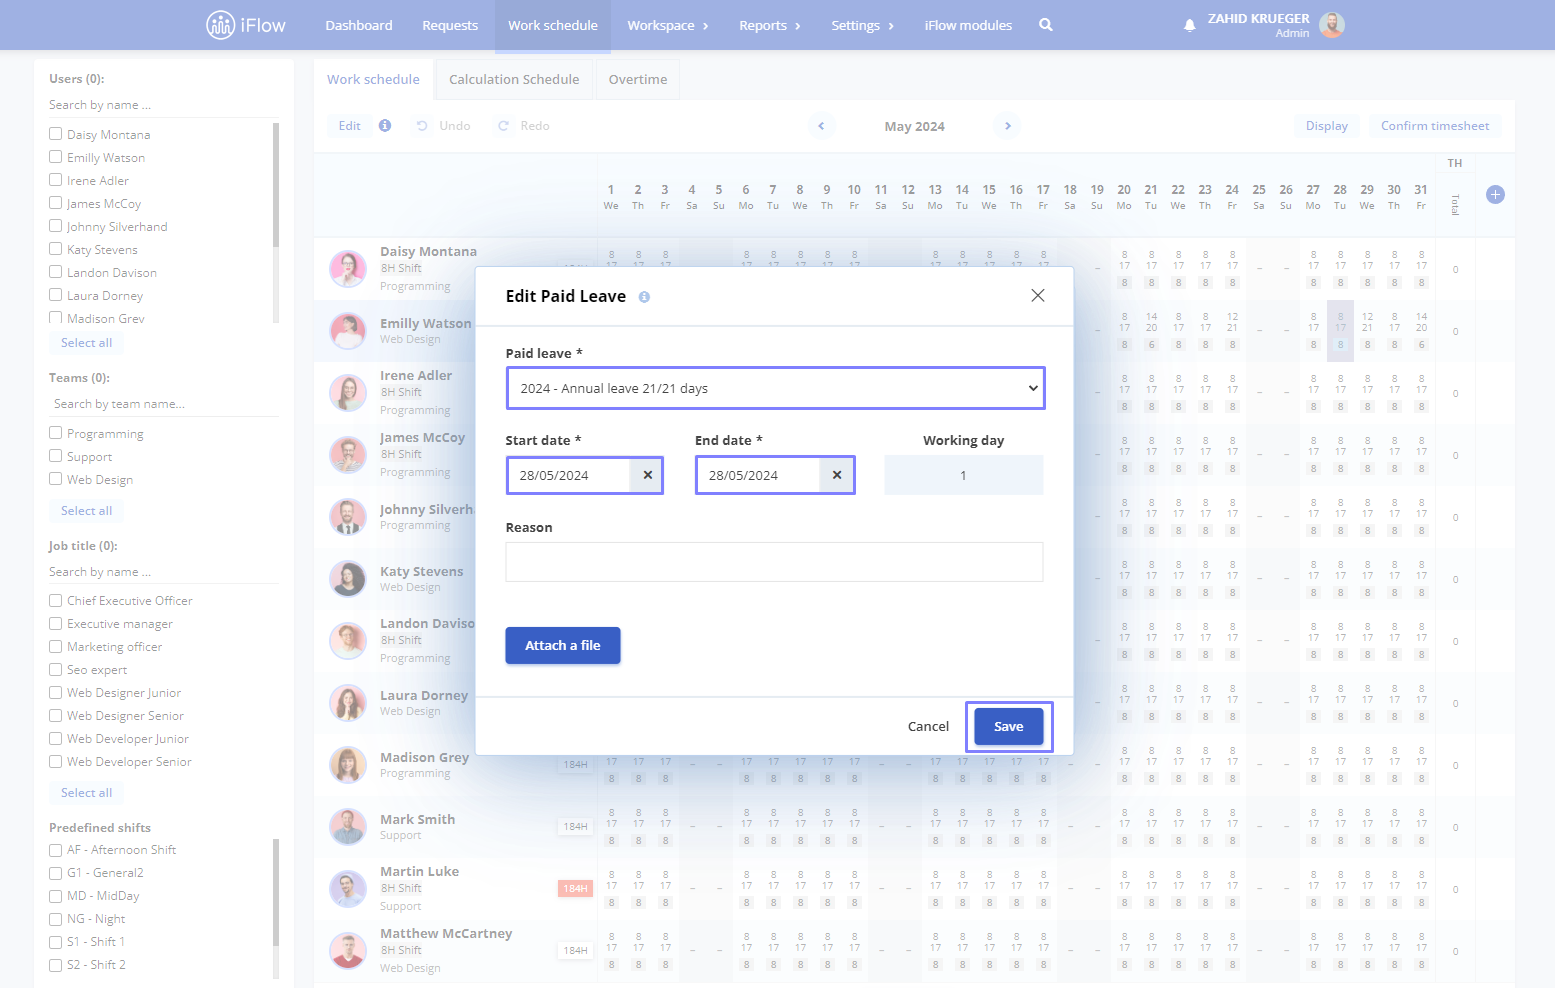
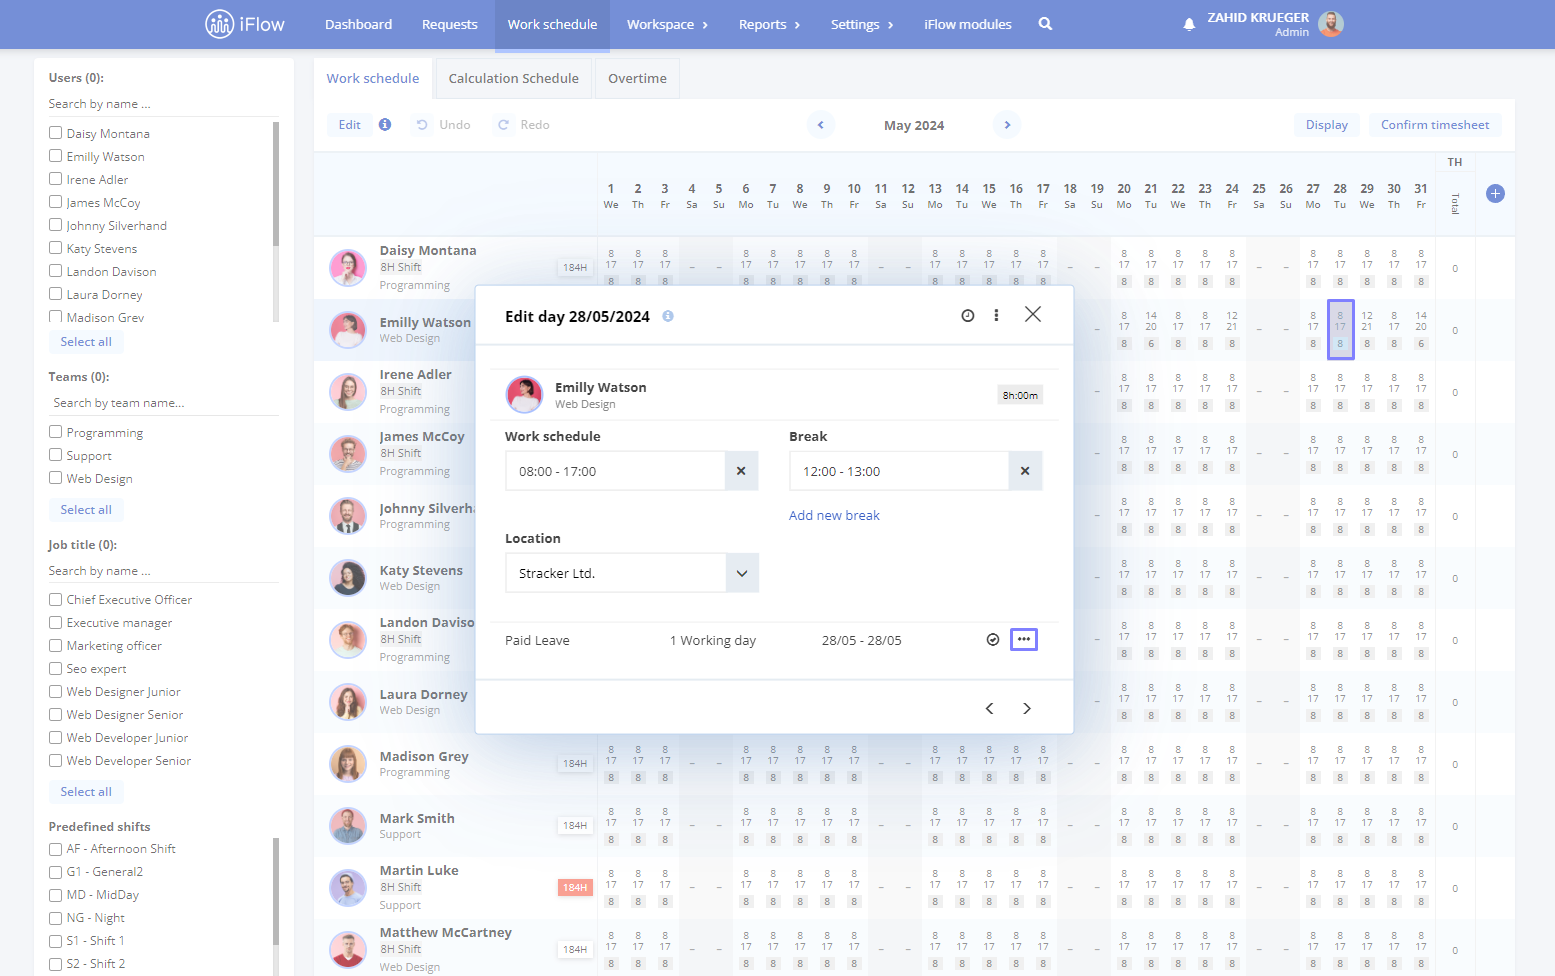
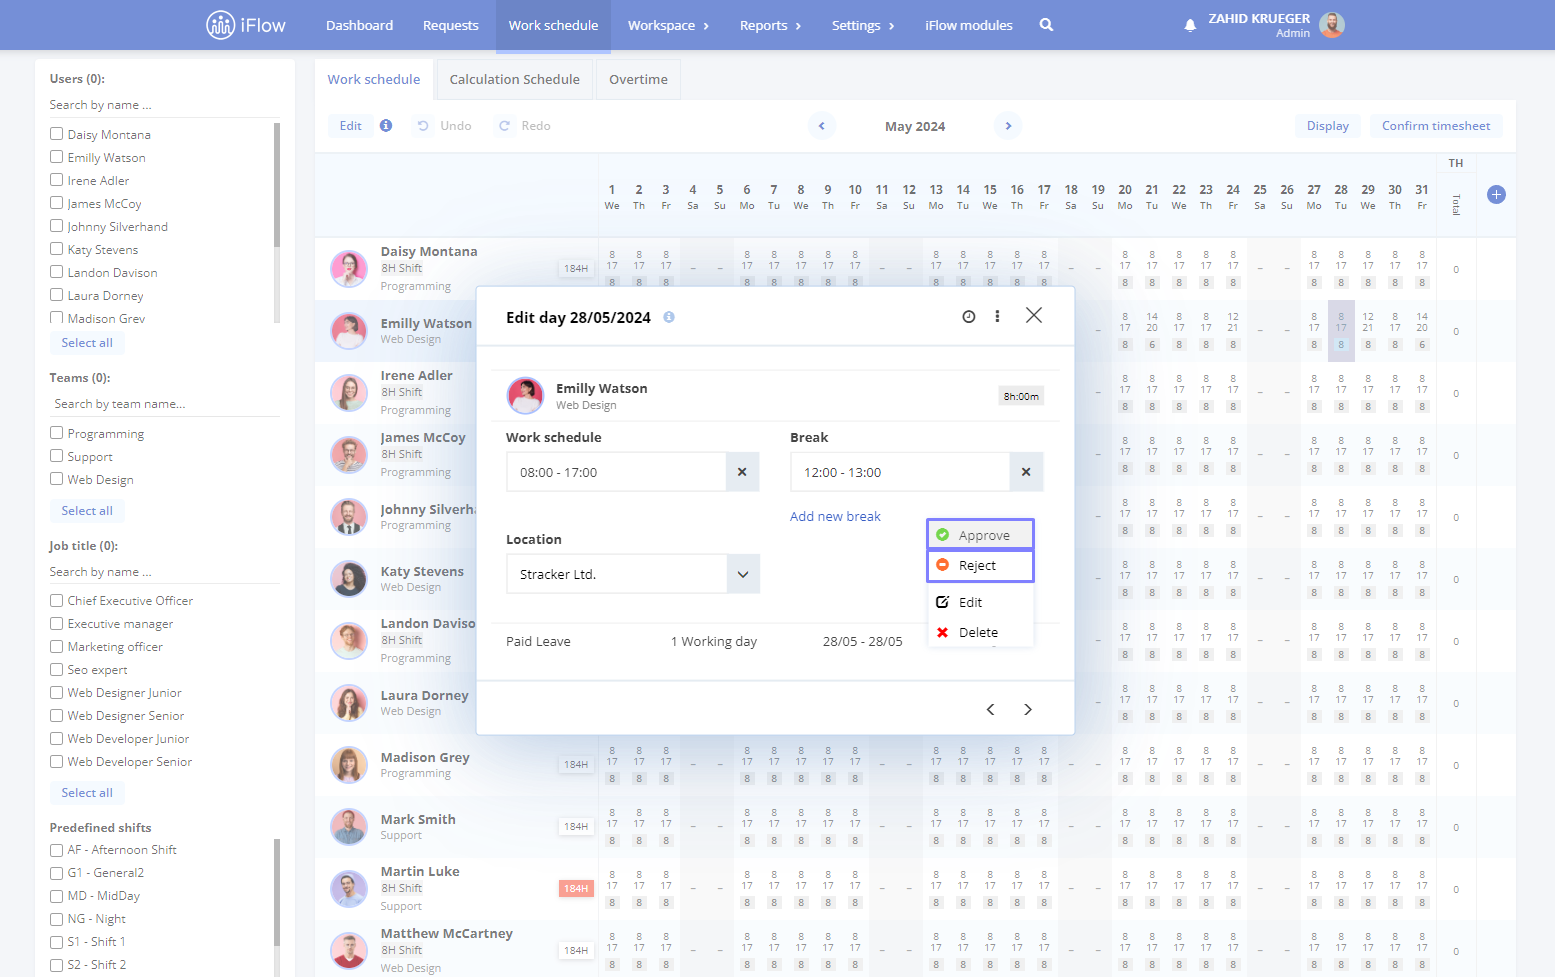
How do I edit/approve/reject an event in the work schedule?
Follow these steps to edit/approve or reject an event.
How do I edit an event?
- “Work schedule” panel
- Double-click on the box of the day of the event
- Click on the “3 points” symbol next to the event
- Select “Edit”
- Make the changes and click “Save”
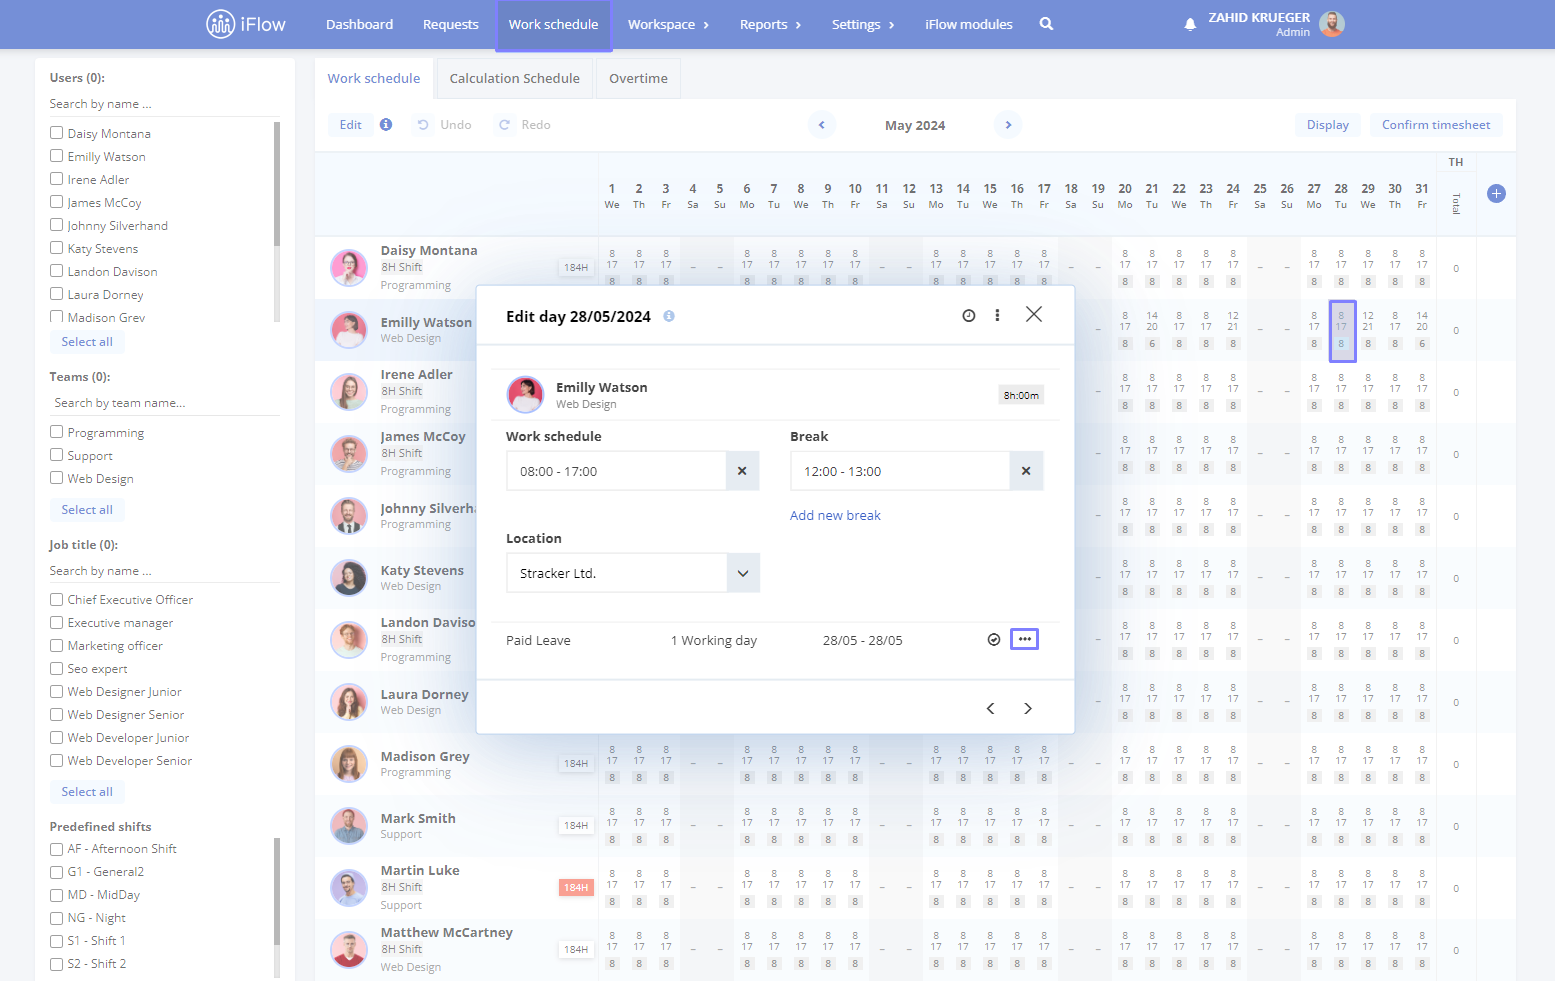
How do I approve/reject events?
- “Work schedule” panel
- Double-click on the box of the day of the event
- Click on the “3 points” symbol next to the event
- Click on “Approve” or “Reject”

Keywords: work schedule, work shift, add work schedule, set schedule

