
This feature was developed to help you and your employees. You can now organize files like: annual leave requests, sick leave certificates, etc.
Any employee that needs to take a sick leave, can do it directly in the app. No longer needing to come into work while not feeling well.
Annual leave requests can be uploaded directly signed. You will be able to find them in iFlow because everything will be saved. You can find all the documents in the Files menu and download or print them.
Read below to find out how to upload documents when you add an event and where you can find the Files menu.
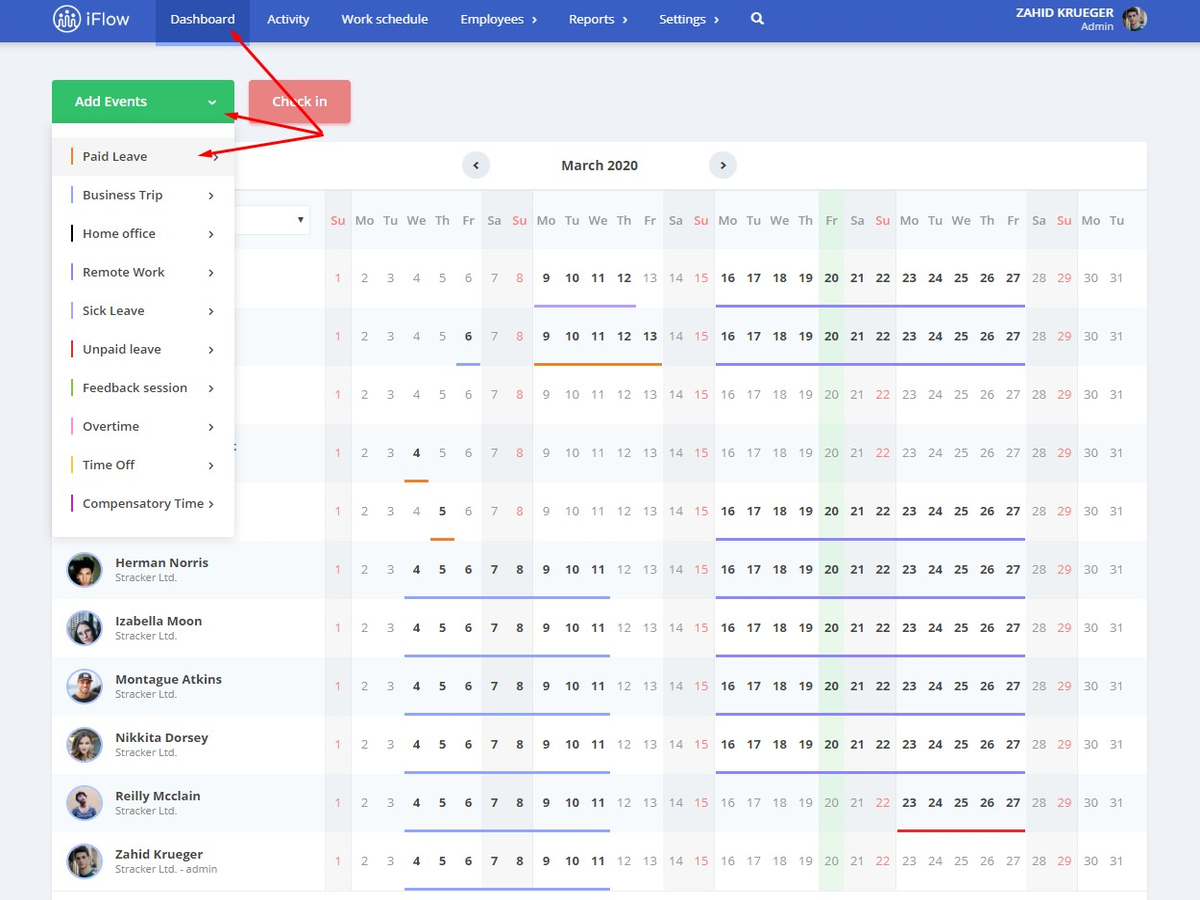
How do I upload documents in the app?
- From the “Dashboard” menu
- Click on “Add events”
- Choose the event that you want to add
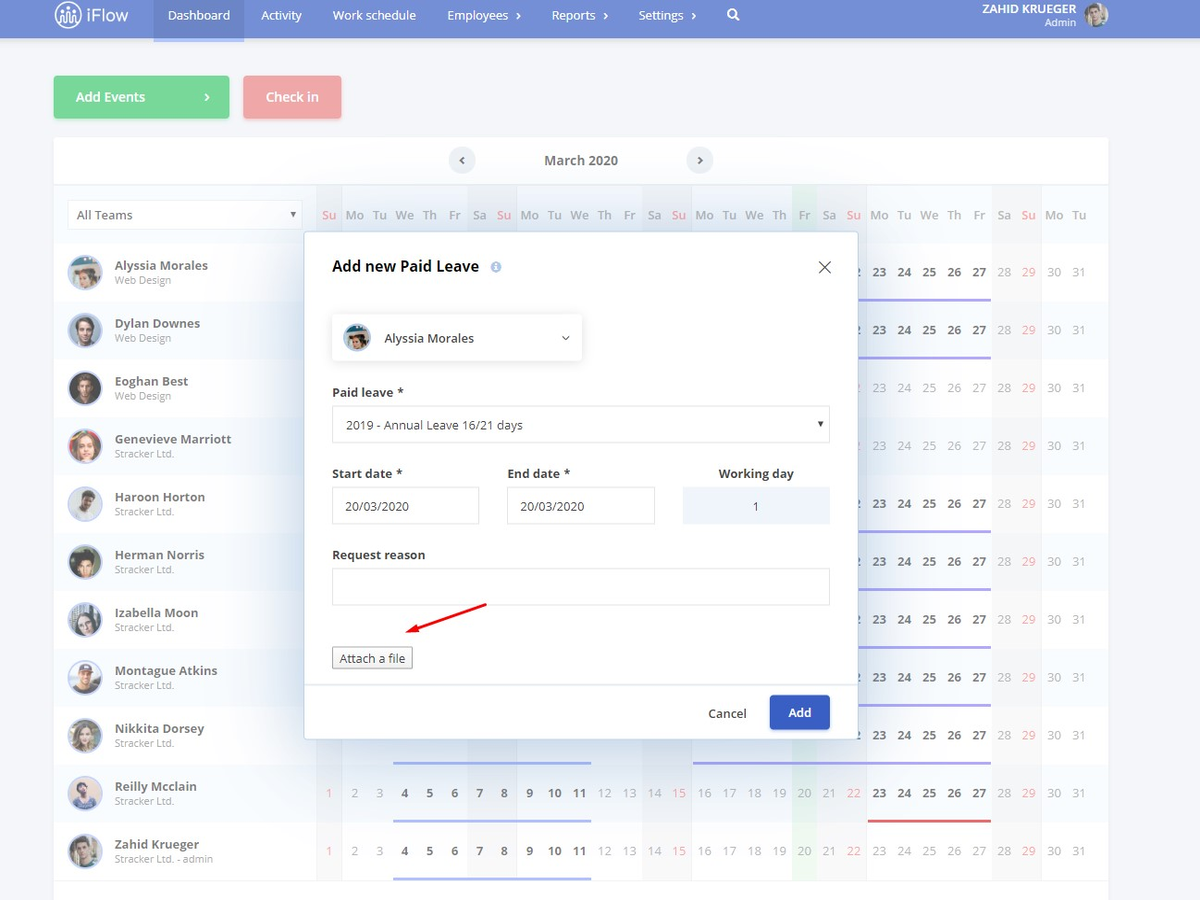
- Complete the data for the selected event
- Click on “Attach a file”
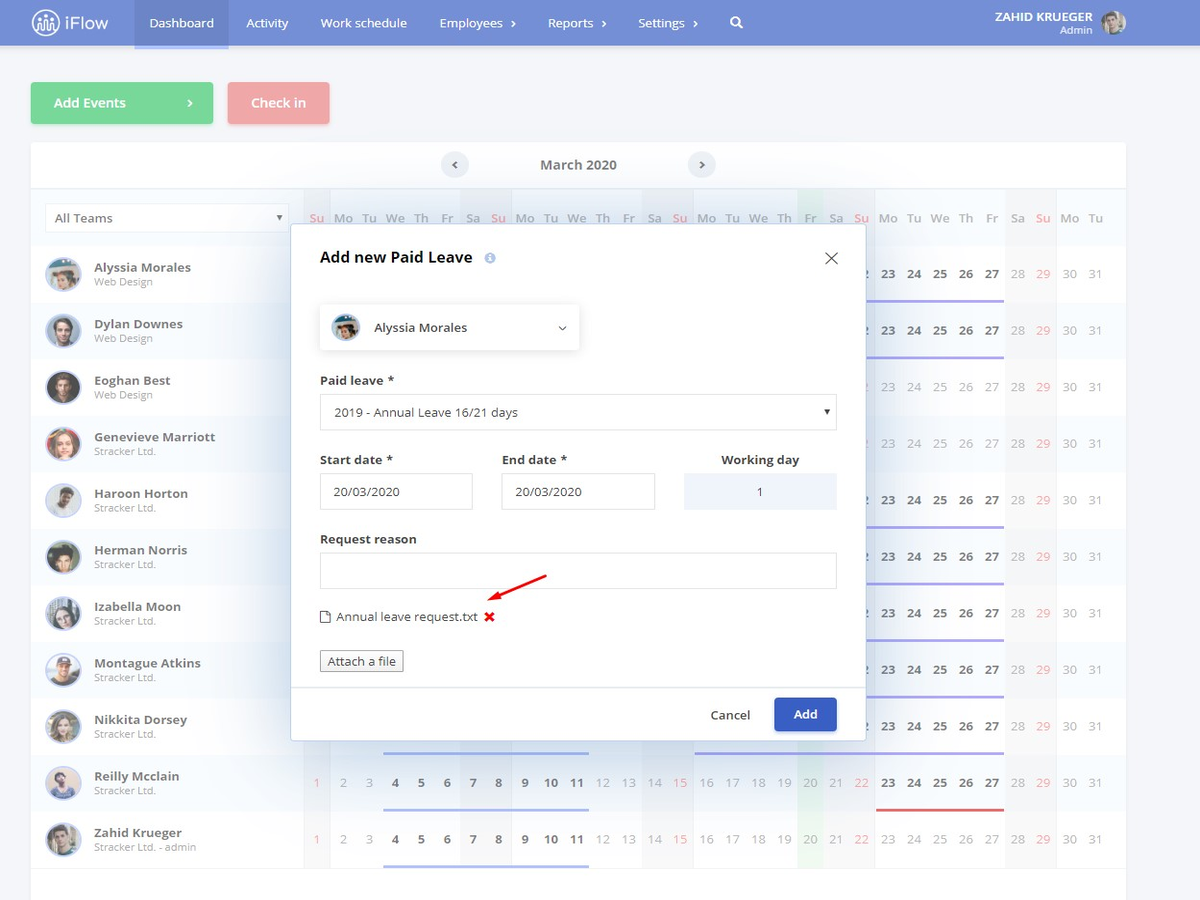
- Choose the file
- Click on “Add”
Advice: The document can be replaced before the event is approved. Once it is approved only the admin, team leader or the user with special permission can edit the event and the added file.
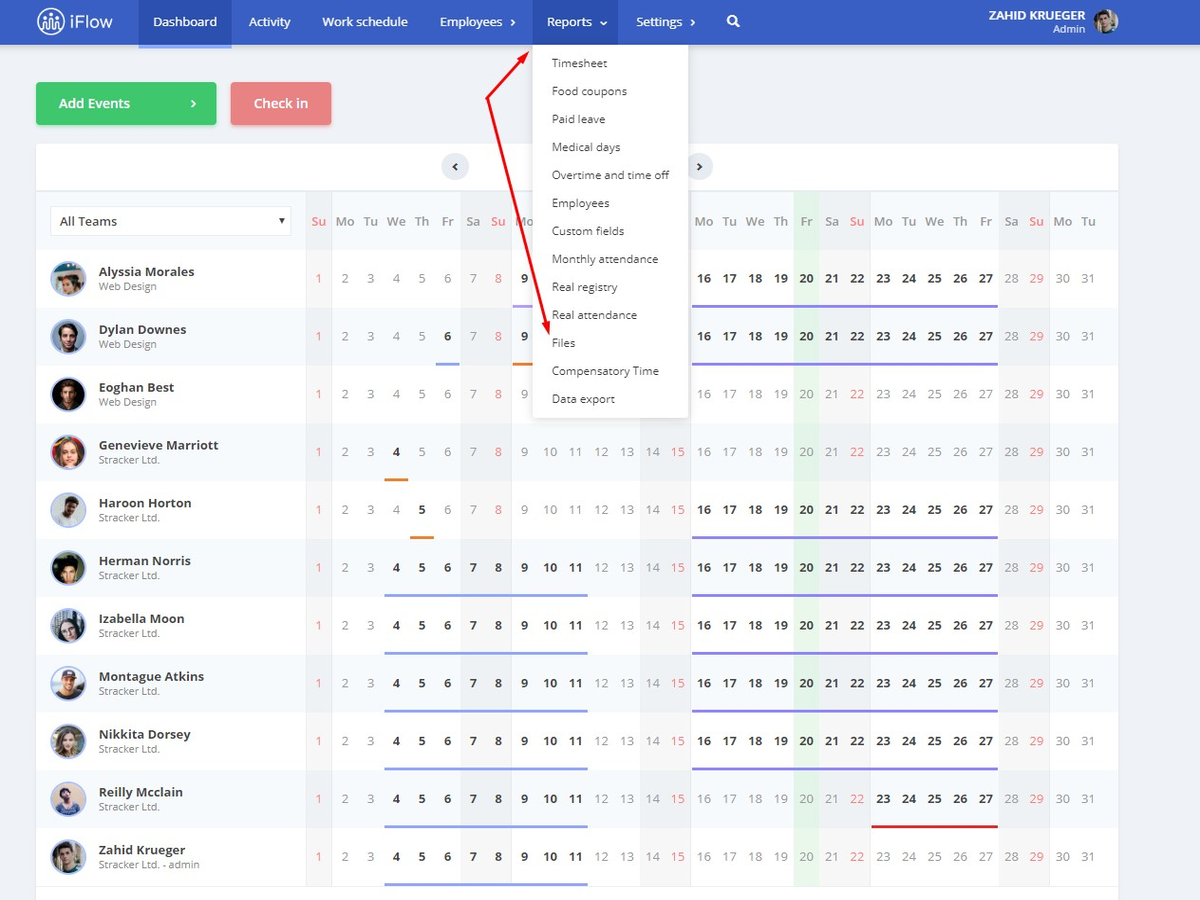
How do I access the “Files” menu?
- “Reports” from the main menu
- Select “Files”
Here you can find all the files uploaded by you or your employees. You can search them by name.
You can upload images and Word Files.
Where can I view the documents uploaded in the app?
You can view the documents from the “Files” menu, “Activity” menu or from the “Day data” category from each employee profile.
In the “Files” menu you can find all the documents uploaded in your company.
In the “Activity” menu you can see the documents for each particular event, meaning that you need to access the event in order to see the uploaded document.
In the “Day data” menu you can the documents for particular events or the documents for a certain period of days.
Keywords: add documents, add files, upload files, upload documents

